Author: valerie.smith28

Molten Lava Cake & Raspberry Sauce

Molten Lava Cake & Raspberry Sauce

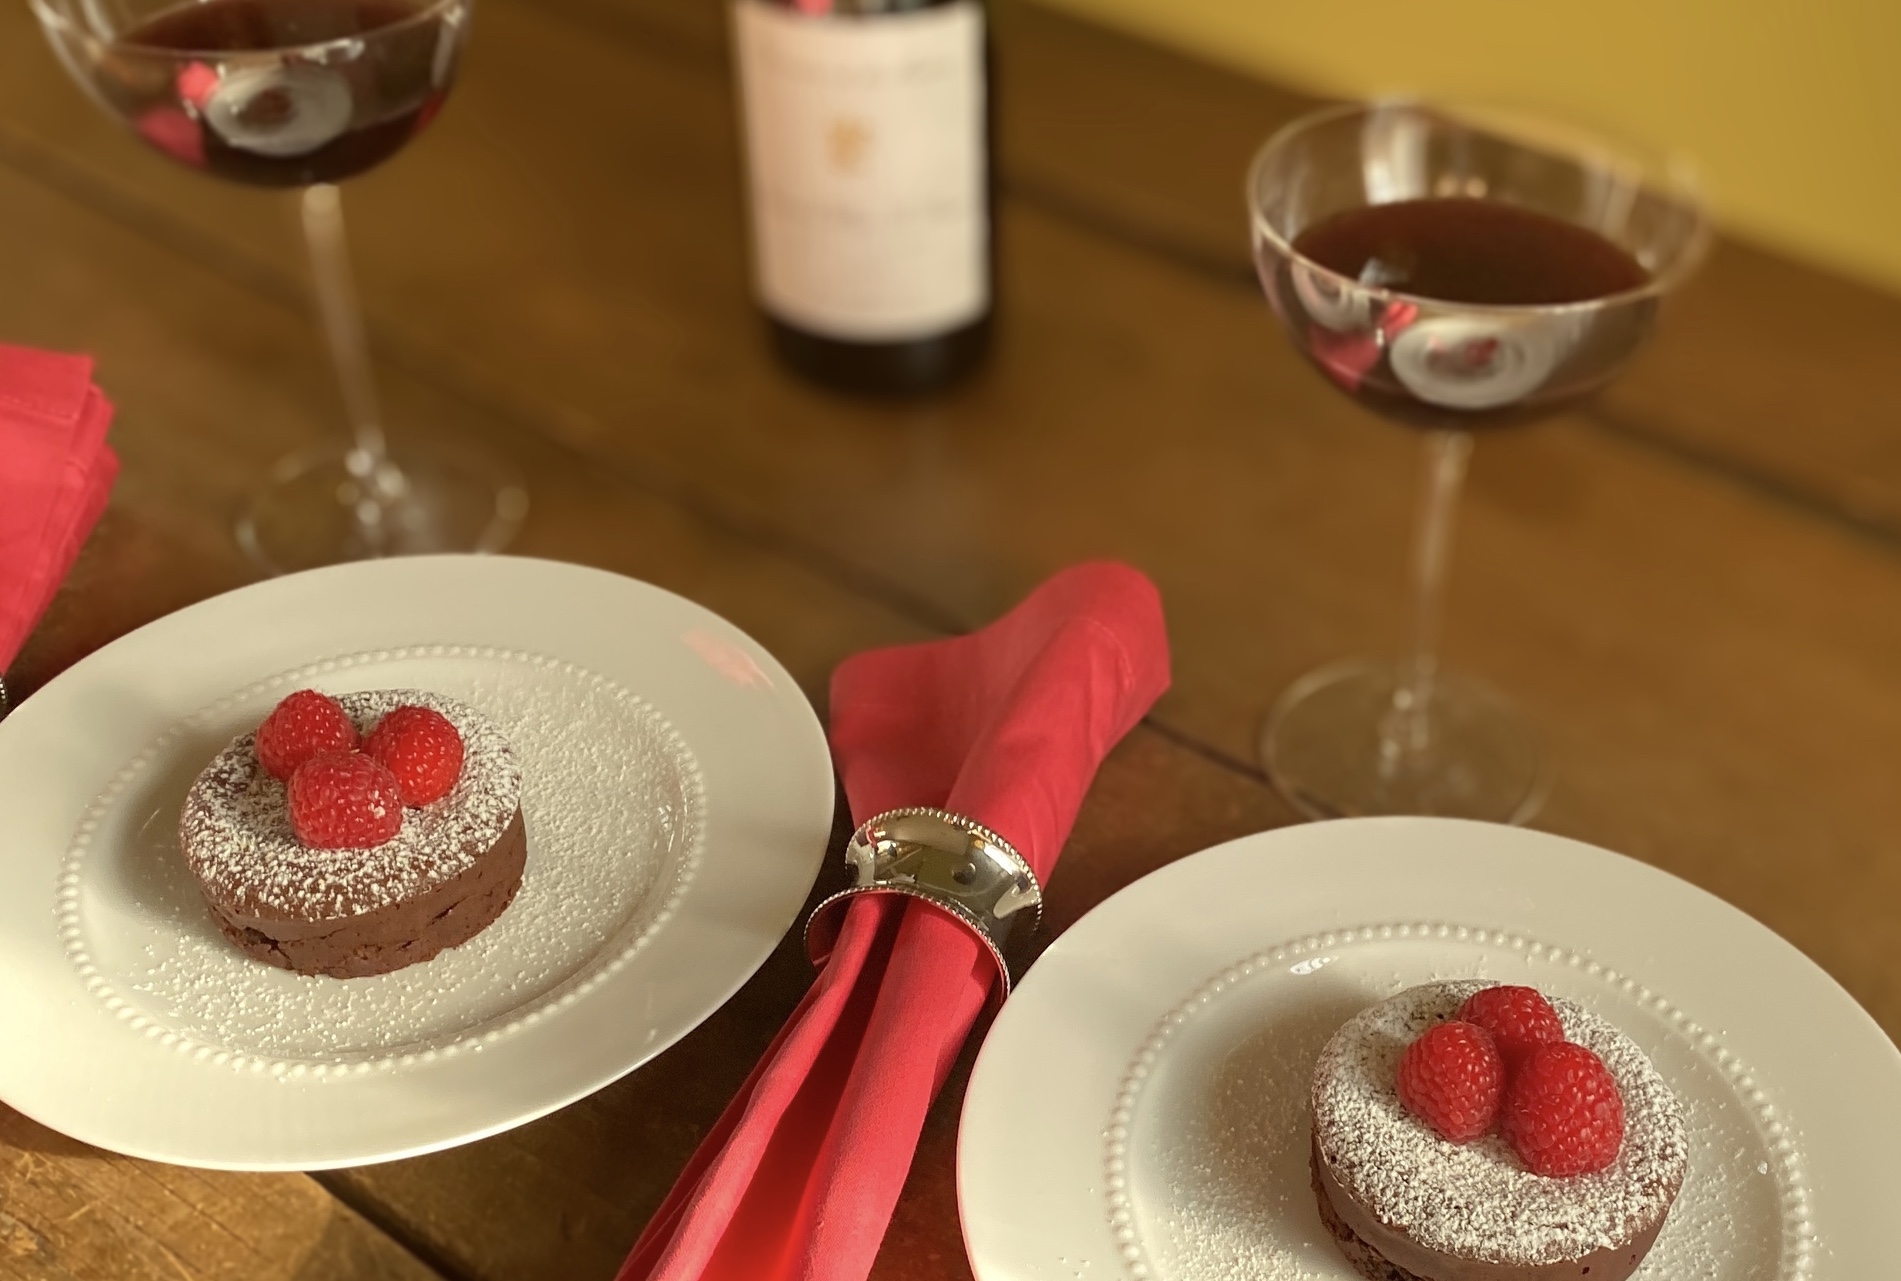
I’ve always been hesitant about taking on “ambitious desserts”.  Baking has never been my thing and always took a back seat to other recipes. I needed to up my desert game. So, I started with one of my favorites, molten lava cake. As a ‘non-baker’, this was a bit daunting at first. As I tried a few different recipes and techniques, it got better. And as I experimented with healthier, gluten-free recipes, I developed this Molten Lava Cake & Raspberry Sauce that is both healthier and delicious!

While tinkering with this recipe, I was trying to figure out a really great pairing. I learned pretty quickly that the wine and chocolate need to be balanced in terms of sweetness and intensity. After a ton of taste testing,  I decided on a medium-bodied Pinot Noir from California with some ripe fruit flavors.  This paired nicely and balanced the tannins in the dark chocolate I used for the cake.  To learn more about California Pinot Noir, check out my Pinot Noir pairing page.


This recipe has no ratings just yet.

Molten Lava Cake & Raspberry Sauce

February 11, 2021
: 4

By:

Ingredients
  • 1 stick unsalted butter plus 1 tablespoon
  • 2 teaspoons cocoa powder
  • 6 oz. good quality chocolate (I use 70-80%)
  • 2 eggs
  • 2 egg yolks
  • 1 teaspoon pure vanilla extract
  • 1 tablespoon brewed coffee
  • ¼ cup sugar
  • Pinch of salt
  • 2 tablespoons gluten-free flour (I use Bob’s Red Mill)
  • 2 tablespoons chocolate chips
  • 1 carton fresh raspberries (6oz)
  • Zest and juice of ½ a lemon
  • 1 tablespoon honey
  • 1 tablespoon water
Directions
  • Step 1 Preheat oven to 425
  • Step 2 Use 1 tablespoon butter to lightly grease 4 ramekins. Dust each ramekin with ½ teaspoon cocoa powder. Place the ramekins on a rimmed baking sheet and set them aside.
  • Step 3 In a double boiler over simmering water (about an inch of water), melt one stick of butter with the 6 oz. of chocolate. Whisk until just combined and remove from the heat. Whisk in the vanilla and coffee and set aside.
  • Step 4 With a mixer, whisk the eggs, egg yolks, sugar, and salt for approximately 2-3 minutes until the mixture is thickened. Whisk in the chocolate mixture. Then lightly fold in the flour until just combined.
  • Step 5 Spoon half the mixture into the ramekins. Add a ½ tablespoon of the chocolate chips to each ramekin. Spoon the remaining batter over the chocolate chips.
  • Step 6 Bake in the oven for about 8 minutes or until the side of the cake is firm, but the center is soft. Be careful not to overbake or you will lose the “molten” part of the cake.
  • Step 7 While the cakes are baking, make the raspberry sauce by combining the berries, honey, lemon juice, and 1 tablespoon water in a small saute pan. Cook over medium-low heat for approximately 5-7 minutes to break down the berries and thicken the sauce. Remove from the heat and finish with fresh lemon zest. Set aside.
  • Step 8 When the cakes are done baking, set on a wire rack to cool for about 1-2 minutes. To serve, place a small dessert plate over each ramekin and carefully turn each one over. Spoon the raspberry sauce over the cake and finish with fresh whipped cream or vanilla gelato. Enjoy!
Garlic, Spinach & Mushroom Pizza

Garlic, Spinach & Mushroom Pizza

Getting feedback on recipes and pairings is always exciting. It helps me know things are working, and has provided great information for future recipes. But inspiring others to do their own recipes and parings in much more rewarding. I am thrilled to highlight the communities recipes and pairing for you all.


Gabi’s Garlic, Spinach & Mushroom Pizza

I love a white pizza, especially when made with fresh ingredients, including garlic and olive oil…Talk about perfection on a plate.  It is genuinely excellent all on its own, but I wanted to elevate the flavors a little more by adding some other favorite ingredients: caramelized mushrooms and spinach. It just doesn’t get any better than this.   Pair with your favorite dry riesling!


This recipe has no ratings just yet.

Garlic, Spinach & Mushroom Pizza

February 9, 2021
: 4

By:

Ingredients
  • ½ pound pizza dough
  • 3 tablespoons olive oil
  • 4 cloves garlic finely chopped
  • 1 cup shredded mozzarella
  • 1 cup feta cheese
  • 5 cups loose leaf spinach
  • Red pepper flakes and oregano to garnish
  • Lemon wedges to serve
  • 1 lb wild mushrooms
  • 3 tablespoons olive oil
  • 4 cloves garlic minced
  • 1 shallot sliced
Directions
  • Step 1 Preheat your oven to 500 degrees.
  • Step 2 In a large skillet over medium high heat, heat the olive oil. Add the shallots and sliced mushrooms and sauté for 8-10 minutes until they are soft and starting to caramelize. Season with salt and continue to cook until golden brown, adding the garlic the last minute of cooking. Remove and drain any excess liquid as needed. Set Aside
  • Step 3 Stretch the dough in a circular motion, then lay it out on a flat surface and flatten out using a rolling pin. Once your dough is flat, brush the olive oil over the pizza and sprinkle with garlic. Add Spinach (leave 1 inch of crust)
  • Step 4 Sprinkle with the feta, mozzarella and mushrooms allowing the cheese to fall into the spinach. Season with salt and pepper.
  • Step 5 Transfer the pizza into the oven and bake until the crust is golden. (8-10 mins)
  • Step 6 Remove pizza from the oven. Season with red pepper flakes, and oregano, Serve with lemon wedges. Enjoy with a dry Riesling.
Red Wine & Porcini Mushroom Pork Ragu

Red Wine & Porcini Mushroom Pork Ragu

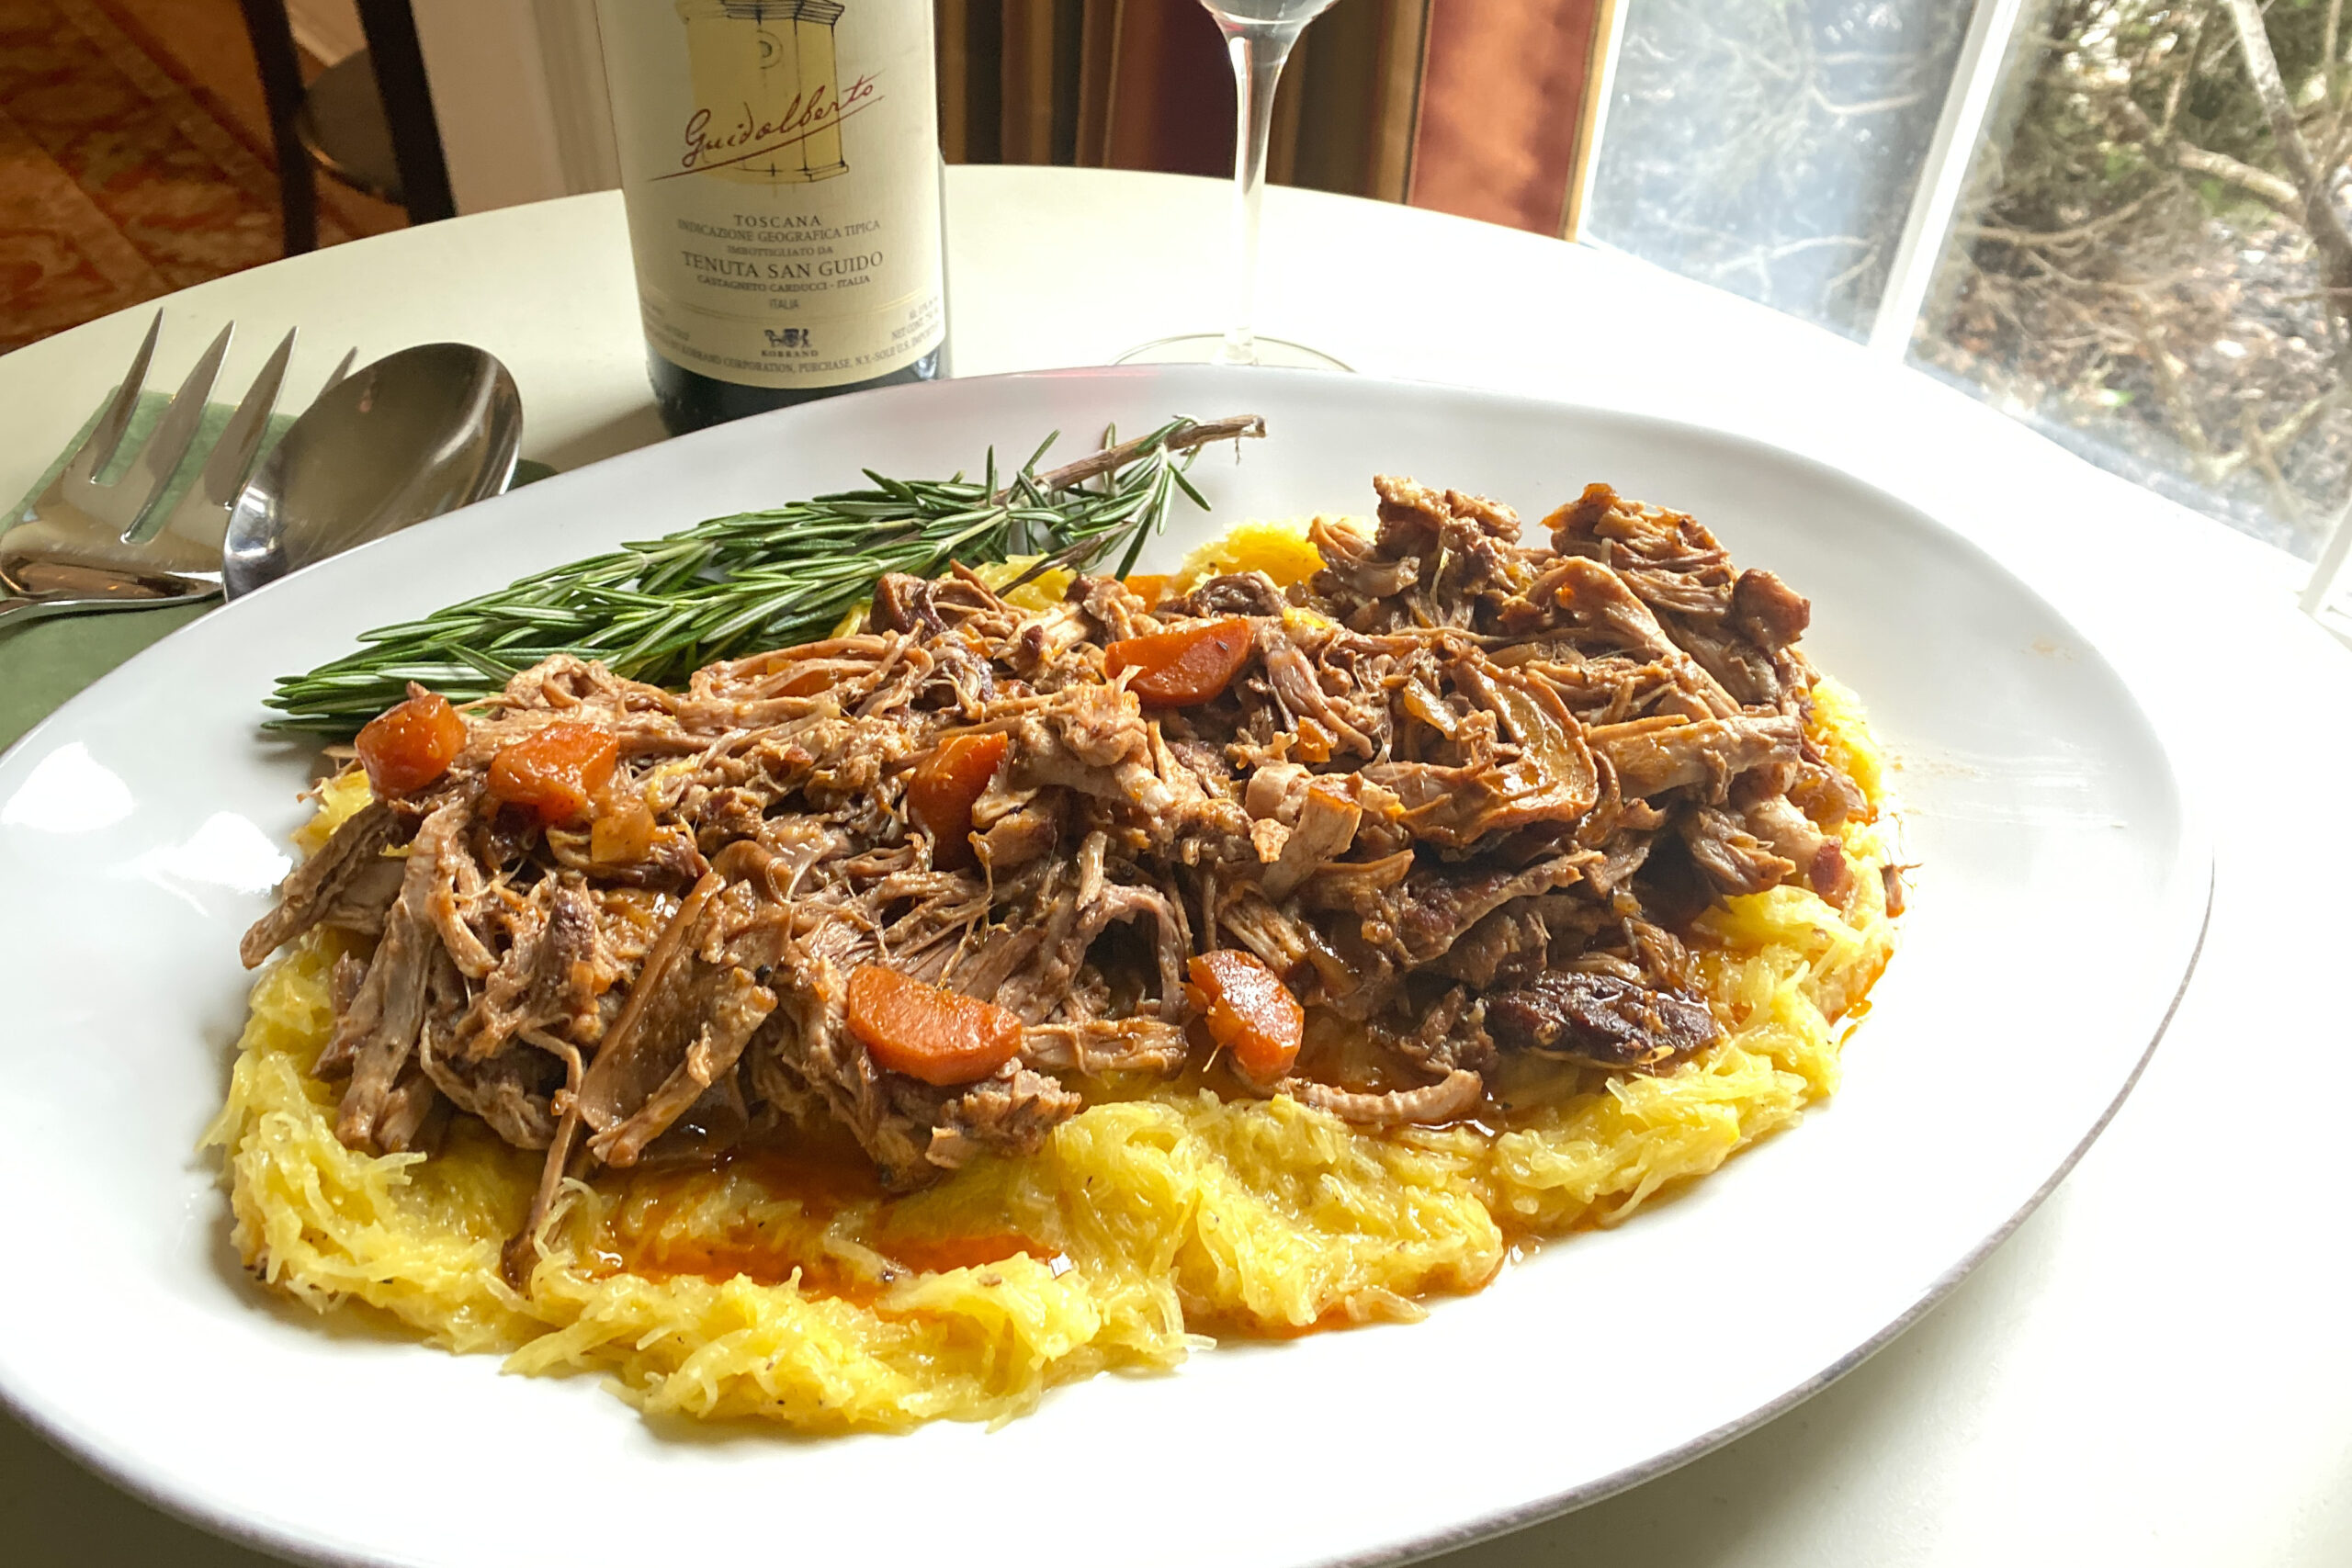
I used to dislike Sundays when I was younger.  Mostly because it signaled the end of the weekend and start of the busy work week.  However, with the “Sunday Funday” movement, I’ve started to come around!  And there is nothing better on a cold, wintery Sunday than a slow-cooked stew and a bottle of red wine.  One of my favorite recipes is Red Wine & Porcini Mushroom Pork Ragu.  I used to serve it over rich and creamy polenta, but to make it a bit healthier, I like to use roasted spaghetti squash. It reminds me of the Italian way of life, bonding over great meals, with family, friends, and delicious wine!


For the wine pairing, I chose a Super Tuscan.  I found an old favorite recently that I couldn’t wait to pair with this dish. The Tenuta San Guido Guidalberto 2018 is a special bottle of wine. It marries a bold fruit flavor with a rich and elegant finish that pairs perfectly with the pork ragu.  My first taste of this amazing wine was back in 2009. I hosted a reunion dinner party with friends that traveled to Tuscany with us the prior year.  I served the 2006 Tenuta San Guido that night.  It was just as amazing then!  I hope you enjoy this pairing.  If you would like to learn more about this style of wine, check out my Super Tuscan pairing page.


This recipe has no ratings just yet.

Red Wine & Porcini Mushroom Pork Ragu

February 4, 2021
: 6-8

By:

Ingredients
  • 1 package dry porcini mushrooms
  • 1 cup boiling water
  • 1 4-5 lb. pork shoulder (ask butcher to remove the bone)
  • 3 tablespoons plus 2 teaspoons extra virgin olive oil
  • 2 tablespoon butter or ghee
  • 1 cup carrots, sliced in rounds
  • 1 cup chopped red onion
  • 2 whole garlic cloves roughly chopped
  • 1 tablespoon Herbs de Provence
  • 2 tablespoons tomato paste
  • 1.5 cups of dry red wine
  • 1 ¼ cup chicken stock
  • 1 tablespoon low sodium soy sauce
  • 2 small spaghetti squash, halved and seeded
  • ¼ cup half & half
  • ¼ cup parmesan cheese
  • 1 parmesan cheese rind
  • Kosher salt & freshly ground pepper
Directions
  • Step 1 Heat oven to 425 degrees.
  • Step 2 Place the porcini mushrooms in a bowl and cover with the boiling water. Let stand for at least 20 minutes. Use a paper towel in a strainer to separate the mushrooms from the liquid. Set aside.
  • Step 3 For the spaghetti squash, place each half on a baking sheet. Drizzle with extra virgin olive oil and season with salt & pepper. Cook at 425 degrees for approximately 35-40 minutes depending on the size of your squash. Remove from the oven and set aside. Lower oven temperature to 325 degrees to cook the pork.
  • Step 4 Cut the pork into 4 even pieces. Season with salt & pepper on all sides. In a large saute pan or dutch oven (fitted with a lid that also can go into the oven), heat 2 tablespoons of the oil and 1 tablespoon butter or ghee. Brown the pork on all sides. Should take about 2-3 minutes per side. You may need to work in 2 batches depending on the size of you saute pan. Once browned, remove the pork from the pan and drain the fat.
  • Step 5 Add the remaining 1 tablespoon olive oil to the pan. Add the carrot, onion and Herbs de Provence. Season with salt & pepper. Cook on medium heat for approximately 3 minutes. Add the tomato paste and garlic and cook for another 1-2 minutes.
  • Step 6 Start adding the liquid, beginning with the red wine. Cook for about 2 minutes before adding 1 cup of chicken stock, the mushroom liquid and the soy sauce. Stir to combine. Place the pork back into the pan. Add the mushrooms and parmesan cheese rind. Cover and place in oven and cook for 2.5 hours.
  • Step 7 Remove the lid and cook for another 20 minutes to thicken the gravy. Remove from the oven. Remove the pork to a cutting board and let rest for about 20 minutes. Then, using 2 forks, pull apart the meat and add it back to the gravy in the pan. You know the meat is cooked perfectly when it easily pulls apart.
  • Step 8 To finish the squash, use a fork to scrape the flesh out of the skin. In a medium saute pan, heat 1 teaspoon of olive oil and 1 tablespoon butter or ghee. Add the squash and cook for 2 minutes. Add ¼ cup chicken stock and ¼ cup half & half. Cook for another 1-2 minutes to reduce the liquid. Remove from the heat and stir in the cheese. Season with salt & pepper.
  • Step 9 To serve, place the squash in serving bowls. Spoon over the pork & mushrooms. Garnish with parmesan cheese and a drizzle of olive oil.
Granola & Tart Cherries

Granola & Tart Cherries

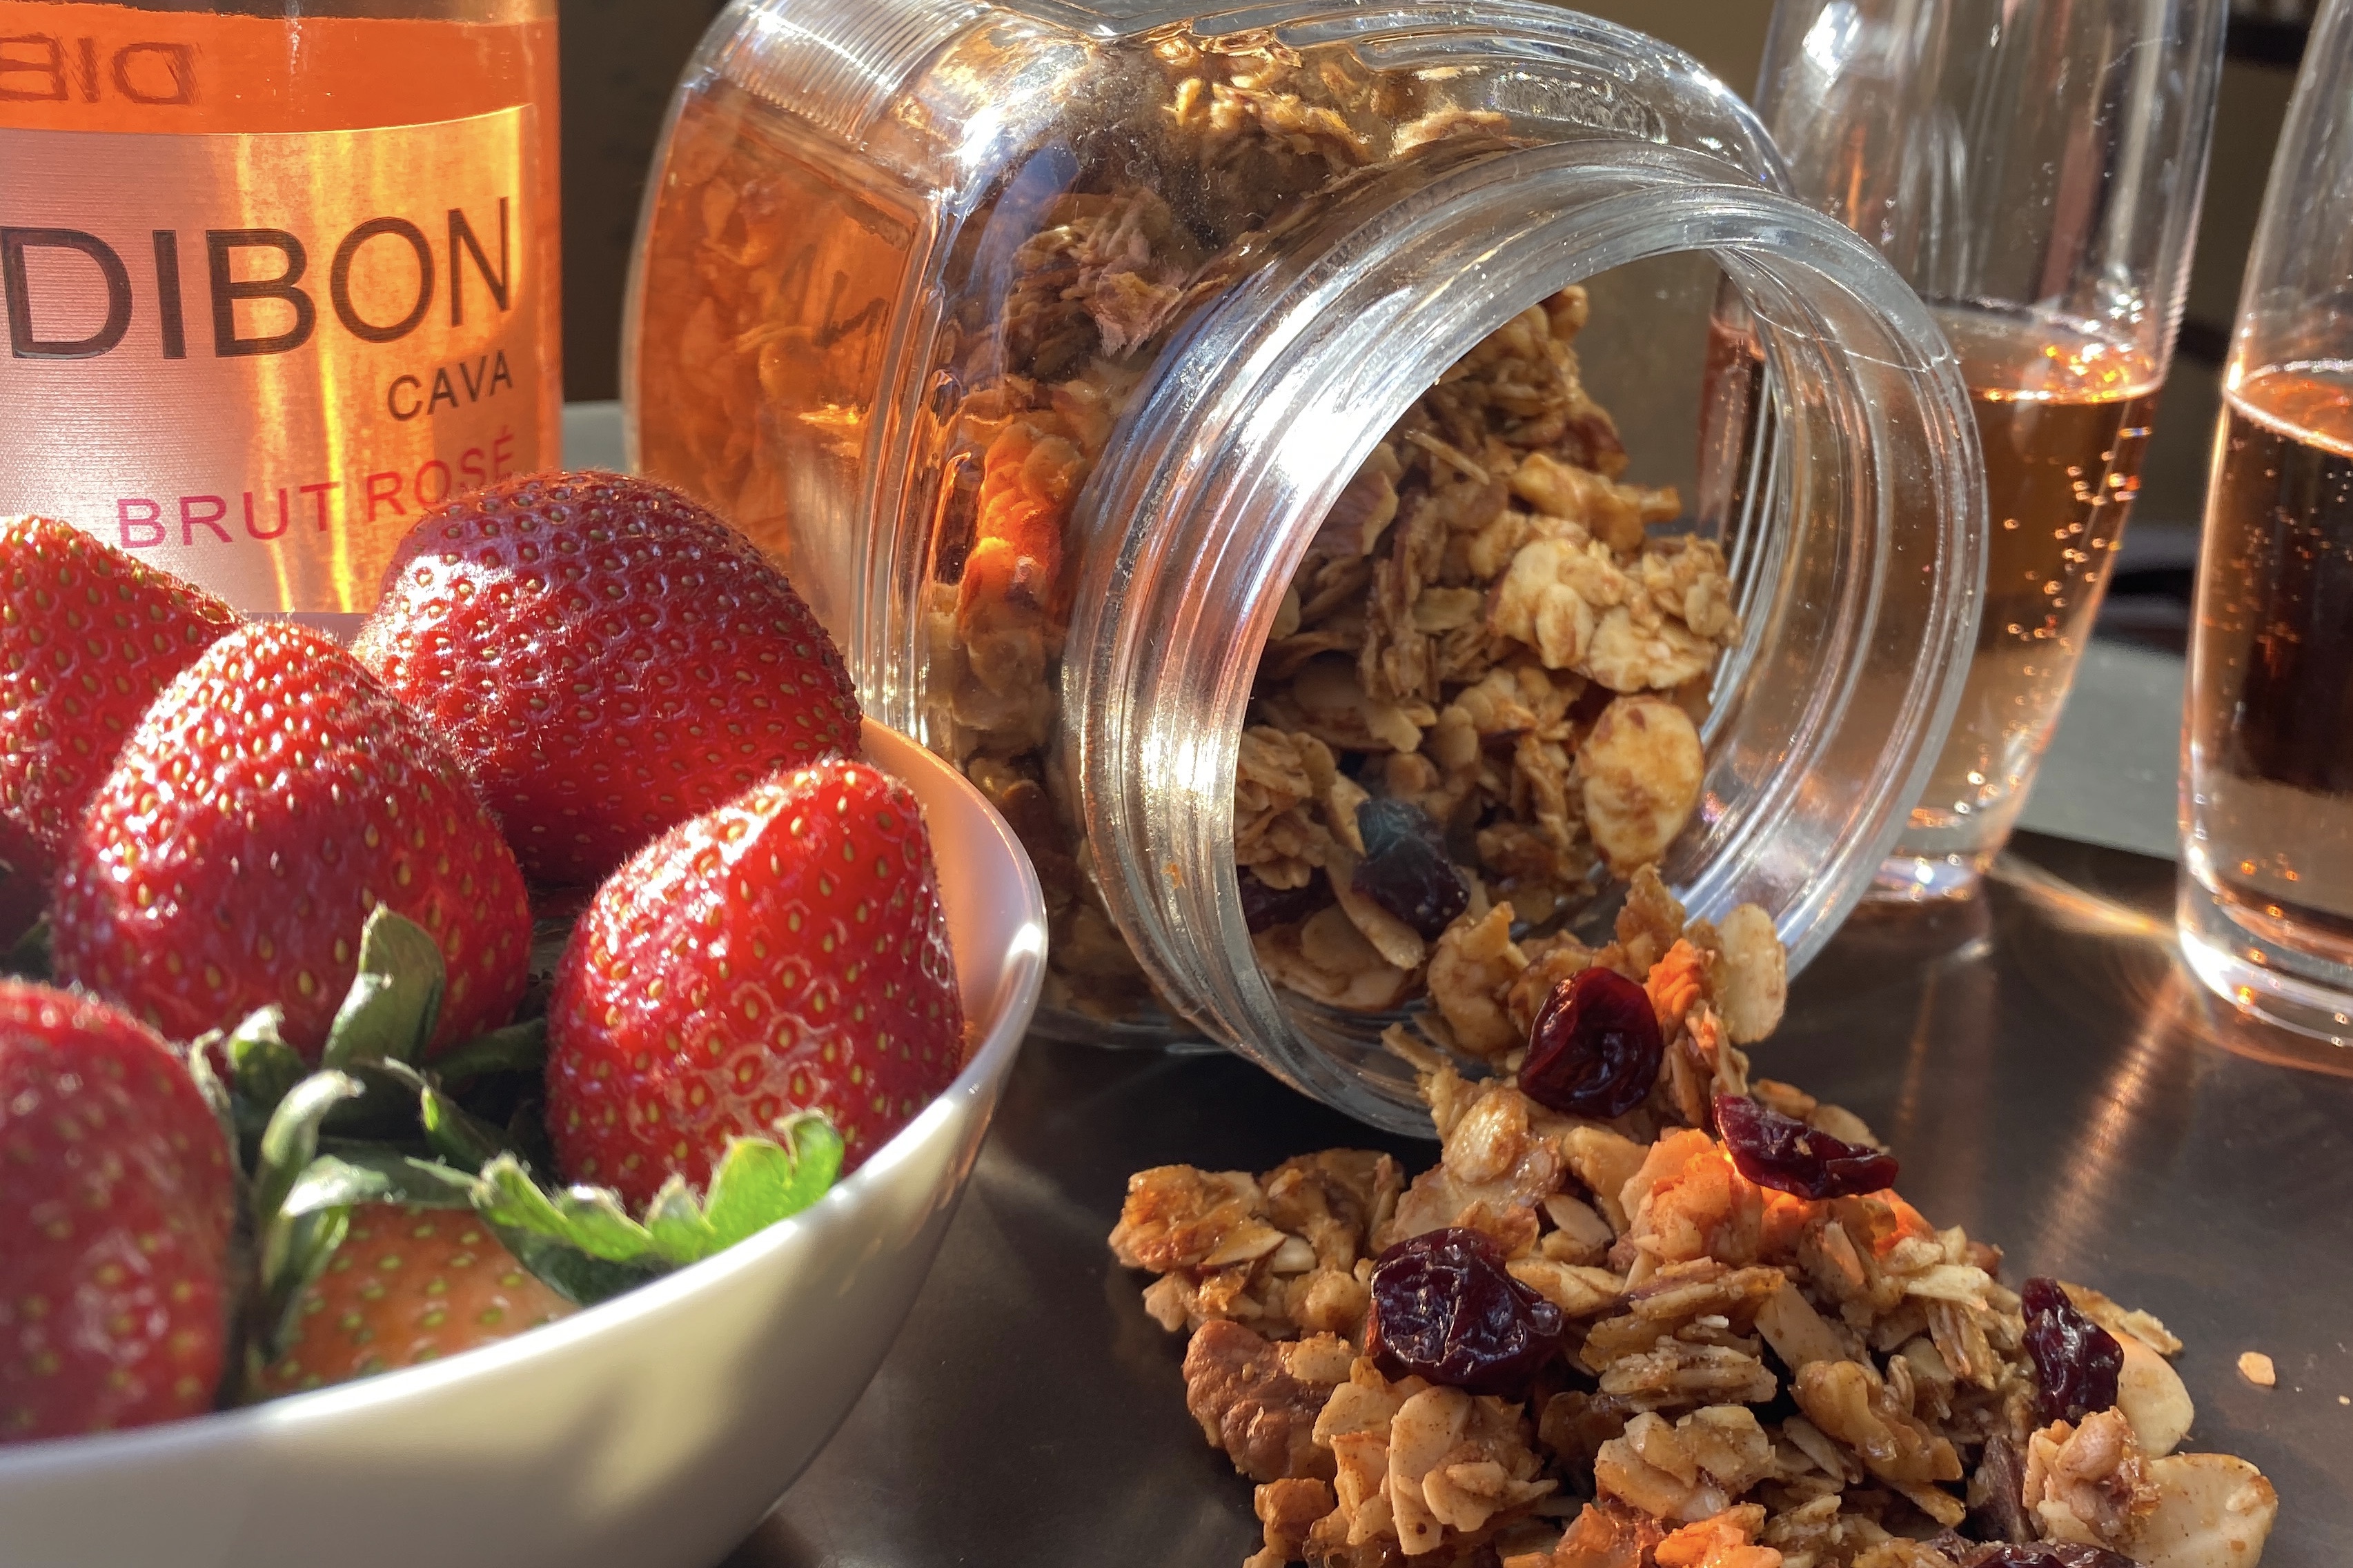
One of my greatest pleasures in life is to entertain — mostly because I love to experience friends and family enjoy a good meal and laugh over a great bottle of wine.  In fact, it is my love of entertaining that inspired Simply Paired!  Part of the entertaining process for me is to find a new way to “wow” my guests and make them feel special.  Creating a homemade version of something that can be easily store-bought is one of my tricks.  And that is how my Granola & Tart Cherries recipe was born!  I never knew how easy it was to make your own granola until I tried it myself.  And, it is much healthier!  This recipe is a staple in my house.  I make it weekly for the family!


For the wine pairing, I wanted to elevate the experience so I thought sparkling wine was in order.  I chose a sparkling Rose wine from Spain to complement the tart cherries in the granola.  I love to serve this combination for a Sunday brunch but quite frankly, it works any time!


This recipe has no ratings just yet.

Granola & Tart Cherries

January 28, 2021
: 6-8

By:

Ingredients
  • 1 cup of gluten-free, old-fashion oats (I use Bob’s Red Mill)
  • 1 cup of sliced almonds
  • ½ cup of chopped walnuts
  • 1 teaspoon of cinnamon
  • ¼ teaspoon of sea salt or kosher salt
  • ¼ cup of extra virgin olive oil
  • ¼ cup good honey
  • 2 tablespoons of pure maple syrup
  • ¼ cup tart cherries
Directions
  • Step 1 Heat oven to 275 degrees. Line 2 baking sheets with parchment paper
  • Step 2 Mix together oats, almonds, walnuts, cinnamon and salt.
  • Step 3 Stir in the olive oil, honey and maple syrup. Combine well so that all ingredients are moist.
  • Step 4 Spread the mixture evenly on to two baking sheets. Bake for 25-30 minutes until golden brown and crisp. Cool on wire rack for about 15 minutes. Break up the granola with your hands and stir in the cherries. Store in air-tight container for up to a week.
Spinach & Mushroom Frittata

Spinach & Mushroom Frittata

I enjoy the beginning of every new year (especially coming out of 2020). It allows me to hit the reset button and simplify as much as possible. I also like to focus on clean eating. Every year I start with a ‘cleanse’, reducing the ingredients I eat to a handful of powerhouse foods that are nutritious and simple.  One of my favorite recipes this time of year is my Spinach & Mushroom Frittata. In keeping with my cleanse, I substitute avocado for cheese. It replaces the creaminess of the cheese beautifully while providing a ton of health benefits. While this recipe is perfect for Sunday brunch, I prefer to make it for a weekday dinner.


For the pairing, there is nothing better than a glass of French champagne to complement this simple egg dish. How quintessentially French!


This recipe has no ratings just yet.

Spinach & Mushroom Frittata

January 16, 2021
: 4

By:

Ingredients
  • 1 cup of sliced mushrooms (baby Bella or oyster)
  • 2 scallions, chopped
  • 1 cup of chopped, fresh spinach
  • Pinch of red pepper flakes
  • 1 teaspoon of chopped tarragon
  • 1 teaspoon lemon juice
  • 1 avocado, thinly sliced
  • 1 16 oz. carton of egg whites
  • 1 tablespoons extra virgin olive oil
  • Lemon zest
  • Salt & pepper to taste
Directions
  • Step 1 Preheat oven to 425 degrees
  • Step 2 Heat a medium, non-stick sauté pan with 1 tablespoon of oil. Add the mushrooms and scallions and cook for about 4-5 minutes until lightly browned. Add the red pepper flakes and cook for another minute.
  • Step 3 Add the chopped spinach and cook for another 1-2 minutes until the spinach wilts. Season with salt & pepper and about ½ teaspoon of lemon juice.
  • Step 4 Whisk egg whites until lightly frothy. Add the egg mixture to the sauté pan to cover the vegetables. Season with salt and pepper. Cook for 30 seconds. Place sauté pan in the oven and cook for about 8-10 minutes until nicely browned on top and cooked through.
  • Step 5 To serve, place the frittata on a platter and top with the avocado slices, fresh tarragon, and lemon zest. Finish with a drizzle of olive oil. Partner with a simple green salad and you’ve got a meal!
Maple Walnut Scones

Maple Walnut Scones

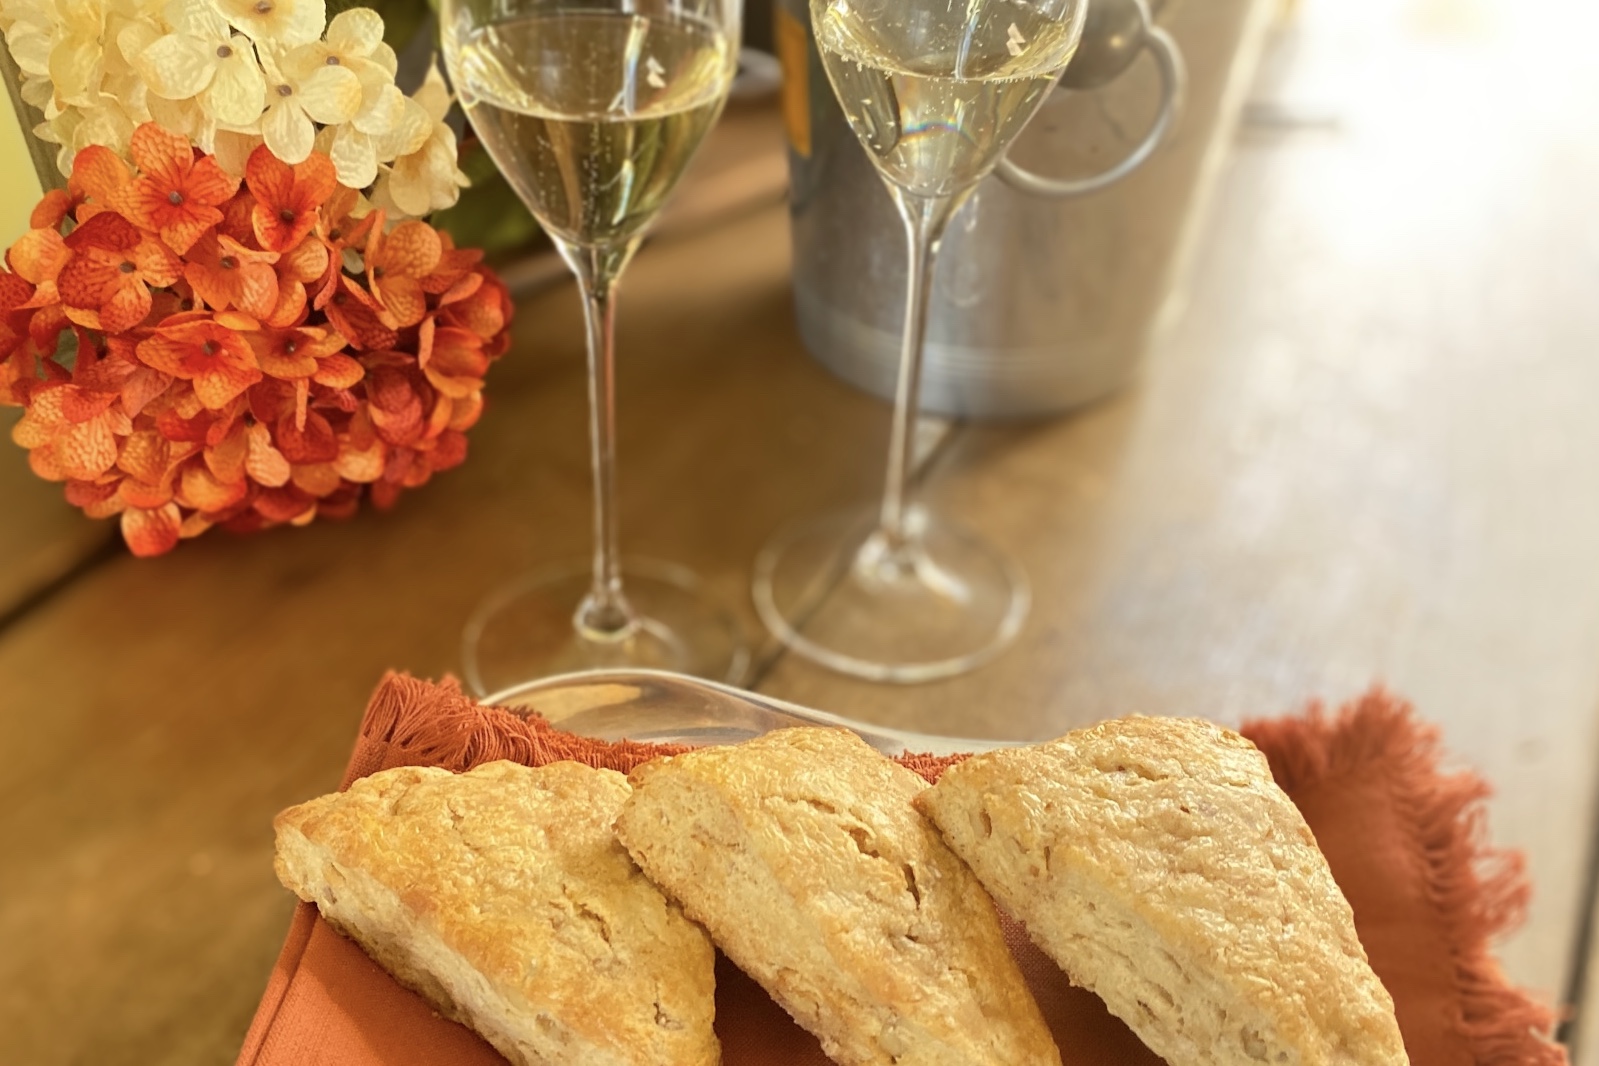
The end of the holiday season always brings a bit of sadness. The parties end, everyone goes home, and the long stretch of winter sets in for a few months. And, since the new year brings on my “January cleanse”, I allow the 1st to be one last indulgence with an epic brunch. It’s all the trimmings you would hope in a full buffet, but my favorite is the Maple Walnut Scones I bake–coupled with a perfect sparkling wine.


There is nothing more indulgent than a sweet pastry and a nice glass of sparkling wine to ring in the new year!


This recipe has no ratings just yet.

Maple Walnut Scones

January 1, 2021
: 8

By:

Ingredients
  • 2/3 cup walnut halves
  • 2-1/4 cups all-purpose flour
  • 1 teaspoon cinnamon
  • 1 Tablespoon baking powder
  • ½ teaspoon salt
  • 1 stick of butter, frozen
  • 3 Tablespoons pure maple syrup
  • 1 egg
  • 1 teaspoon pure vanilla extract
  • ¾ cup heavy cream
  • Brown Butter Maple Glaze
  • ½ stick unsalted butter
  • 1 teaspoon pure vanilla extract
  • 2 teaspoons powdered sugar
  • 3 tablespoons maple syrup
  • ¼ teaspoon cinnamon
Directions
  • Step 1 Pre-Heat oven to 400 degrees
  • Step 2 Place walnuts on a baking sheet and toast for 5 minutes in the oven. Cool completely. Chop walnuts and set aside.
  • Step 3 Whisk together the flour, baking powder, cinnamon, and salt in a bowl. Mix in the chopped nuts and set aside. Grate the frozen butter using a box grater and gently combine with the flour mixture using 2 forks.
  • Step 4 Whisk together the egg, vanilla, cream, and maple syrup. Add to the flour mixture. Stir with a wooden spoon until just combined.
  • Step 5 Turn dough out onto a lightly floured surface and fold together gently to combine. The dough should be nearly smooth. Roll out the dough with your hands to form a circle approximately ½ inch thick. Cut the dough into 8 even triangles and place on a parchment-lined baking sheet.
  • Step 6 Brush each scone with additional heavy cream. Bake for 12-14 minutes or until golden brown. Remove scones from baking sheet and place on a wire rack.
  • Step 7 To make the glaze, melt the butter in a small saute pan. Cook over medium-low heat until the foam subsides and the butter starts to brown. Remove from the heat and whisk in the vanilla and maple syrup. Add the cinnamon and powdered sugar and whisk to combine. Sprinkle with kosher salt. Spoon over the warm scones.


Fall Kale Salad

Fall Kale Salad

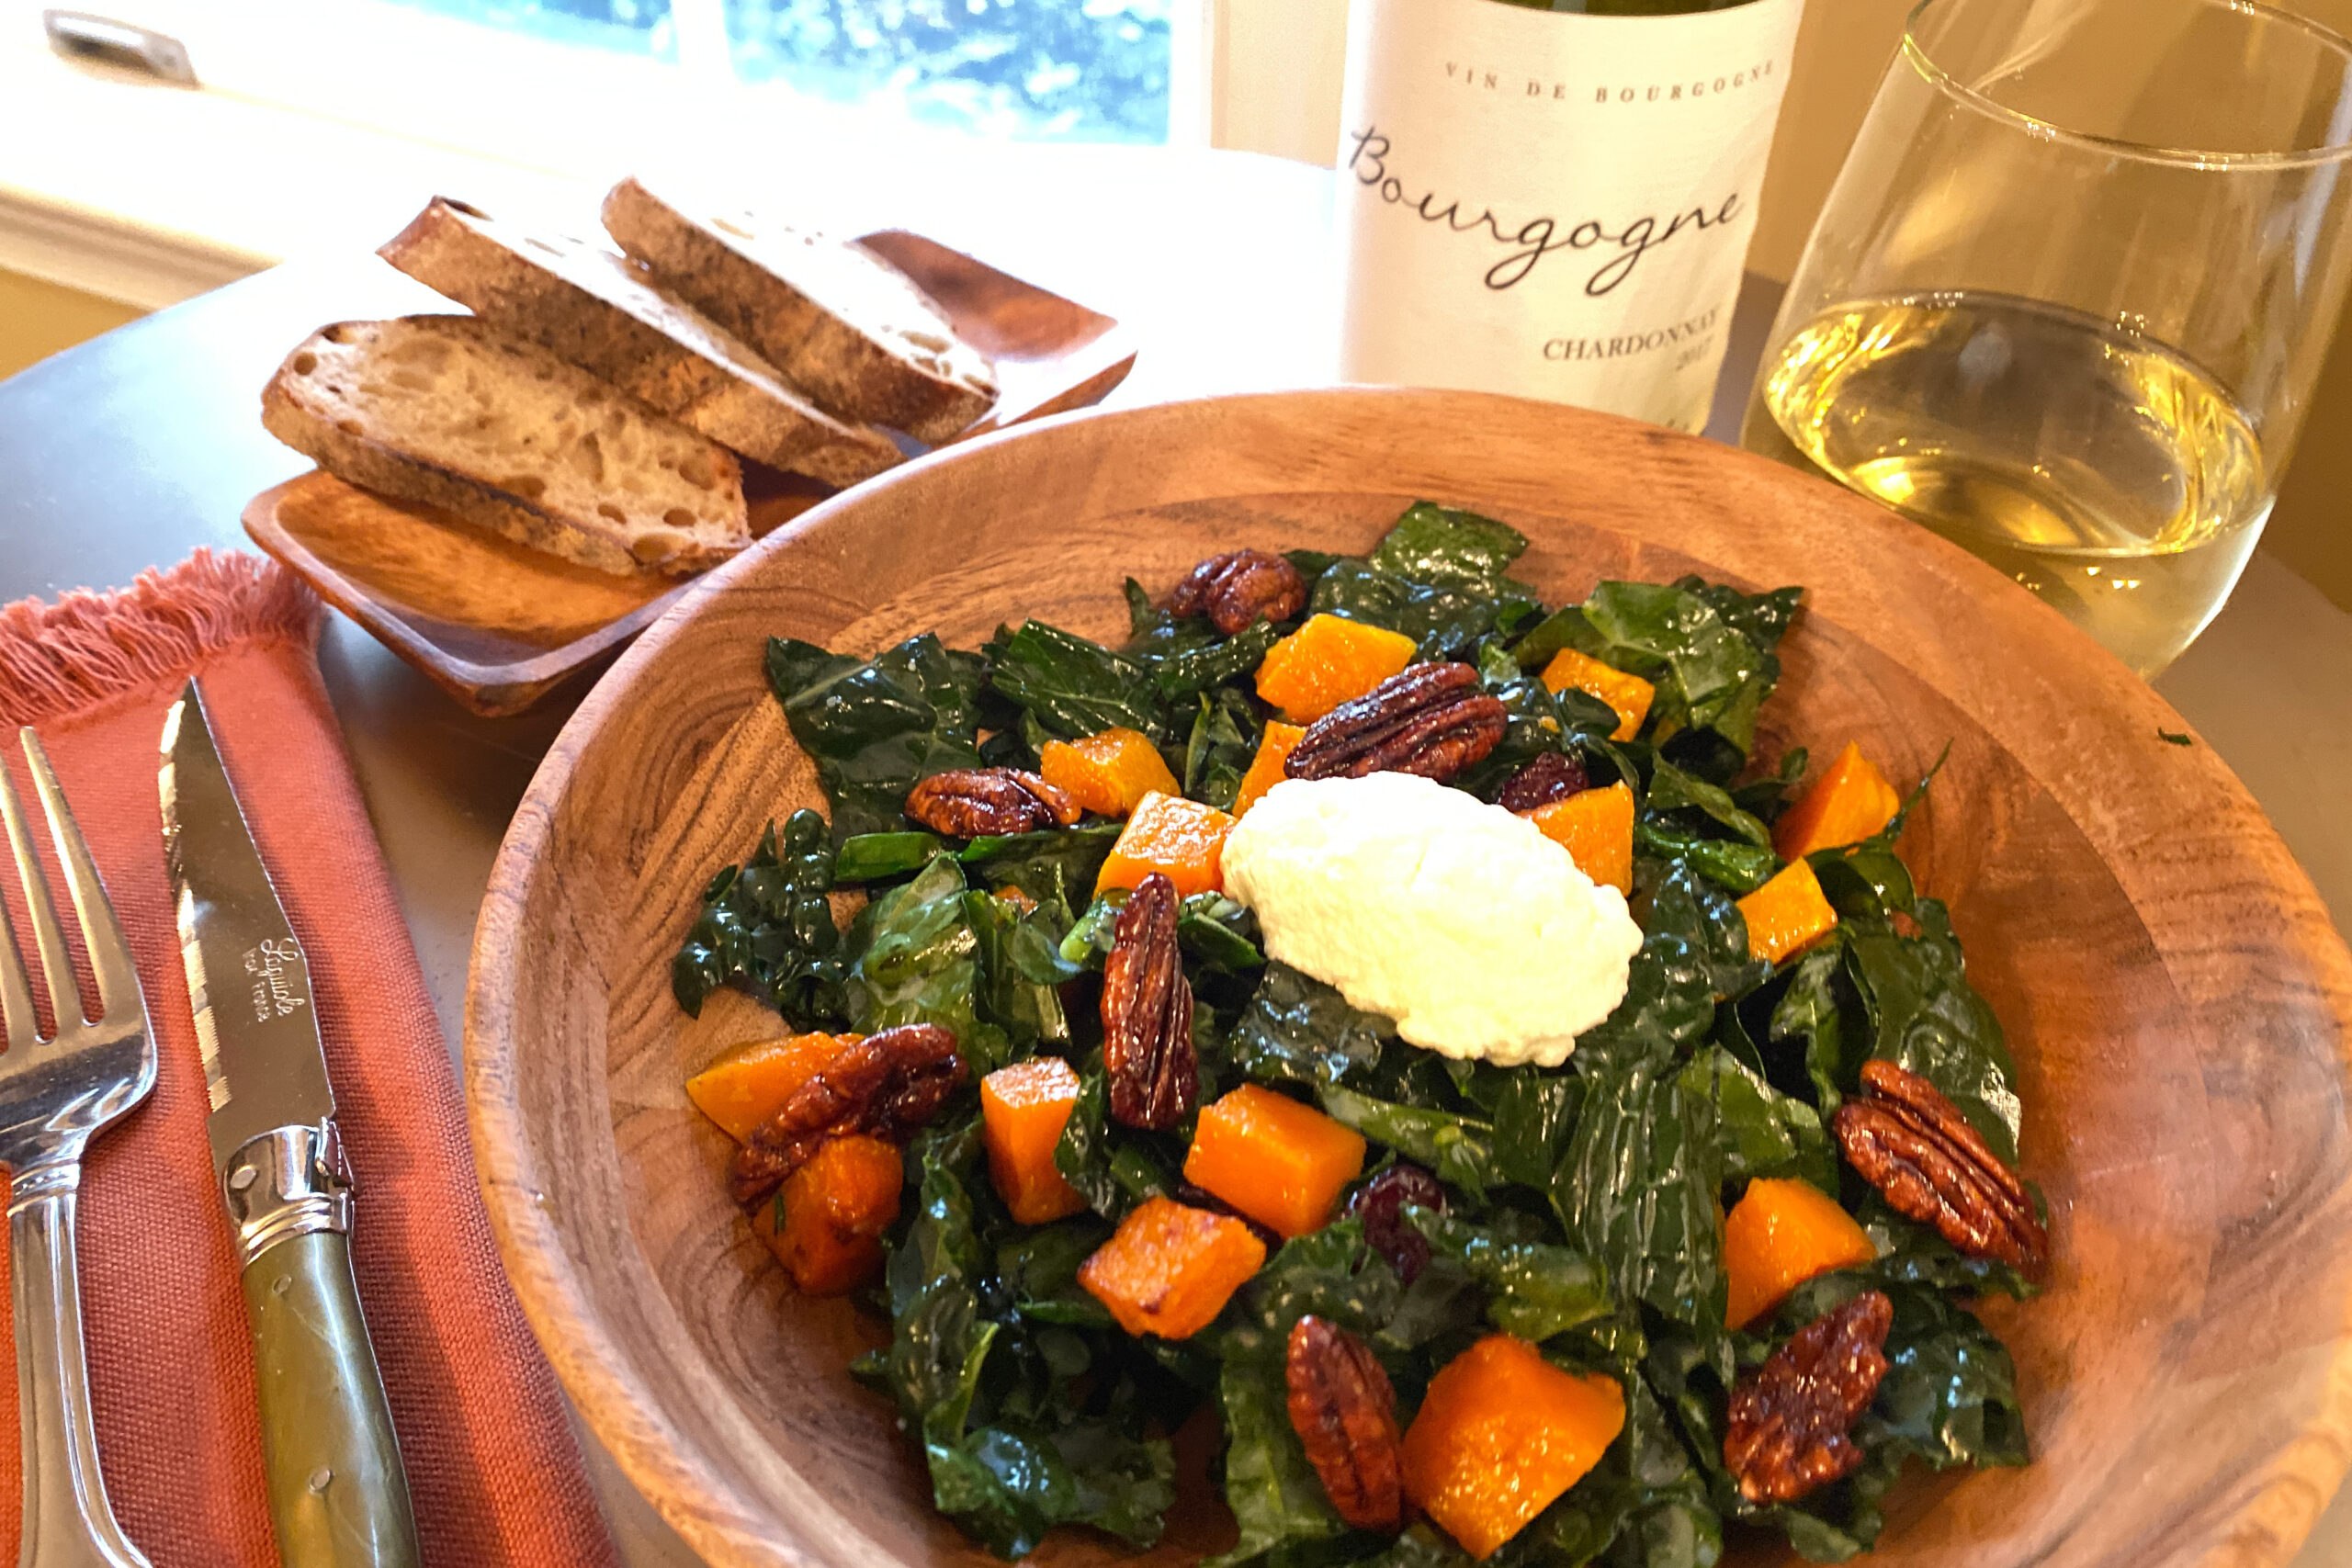
Thanksgiving is such a memorable holiday in my family.  It is the “kick-off” to the whirlwind holiday season and everyone is happy and festive.  For many families, the star of the Thanksgiving meal is the turkey.  But in my family, it is the side dishes.  There can never be enough side dishes at the Thanksgiving table!  My favorite recipe is my Fall Kale Salad.  It is light, healthy yet surprisingly rich and satisfying.  Everything you would expect from a Thanksgiving side dish!


For the pairing, I chose a White Burgundy from France.  It is unexpectedly one of my all-time favorite pairings!  I love how the crisp and acidic flavors of the wine complement the sweetness and tartness of the cherries in the salad.  And White Burgundy is also a fuller-bodied white wine so it matches the richness and creaminess of the fresh ricotta cheese.  To make your own cheese, check out my recipe here.


I love this pairing so much that it has become a weekday staple in our house meant to be enjoyed long after the Thanksgiving holiday.  To learn more, check out my White Burgundy pairing page.


This recipe has no ratings just yet.

Fall Kale Salad

November 18, 2020
: 4

By:

Ingredients
  • ¼ cup fresh ricotta cheese
  • small butternut squash
  • ¼ cup tart cherries
  • 1 small to medium bunch Tuscan kale
  • ¼ cup caramelized pecans (store-bought)
  • 1 tablespoon extra virgin olive oil
  • Dressing
  • 2 tablespoons champagne vinegar
  • 4 teaspoons maple syrup
  • 1 tablespoon extra virgin olive oil
  • Kosher salt & freshly ground black pepper
Directions
  • Step 1 Preheat the oven to 425 degrees.
  • Step 2 Place the ricotta in a strainer lined with a paper towel. Let it sit at room temperature for 30 minutes and up to 1 hour.
  • Step 3 Peel the butternut squash and cut in half to separate the long, seedless end (the neck) from the wider end. Cut the neck into ¼ inch cubes. You can reserve the remaining squash for another recipe.
  • Step 4 Place the squash onto a parchment-lined baking sheet. Toss with a tablespoon of olive oil and season to taste with salt and pepper. Roast the squash in the oven for approximately 15 minutes. Add the cherries to the squash and stir to combine. Continue to roast for another three minutes. Remove from the oven and place in a large serving bowl and set aside.
  • Step 5 To make the salad, remove the rib from the kale and chop it into thin strips. Add to the bowl with the squash mixture. Add the strained ricotta cheese and pecans.
  • Step 6 To make the dressing, whisk together the vinegar and maple syrup. Slowly add the olive oil. Season to taste with salt and pepper. Add the dressing to the bowl and toss to combine. Season with salt and pepper and serve.


Halibut & White Bean Ragout

Halibut & White Bean Ragout

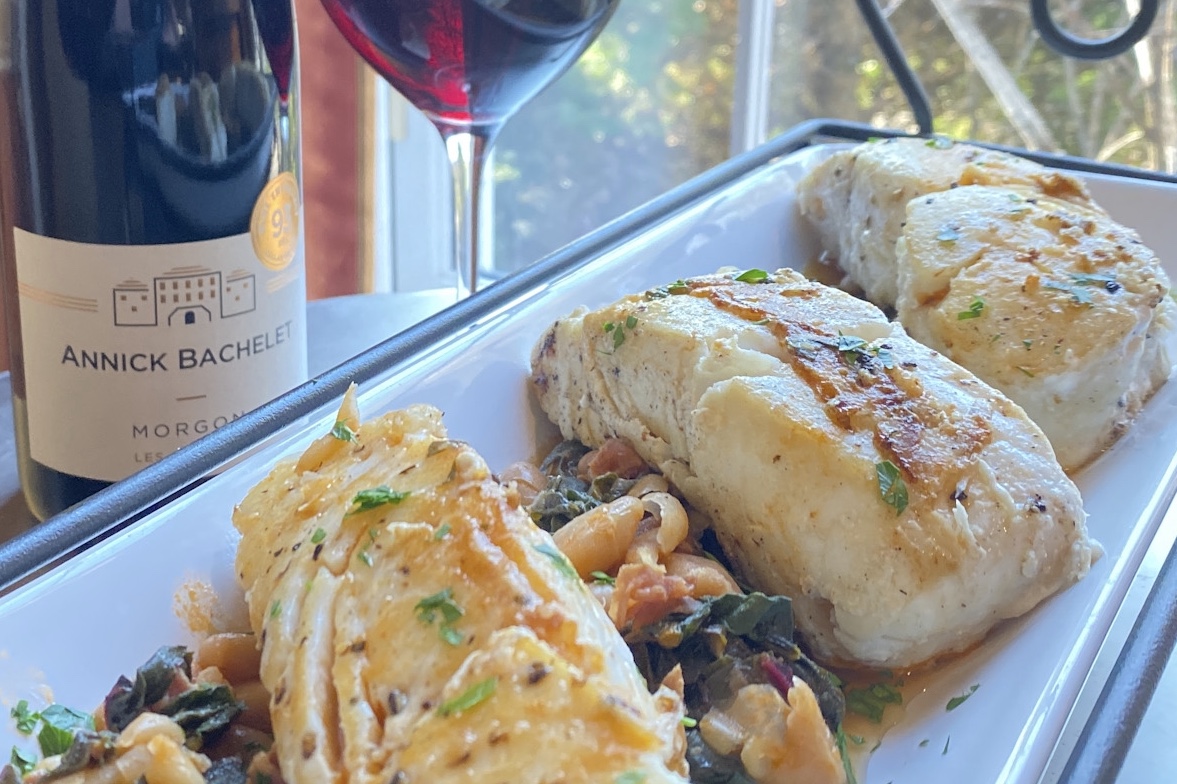
Simply Paired is all about fresh, healthy and of course, simple recipes. Fish has always been a big part of my recipes. With the arrival of fall, I was looking for a heartier fish dish that would work well with the season’s flavors. This Halibut & White Bean Ragout seems to hit all the marks. It has the creaminess of the white beans and the saltiness of the prosciutto which accentuates the meatiness of this fish. It provides a stew-like experience. And, it is easy to quickly whip up during a weekday dinner.

You might be thinking this would pair with a bigger white wine like a chardonnay. But, for me, the richness of the ragout calls for something a bit unconventional….a medium-bodied yet fruity red with a great nose that is super food-friendly…..for me, that screams Beaujolais! Check out my Beaujolais pairing page to hear more about this versatile red.


This recipe has no ratings just yet.

Halibut & White Bean Ragout

October 29, 2020
: 4

By:

Ingredients
  • 1 pound halibut (ask your fishmonger to remove the skin)
  • 3 tablespoons extra virgin olive oil
  • ½ cup of diced prosciutto or speck
  • 2 garlic cloves, sliced thinly
  • ¼ teaspoon red pepper flake
  • 3 cups swiss chard, stems removed
  • ½ cup dry white wine
  • 1/2 cup low sodium vegetable or chicken broth
  • 1 tablespoon tomato paste
  • 1 15 oz can of cannellini beans
  • 1 1/2 teaspoons fresh thyme
  • Zest of 1 lemon
  • Kosher salt and freshly ground black pepper to taste
Directions
  • Step 1 Heat 1 tablespoon olive oil in a large skillet. Add the prosciutto and cook over medium heat for 2-3 minutes until lightly brown. Remove from the pan.
  • Step 2 Add another 1 tablespoon of olive oil to the pan and add the garlic, red pepper flake, and 1 teaspoon of thyme. Cook for 30 seconds. Add the tomato paste and cook for 1 minute. Add the swiss chard and stir for about 1-2 minutes until it starts to wilt. Add the wine and cook for about 2 minutes. Add the stock and beans and bring to a boil. Reduce the heat to low, cover the pan, and cook for about 5 minutes. Remove from the heat and season with salt and pepper. Set aside.
  • Step 3 For the fish, season with salt & pepper. Heat 1 tablespoon of olive oil in a non-stick pan. Cook the halibut for about 3 minutes per side until cooked through.
  • Step 4 To serve, spoon the bean and chard ragout into the center of the plate. Place the halibut on top. Drizzle with extra virgin olive oil, fresh thyme, and lemon zest.
Tuna & Zucchini Ribbon Salad

Tuna & Zucchini Ribbon Salad

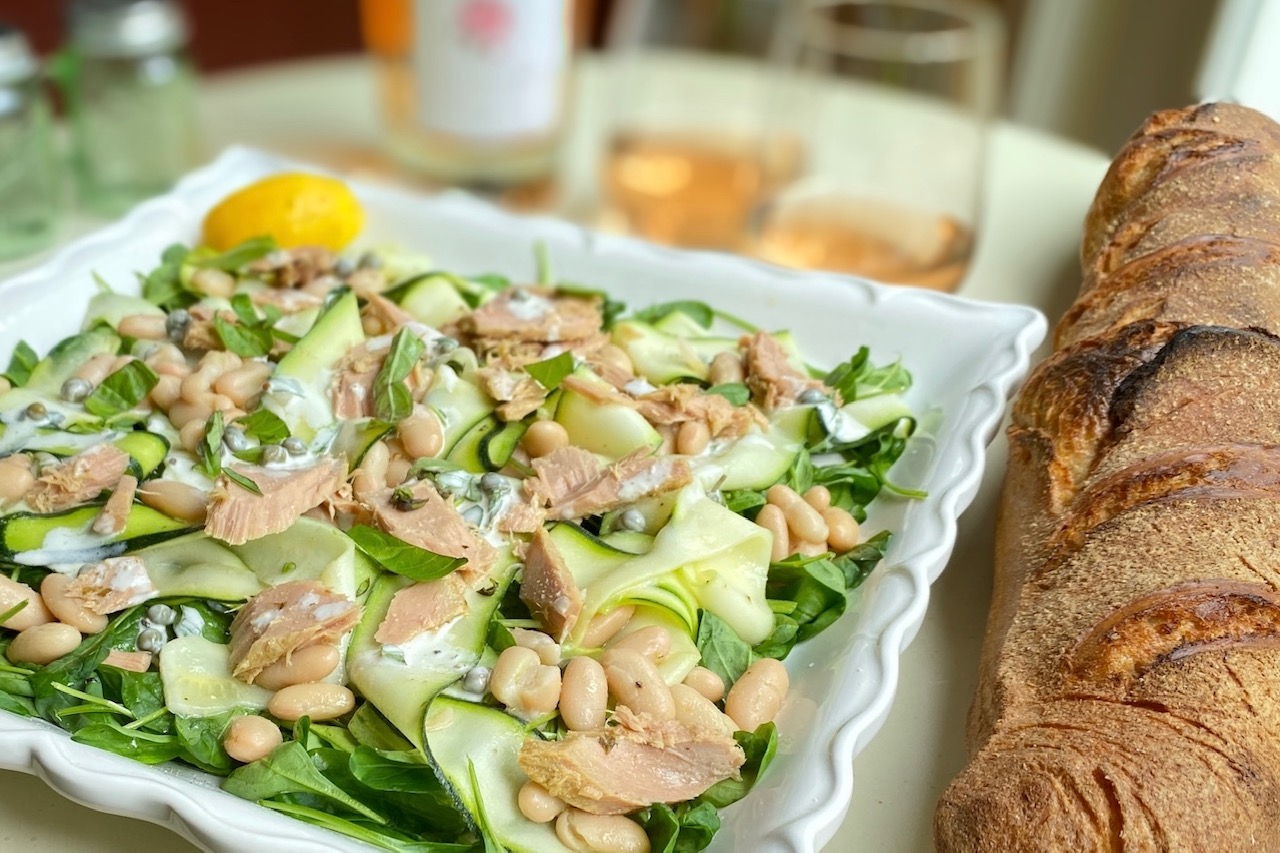
The end of the summer season is always a bit bittersweet for me. I enjoy holding onto the warm weather, outdoor entertaining, and farmer’s market ingredients that create simple, yet amazing meals. I get a sense of excitement for fall recipes about to come but just don’t like to let summer go. One of my favorite recipes is Tuna & Zucchini Ribbon Salad. There is always an abundance of zucchini in late summer and this is the perfect recipe to showcase it.  I especially love to serve this salad as part of a poolside lunch!


For the pairing, I chose a Provencal Rosé because the tuna and wine complement each other beautifully.  It is a classic pairing! It immediately reminds me of lazy days by the beach, enjoying the smells and tastes of the ocean. The Rosé brings a crisp fruitiness, the tuna a light salinity, and the zucchini a fresh earthiness of the late Summer season. It’s become a classic in our house. To learn more about Provence Rosé, check out my Rosé pairing page.


This recipe has no ratings just yet.

Tuna & Zucchini Ribbon Salad

September 24, 2020
: 4

By:

Ingredients
  • 2 small zucchini
  • 4 tablespoons fresh lemon juice, divided
  • 2 tablespoons extra virgin olive oil, plus more for drizzle
  • ½ teaspoon Dijon mustard
  • 1 15 oz. can of cannellini beans, rinsed and drained
  • 4 cups baby arugula
  • 1 jar of Italian tuna packed in extra virgin olive oil, drained
  • 2 tablespoons of capers, drained
  • 1 tablespoon mayonnaise
  • 1 tablespoon Greek yogurt
  • ½ cup fresh basil leaves, chopped
  • Kosher salt & freshly ground black pepper
  • Grilled bread
Directions
  • Step 1 In a large bowl, whisk together 3 tablespoons of lemon juice, 2 tablespoons olive oil and the Dijon mustard. Using a vegetable peeler, slice the zucchini lengthwise into ribbons. Toss them in the bowl with the marinade. Let sit for 10 minutes at room temperature. Add in the rinsed beans and toss lightly so as not to break up the beans.
  • Step 2 Arrange the arugula on a serving platter and drizzle with olive oil and salt & pepper. Layer the zucchini and bean mixture evenly over the arugula. Top the salad with the tuna.
  • Step 3 For the dressing, combine the mayonnaise, yogurt, 1 tablespoon of lemon juice, capers, and chopped basil. Season with salt & pepper. Lightly drizzle over the top of the salad. Garnish with fresh basil leaves and serve with grilled bread.
Citrus Salmon & Coconut Rice Bowl

Citrus Salmon & Coconut Rice Bowl

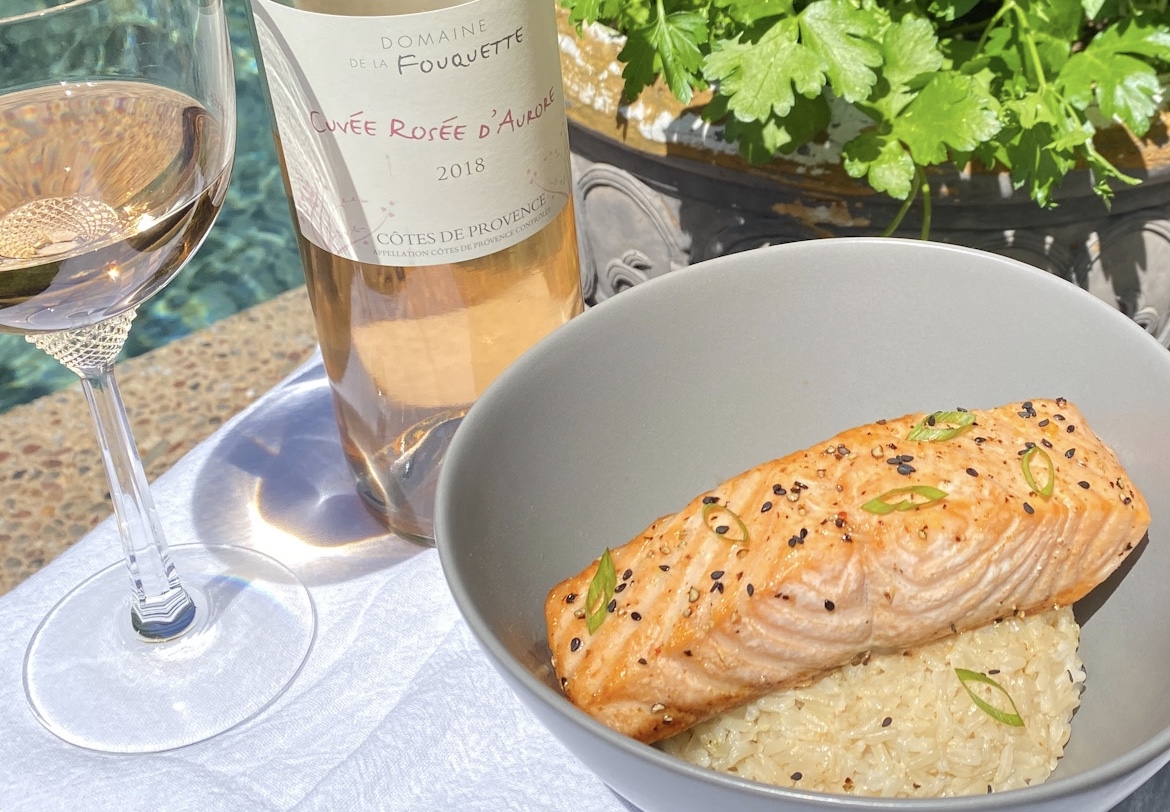
Summer can be very hectic in our house so I am always trying to find ways to simplify meal prep.  Lately, I have been experimenting with different kinds of rice bowls because they are not only healthy but simple to prepare.  My latest favorite, Citrus Salmon & Coconut Rice Bowl, combines only a handful of ingredients yet is extremely flavorful.


For the wine pairing, I chose a Provence Rose because it is light and has a hint of citrus that pairs nicely with the sauce for the Salmon.  If you prefer red wine, I would recommend a Pinot Noir from California.  Salmon and Pinot are a perfect pair!  For more information about the wine pairings, check out my Rose Pairing page or my Pinot Noir Pairing page.


This recipe has no ratings just yet.

Citrus Salmon & Coconut Rice Bowl

September 4, 2020
: 4

By:

Ingredients
  • 1 cup brown jasmine or basmati rice
  • 1 cup unsweetened coconut milk (mix well)
  • 1 cup water
  • 2 scallions, chopped, separate green from white part
  • Zest and juice of 1/2 orange (about 3 tablespoons)
  • Zest and juice of 1 lime (about 1 tablespoon)
  • 1 teaspoon Siracha
  • 2 tablespoons pure maple syrup
  • 1 pound organic or wild salmon, cut into 4 even portions
  • Kosher salt & freshly ground black pepper
  • ½ tablespoon toasted sesame seeds
Directions
  • Step 1 Prepare grill until very hot. Place a cast-iron pan on the grill to pre-heat.
  • Step 2 For the coconut rice, combine the water, coconut milk, rice, and the white part of the scallions in a medium pot. Bring to a boil then reduce the heat to low. Cover the pot and cook for approximately 30 minutes. Check your package directions for the exact cook time for the rice. You will know when the rice is cooked when all the liquid has been absorbed. Remove from the heat and season with salt and pepper. Set aside.
  • Step 3 While the rice is cooking, whisk together citrus juices and zest, Siracha, and maple syrup. Set aside.
  • Step 4 For the salmon, brush the fillets with canola oil and season with salt & pepper. Place in the preheated cast iron pan and cook for about 2-3 minutes per side based on the thickness of your fish. Remove the fish from the cast iron pan and place it on a plate. Spoon about 2 tablespoons of the sauce over the fish. Set aside.
  • Step 5 To serve, place an equal amount of the rice in each bowl. Place the salmon on top of the rice. Spoon the remaining sauce over the salmon and rice. Garnish with the green part of the scallion and the toasted sesame seeds.