Author: valerie.smith28

Heirloom Tomato Tart

Heirloom Tomato Tart

One of my favorite restaurants in the Philly area is Parc on Rittenhouse Square. It’s a classic bistro with authentic French food and ambiance. I’ve enjoyed their seasonal tomato tart more often than I can count so I decided to pay homage to this amazing restaurant and dish by creating my own version. My Heirloom Tomato Tart recipe is a simple dish using the best summer tomatoes at the peak of ripeness. Not only is it delicious, but it looks beautiful on the plate!


To complete my “Parc Experience”, it has to be a Provence Rose! It reminds me of sitting at the bar, friends closely packed, chatting with strangers, and trading pairing stories with the bartender. Nothing is more fun than feeling the energy of a traditional French bistro and enjoying great company. I hope this can inspire you to create that special experience!


To learn more about Rose from Provence, check out my pairing page.

This recipe has no ratings just yet.

Heirloom Tomato Tart

August 29, 2021
: 4

By:

Ingredients
  • 2 sheets store-bought puff pastry
  • 2 small heirloom tomatoes, thinly sliced
  • 1 large leek, white part only
  • 1 tablespoon extra virgin olive oil
  • 2 teaspoons Dijon mustard
  • 2 tablespoons Crème Fraiche
  • ½ cup Gruyere cheese, grated
  • 1 tablespoon each fresh Tarragon & chives
  • Kosher salt & freshly ground black pepper
Directions
  • Step 1 Preheat oven to 400 degrees
  • Step 2 Thaw the puff pastry overnight in the refrigerator or on the kitchen counter for 30-45 minutes. Place one pastry sheet on the work surface with a little flour to prevent sticking. Roll out to a 13 x 9-inch rectangle. Using a large, round cookie cutter, cut out 4 large circles of dough. Prick each with a fork all over leaving a small border. Place pastry rounds on a baking sheet lined with parchment paper and set them aside in the refrigerator. Repeat process with the second sheet of puff pastry dough.
  • Step 3 Slice the leeks into small pieces and place in a bowl of cold water to rinse for 5 minutes. Remove and pat dry. Heat 1 tablespoon extra virgin olive oil in saute pan over medium heat. Add the leeks and cook over medium-low heat for approximately 5 minutes until the leeks are soft. Remove from heat, season with salt and pepper, and set aside.
  • Step 4 Mix together the Dijon mustard and crème fraiche. Season with salt & pepper. Set aside.
  • Step 5 Remove the pastry from the refrigerator and bake in the oven for approximately 8-10 minutes until the pastry is partially cooked and lightly browned. Spread the mustard dressing evenly over each puff pastry round, leaving a small border. Next, spread the leeks evenly over the puff pastry. Then add the grated gruyere cheese evenly over the puff pastry. Then, place the thinly sliced tomatoes evenly over the puff pastry. Season with freshly ground pepper and salt.
  • Step 6 Bake in the oven for another 3-4 minutes until the cheese melts. Remove from the oven and let stand at room temperature for 10 minutes before serving. Garnish with fresh chives and tarragon.
Grilled Pork Chop & Cherry Salsa

Grilled Pork Chop & Cherry Salsa

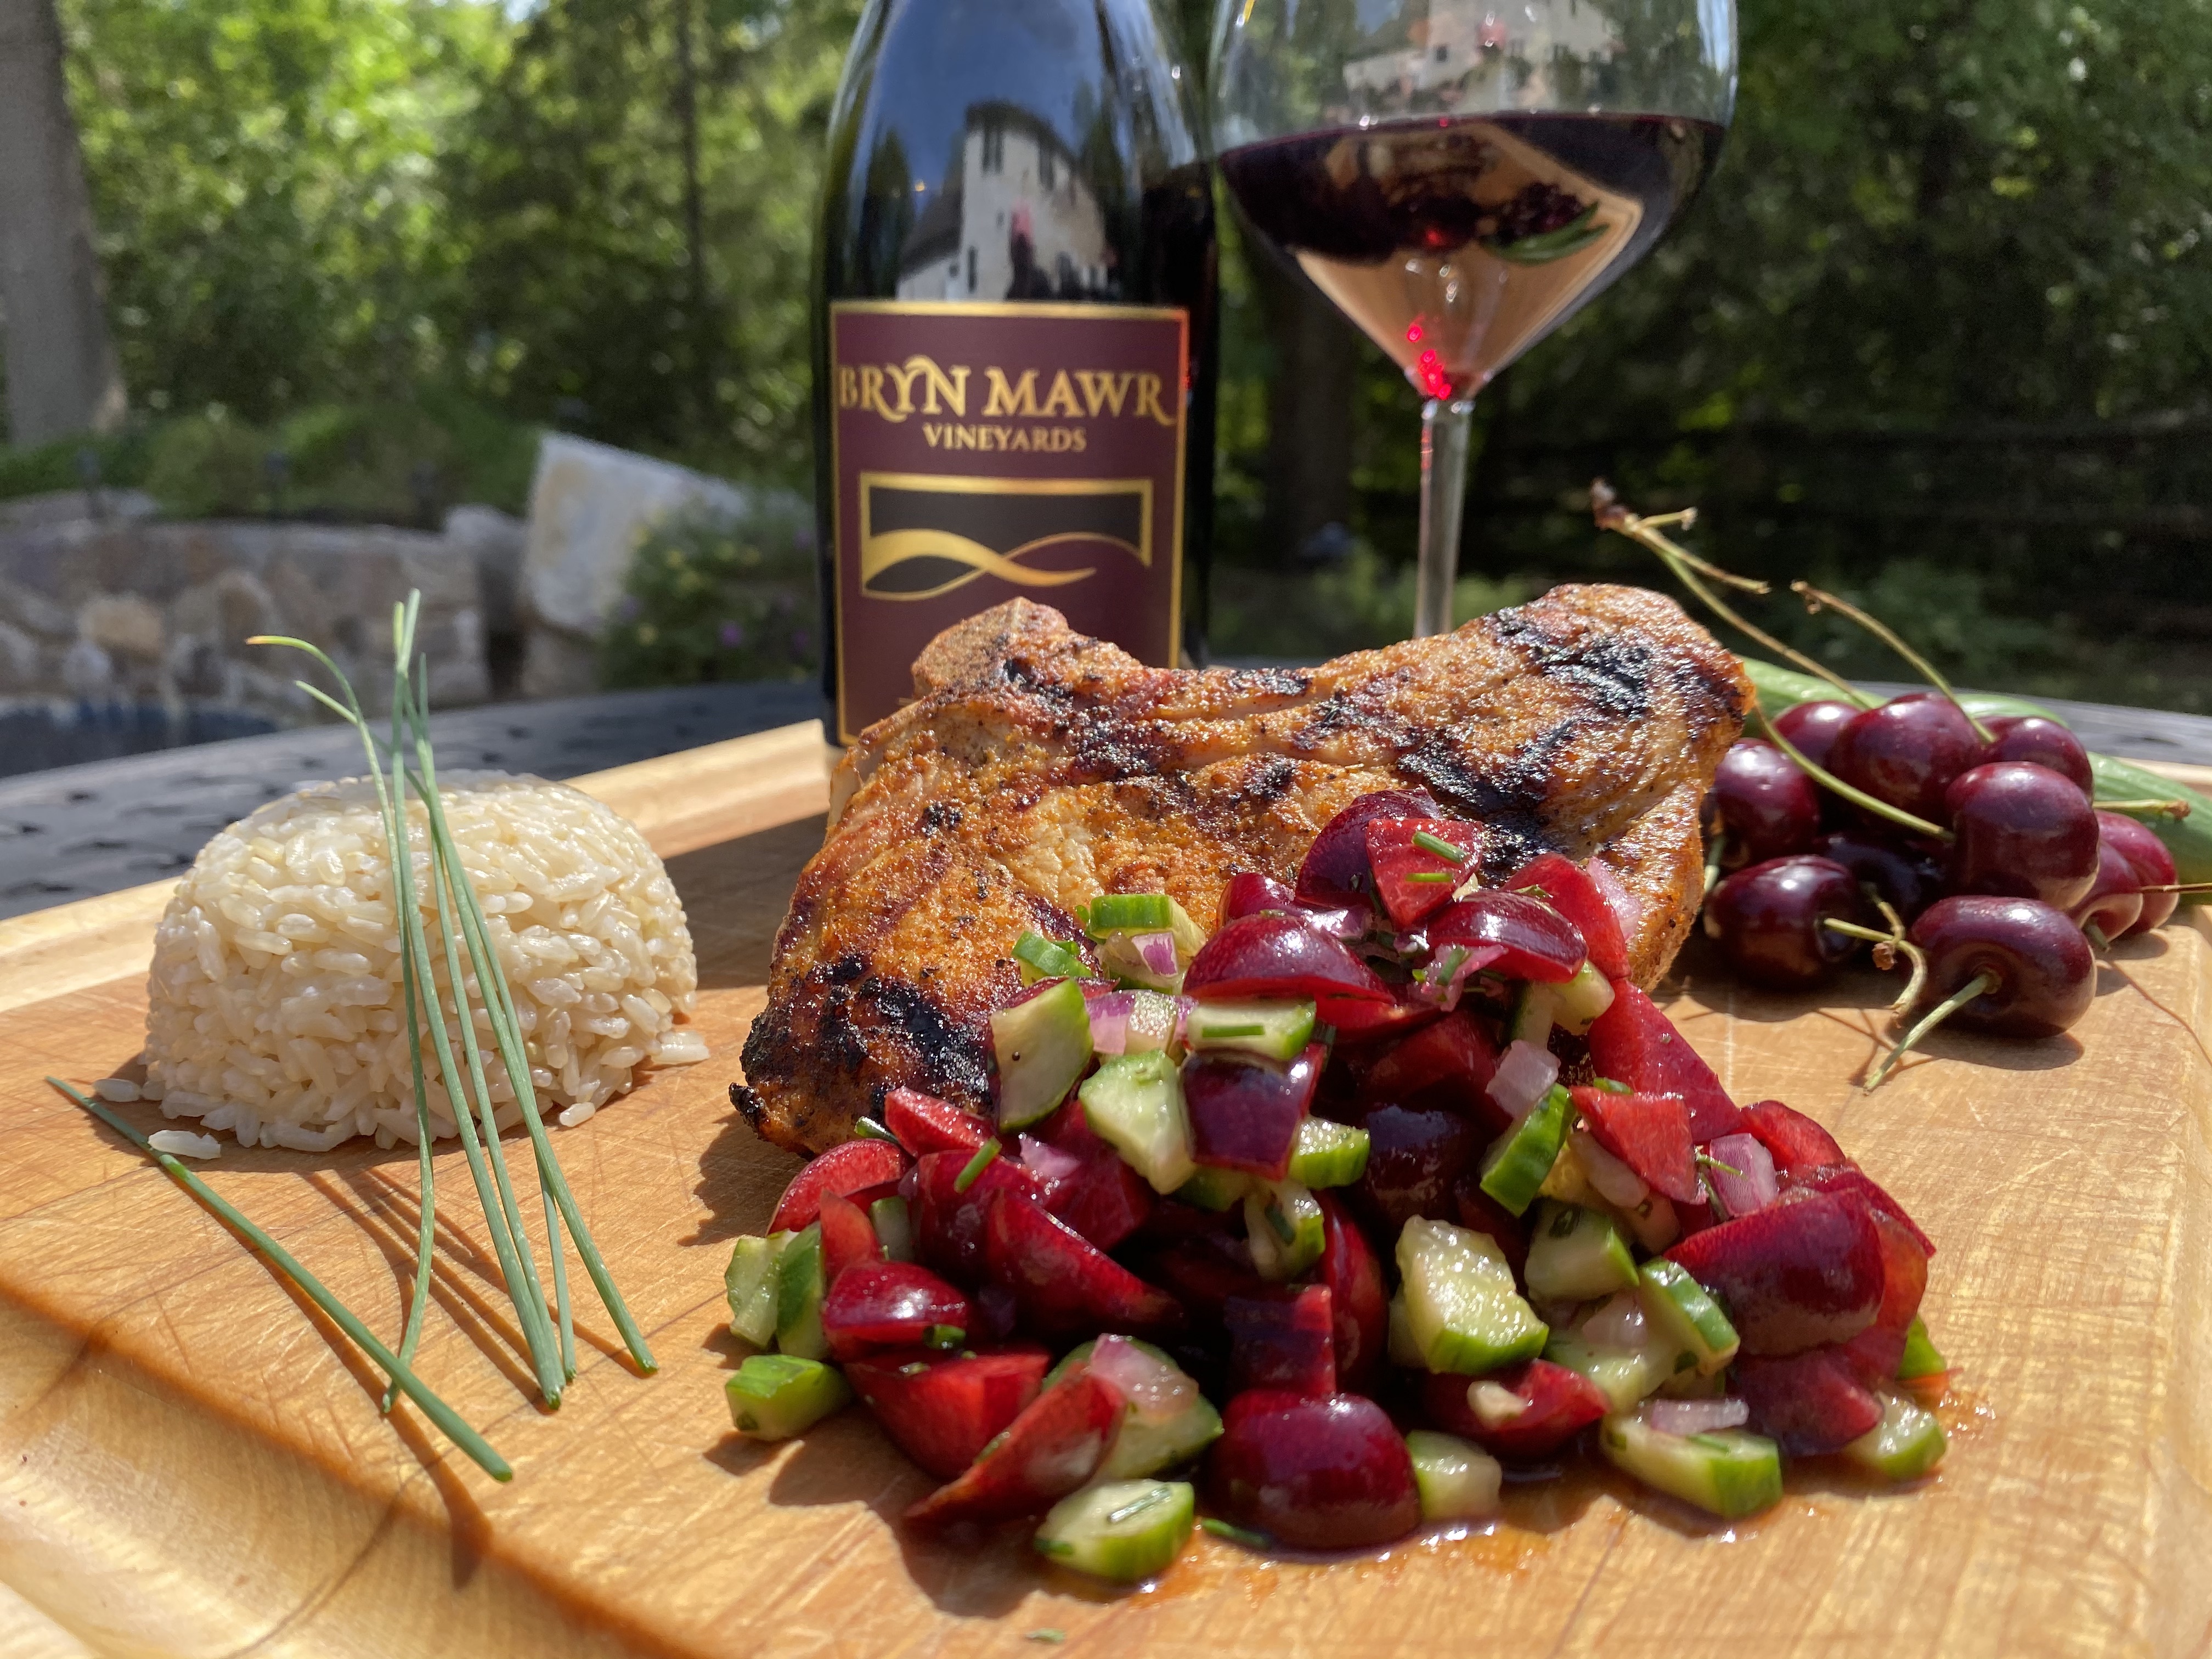
As my friends and family know, my wine journey started with Pinot Noir and to this day it remains my favorite grape.  I love celebrating International Pinot Noir Day each year in August. This year, I created a special recipe, my Grilled Pork Chop & Cherry Salsa, which is simple to prepare as well as fresh and seasonal.  I use local, organic pork chops which really make a difference given the simplicity of the recipe   The salsa combines fresh cherries, crisp Persian cucumber, sweet red onion, and fresh herbs.  But it is the addition of the sauce that gives the salsa its unique flavor.


For the pairing, I selected a Pinot Noir from the Willamette Valley in Oregon but you could pair this dish with any fruit-forward Pinot.  Look for a wine that has notes of dark fruit, earthiness, and a hint of spice. It is the perfect, late-Summer weekday pairing! To learn more about Pinot Noir wines, check out my Pinot Noir Pairing Page.


This recipe has no ratings just yet.

Pork Chop & Cherry Salsa

August 19, 2021
: 2

By:

Ingredients
  • 2 1-inch thick, bone-in pork chops
  • 1 tablespoon Herbs de Provence
  • 1 cup fresh cherries, pitted and chopped
  • ½ cup Persian cucumber, chopped
  • 1 tablespoon finely chopped red onion
  • Zest and juice of ½ lime
  • 1 tablespoon pure maple syrup
  • ¼ teaspoon Sriracha
  • ½ tablespoon chopped fresh chives
  • ½ tablespoon chopped fresh tarragon
  • Kosher salt and freshly ground black pepper to taste
Directions
  • Step 1 Season the pork chops with the Herbs de Provence and drizzle with extra virgin olive. Marinate at room temperature for 30 minutes. Season with salt and pepper.
  • Step 2 To make the cherry salsa, combine the cherries, cucumber, and red onion in a small bowl. Whisk together the lime zest & juice, maple syrup, and Sriracha in a separate bowl. Combine with the cherry mixture and add the chives and tarragon. Season with salt. Set aside.
  • Step 3 Pre-heat grill to high heat on one side and low heat on the other side. Grill the pork chops for approximately 2-3 minutes per side on high heat. Move the pork chops to low heat and grill another 2-3 minutes per side depending on the thickness of the meat.
  • Step 4 Serve with the Cherry Salsa, a side of Coconut Jasmine Rice and your favorite Pinot Noir!
Lemon & Lavender Madeleines

Lemon & Lavender Madeleines

I met my first madeleine cookie at Starbucks many years ago.  I loved the light & buttery “cake cookie”, especially with my morning coffee.  It wasn’t until a few years later when I tasted a homemade madeleine that I truly understood the magic of these cookies.  I decided then that I needed to make my own.  I soon realized, looking at the many different recipes, that I would need special pans to make these cookies so off to Williams Sonoma I went.  Over the years I have experimented with many different flavors from traditional lemon to orange & chocolate to my new favorite, Lemon & Lavender Madeleines. Lemon and lavender are such a great flavor combination and remind me of a lovely summer day in the south of France!


For the pairing, I of course chose a Rosé from the Provence region of France.  Lavender grows wild and abundant there so it was only fitting.  It can be difficult to pair a dry wine with dessert but madeleines are not typically too sweet so this pairing works beautifully.  To learn more about Rose wine, check out my French Rosé pairing page.


This recipe has no ratings just yet.

Lemon & Lavender Madeleines

June 23, 2021
: 6-8

By:

Ingredients
  • 1 stick plus 2 tablespoons unsalted butter
  • 2 large eggs, at room temperature
  • 1/4 cup granulated sugar
  • ¼ cup lavender honey
  • Zest of 2 lemons
  • 1 teaspoon pure vanilla extract
  • 1 cup all-purpose flour, sifted
  • 1/2 teaspoon baking powder
  • 1/8 teaspoon salt
  • 2 teaspoons lavender buds
Directions
  • Step 1 In a small pan, melt 1 stick of butter and set aside.
  • Step 2 Using an electric mixer, whisk together the eggs, sugar, and honey on high speed for 5 minutes. Add in the lemon zest and vanilla.
  • Step 3 In a separate bowl, whisk together the flour, baking powder, salt, and 1 teaspoon lavender. Gently fold the dry ingredients into the egg mixture. Gently stir the melted butter into the batter. Cover and chill in the refrigerator for about an hour.
  • Step 4 Preheat the oven to 350 degrees. Melt the remaining 2 tablespoons of butter. Using a pastry brush, lightly brush the pan with melted butter.
  • Step 5 Spoon 1 tablespoon of batter into the center of each scalloped well. No need to spread it to the edges. Sprinkle each with a little lavender.
  • Step 6 Bake for approximately 10 minutes until lightly golden brown. Transfer the warm madeleines to a wire rack to cool. Sprinkle with confectioner sugar and lemon zest. Serve with a side of lavender honey or lemon curd.
Mediterranean Chicken, Hummus & Tzatziki Sauce

Mediterranean Chicken, Hummus & Tzatziki Sauce

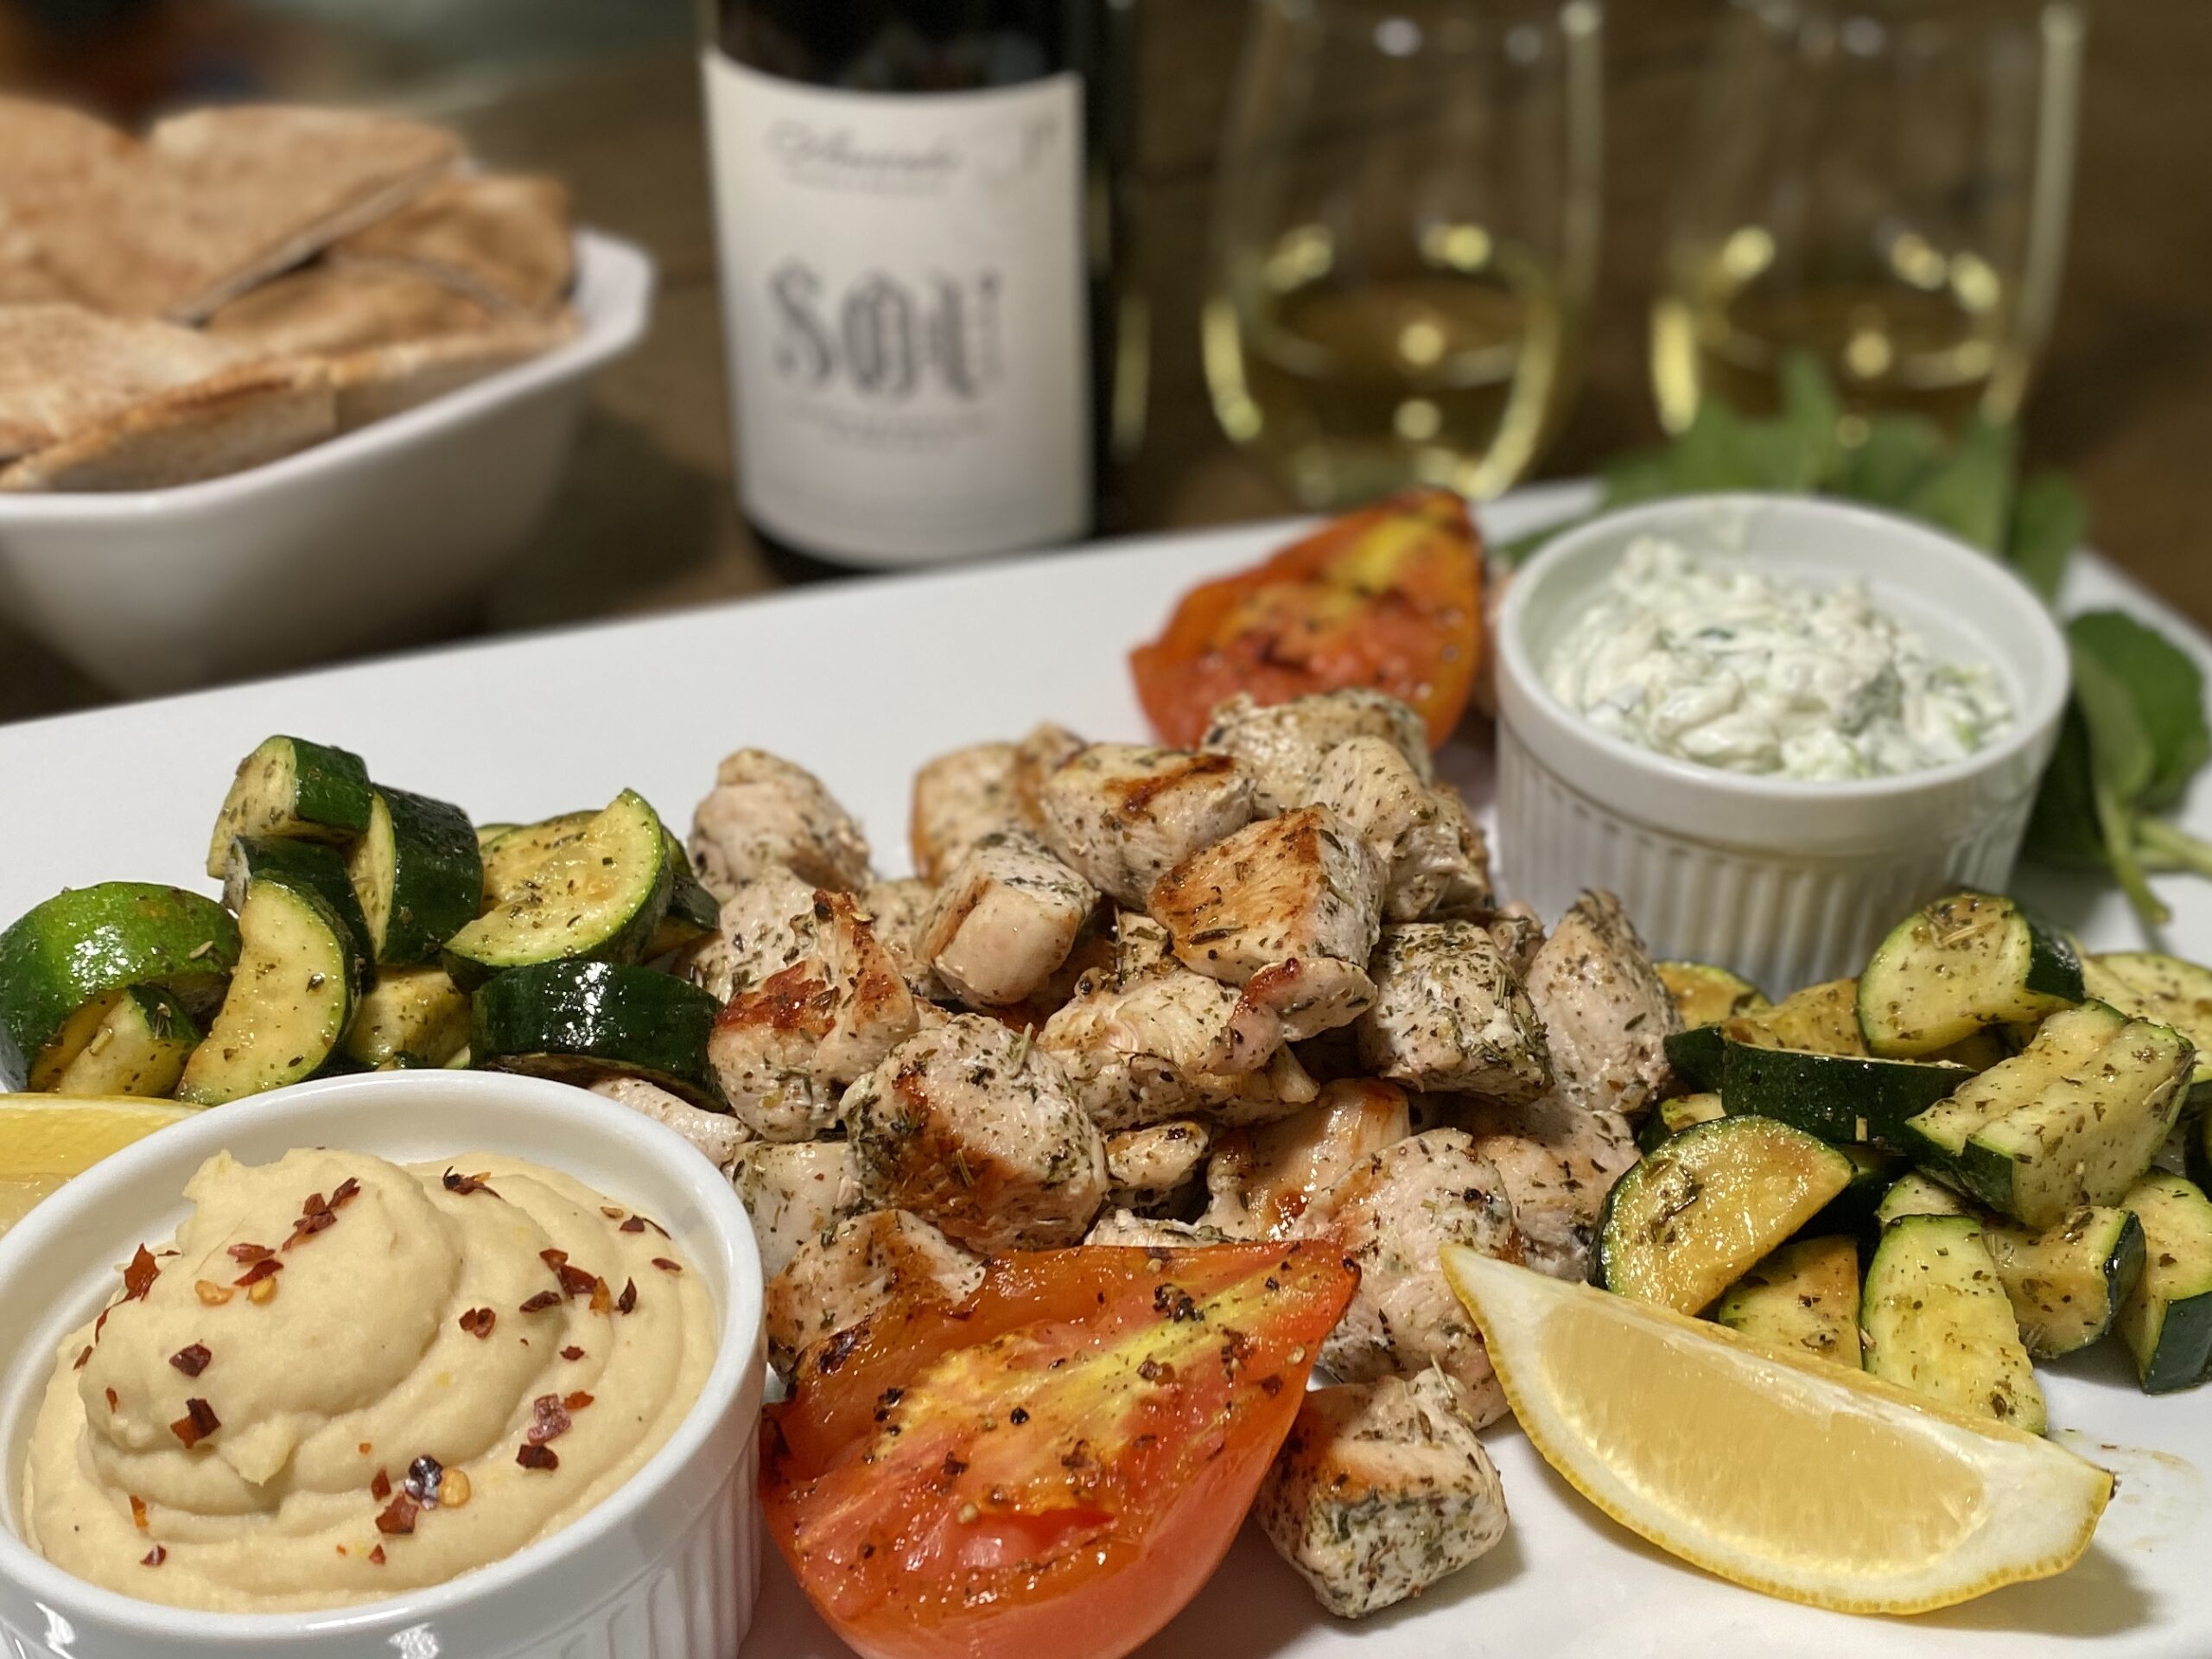
I started making my own hummus a few years ago after watching an episode on the Food Network.  It was so simple and tasted much better than store-bought hummus that I never looked back.  Since then, I have added homemade Tzatziki sauce to my repertoire.  I would serve both alongside some freshly grilled pita for a nice Hors d’oeuvre to serve at parties.  Over the years, I added some protein & vegetables and voila, my Mediterranean Chicken, Hummus & Tzatziki Sauce recipe was born!  It remains a family favorite to this day.  It is great for a simple, weekday meal.  However, my favorite way to serve is family-style at parties.


For the pairing, I chose a nice Alvarinho wine from Portugal.  These wines are typically crisp and acidic with notes of citrus and tropical fruits.  I love this pairing on a warm Spring afternoon, sitting pool-side with friends.  To learn more about Alvarinho wines, check out my pairing page.  Hope you enjoy it!


This recipe has no ratings just yet.

Mediterranean Chicken, Hummus & Tzatziki Sauce

April 16, 2021
: 4-6

By:

Ingredients
  • 1 lb. organic chicken breast
  • 1.5 tablespoon Herbs de Provence
  • 2 small zucchinis
  • 1 15.5 oz can of cannellini beans, drained & rinsed
  • 1 sprig of fresh rosemary
  • 3 garlic cloves
  • 1 cup Greek yogurt (I use 5% Greek yogurt)
  • 1 tablespoon chopped fresh mint
  • 2 Persian cucumbers
  • Zest and juice of 1 lemon
  • ¾ cup extra virgin olive oil
  • Kosher salt and freshly ground black pepper
  • 4 whole-wheat pita bread
Directions
  • Step 1 Prepare the grill to medium-high heat.
  • Step 2 Rinse and dry the chicken with paper towels. Drizzle the chicken with extra virgin olive oil and season with 1 tablespoon Herbs de Provence and salt and pepper. Set aside.
  • Step 3 To make the hummus, heat ½ cup of olive oil, rosemary sprig and 2 garlic cloves in a small sauté pan over medium-low heat for about 3-4 minutes. Remove from heat, put into a bowl to cool for 2-3 minutes. Remove the rosemary sprig and add the olive oil and garlic to a food processor along with the cannellini beans. Puree until smooth. May need to add up to a tablespoon of additional olive oil to get it really smooth. Season with salt, pepper, and lemon zest. Place in a bowl with a drizzle of extra virgin olive oil. Set aside.
  • Step 4 To make the tzatziki, grate the cucumbers on the large side of a box grater. Place them in paper towels or cheesecloth to squeeze out all the water. Place the yogurt in a bowl. Add the cucumbers, mint, lemon zest, and juice. Stir to combine. Finely mince the other garlic clove and add to the yogurt mixture. Add a drizzle of olive oil and season with salt and pepper. Set aside.
  • Step 5 To make the zucchini, cut off the ends and slice lengthwise in half. Slice the zucchini in ½ inch half-moons and add to a bowl. Drizzle with olive oil and season with salt, pepper, and the remaining Herbs de Provence. Set aside.
  • Step 6 Grill the chicken for approximately 6-7 minutes per side depending on the thickness of the chicken. Remove from the grill and set aside. Heat a grill basket on the grill for about 2 minutes. Add the zucchini and cook for about 5-6 minutes. Remove from heat. Set aside.
  • Step 7 Lightly grill the pita bread for a few minutes. Remove from the grill and cut into triangles.
  • Step 8 To serve, slice the chicken on the bias and place it in the center of a large platter. Place the zucchini on one side of the chicken and the sliced pita bread on the other. Place the hummus and tzatziki in small ramekin dishes and place them on the platter. Garnish with mint sprigs and sliced tomato wedges.
Mediterranean Tuna Tartare

Mediterranean Tuna Tartare

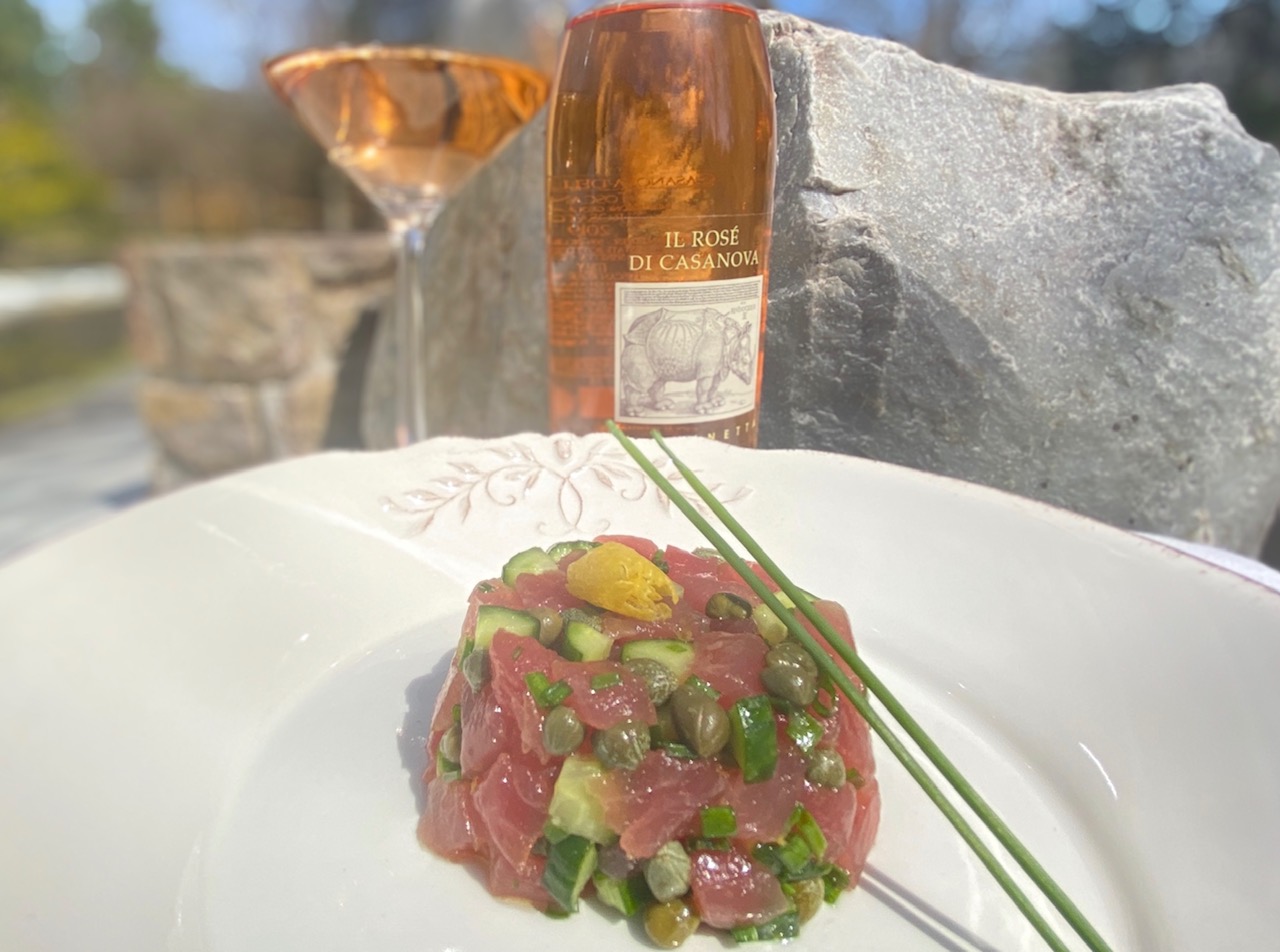
Recently, during a typical family party at the house, I was making my traditional Asian-style tuna tartare when I realized I was missing a key ingredient.  Not wanting to let a beautiful piece of tuna go to waste, I improvised as I usually do, and out came my new favorite, Mediterranean Tuna Tartare.  It is equally as simple to prepare and still keeps the Tuna as the star of the show, but it has a completely different flavor profile.  The capers and preserved lemon pack a briny punch and the basil mayonnaise adds richness and depth.


For the paring, there was only one wine that made sense – a Rosé.  However, instead of a Provence Rosé, I chose one from Italy.  But you certainly can’t go wrong with a Provence Rosé. To learn more, check out my Rosé pairing page here.


lt_recipe name=”Mediterranean Tuna Tartare” servings=”4″ print=”yes” ingredients=”½ 1b. sushi-grade tuna;1/4 cup Persian cucumber, seeded and diced;1 tablespoon quality extra virgin olive oil;2 teaspoons chopped chives;2 teaspoons drained capers;1 teaspoon preserved lemon, finely chopped;½ cup fresh basil;1 teaspoon lemon juice;2 tablespoons mayonnaise; Malden or Kosher salt;” ]Using a sharp knife, finely chop the tuna into a medium-sized dice and add to a bowl. Chop the cucumber into small dice and add to the tuna. Add the chives, capers, and preserved lemon. Stir to combine. Stir in olive oil and finish with the Malden salt. Set aside.; To make the basil mayonnaise, combine the basil, mayonnaise, and lemon juice in a food processor. Process for about a minute until smooth. Season with Malden salt.; To serve, smear the basil mayonnaise on a small serving platter. Place the tuna tartare on top and garnish it with fresh basil. Serve with thin crostini or water crackers.;[/lt_recipe]

Pork Cutlet & Beurre Blanc Sauce

Pork Cutlet & Beurre Blanc Sauce

I love getting feedback on recipes and pairings. It helps me know things are working and has provided great information for future recipes. But inspiring others to do their own recipes and parings is even more rewarding!  I am thrilled to highlight the community recipes and pairing for you all.  This one is from my brother-in-law, Michael Korinko.


Mike’s Pork Cutlet & Beurre Blanc

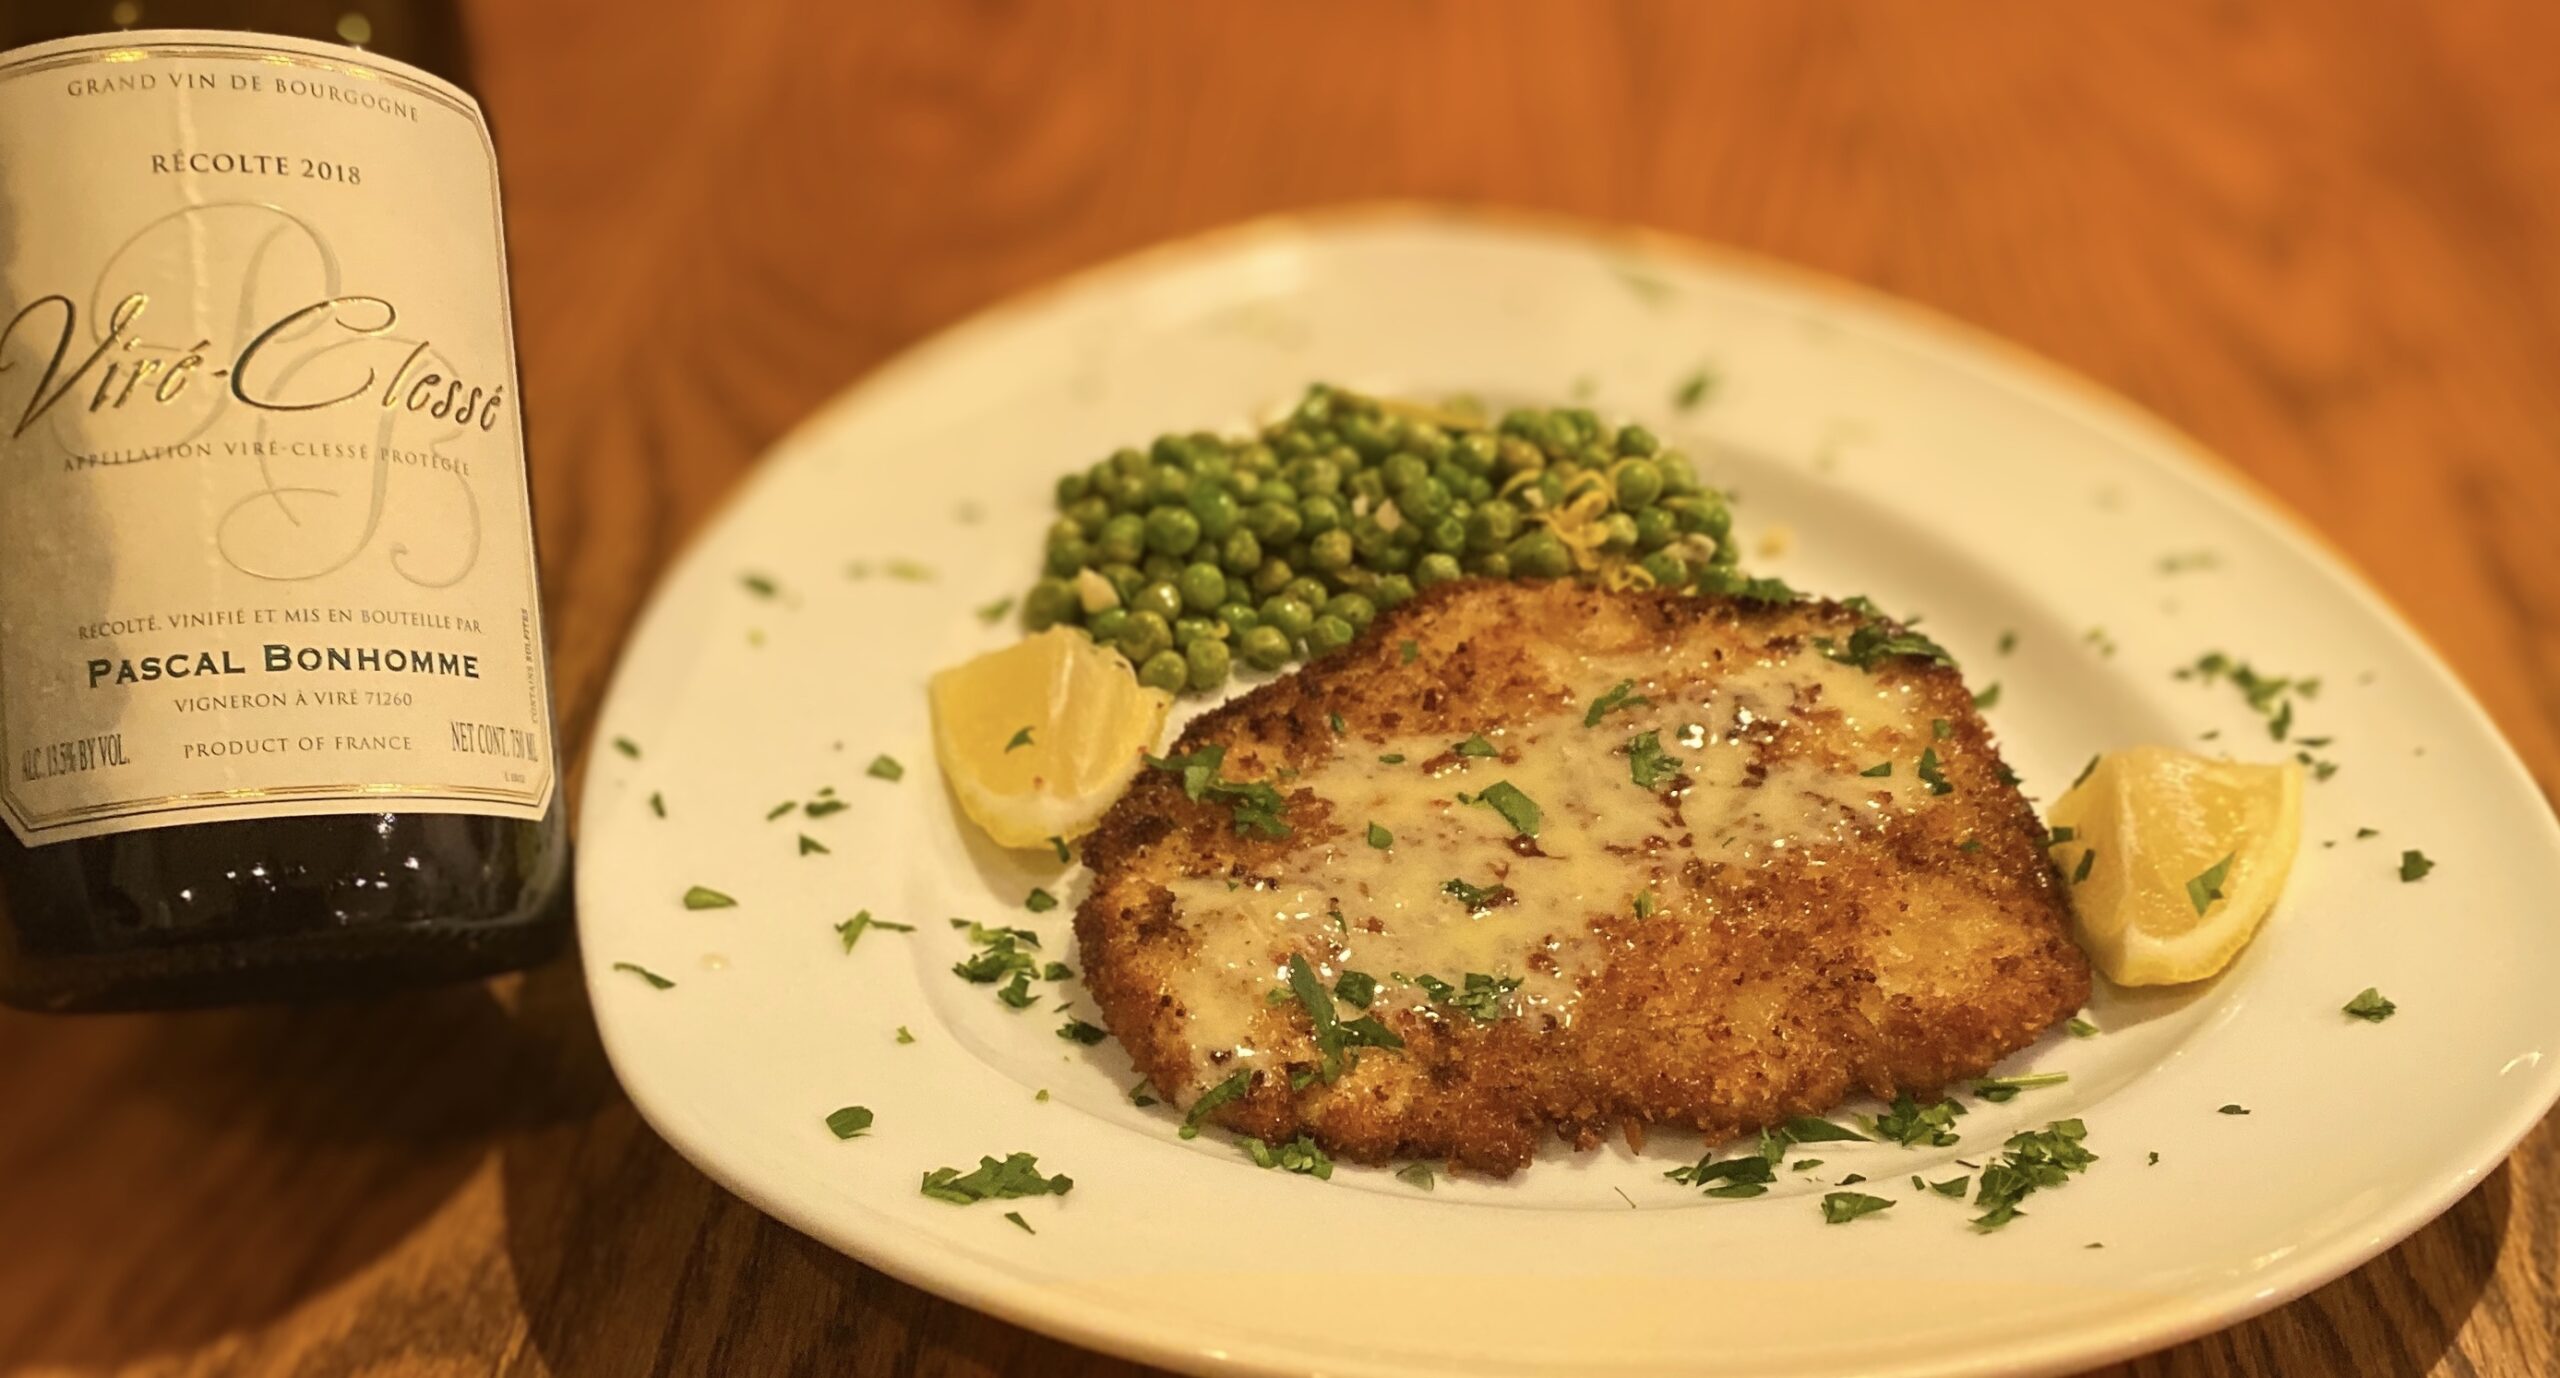
During a recent visit with my in-laws, I decided to take Simply Paired on the road. I challenged my brother-in-law Mike, who is an excellent cook, to come up with a dish and pairing for our Saturday night get-together. He chose his Pork Cutlet & Beurre Blanc Sauce paired with a White Burgundy from France. I have to say, the craftsmanship in pounding the cutlets wafer-thin, precisely breading them, and then delicately frying them was quite impressive!. With the sauce and simple sauteed pea accompaniment, it was a great dish!


For the pairing, he chose a lovely White Burgundy. We all thought it would be a perfect complement, and it was!  The creaminess and the bright acidity of this wine paired beautifully with the richness of the pork and sauce.  We also decided to try the Finger Lakes Riesling I brought to see how that wine would stack up against this dish. The Reisling, from Ravine Vineyard, was very crisp and refreshing with a touch of minerality and lemon curd that really paired well with the lemon in the buerre blanc sauce.  Another great pairing!  I am just learning about Riesling wine and so far, I am loving it!


We had two great pairings, but which was the best? Well, team White Burgundy and team Reisling argued deep into the night, tasting and comparing without a clear winner. I hope you have the opportunity to have your own Simply Paired battle!


This recipe has no ratings just yet.

Pork Cutlet & Beurre Blanc

March 25, 2021
: 4

By:

Ingredients
  • Pork -
  • 4 boneless center-cut loin chops, about 6-8 ounces each
  • Kosher salt
  • ½ cup of good mayonnaise and 2 tablespoons of good Dijon mustard
  • Canola oil, for frying
  • Panko bread crumbs
  • ¼ teaspoon Ground Cayenne Pepper
  • Beurre Blanc –
  • ¼ cup of un-oaked white wine (preferably white burgundy)
  • 1 shallot, finely chopped
  • ¼ cup of heavy cream
  • 1 stick (8 tablespoons) cold unsalted butter, cut into small cubes.
  • Kosher salt and fresh coarse ground pepper (tri-color peppercorns work best)
  • 3 teaspoons of freshly squeezed lemon juice
  • Chopped parsley for the garnish
  • Peas –
  • 2 tablespoons extra-virgin olive oil
  • 2 small shallots, finely chopped
  • 1 clove of garlic (or 2), finely chopped
  • One 10oz bag frozen peas, thawed
  • 1 tablespoon of lemon zest plus 1 ½ tablespoon fresh lemon juice (1/2 lemon)
  • Kosher salt and fresh coarse ground pepper (tri-color peppercorns work best)
Directions
  • Step 1 Preheat the oven to 200 degrees F
  • Step 2 For the pork: On a clean cutting board, trim off excess fat, place the chops between layers of plastic wrap and use a meat mallet (side with tenderizer teeth) to pound the chops to an even thickness of about 1/4 inch. Mix the panko breadcrumbs with the cayenne pepper and spread it on a plate. Add about 1/2 inch of canola oil to a non-stick frying pan and heat to medium. One-piece at a time evenly coats each cutlet in the mayonnaise/Dijon mustard mixture. Dredge the pork in the breadcrumb mixture, pressing the cutlet firmly in the mixture. Carefully place the pork in the hot oil and cook until golden on the underside, about 3 minutes. Flip and cook until golden on the second side, for 3 minutes. Drain on a paper towel-lined plate, lightly salt the cutlet immediately after removing from frying, and then transfer to a cooling rack set over a baking sheet and place in the oven to keep warm.
  • Step 3 For the peas: Heat a medium skillet over medium heat. Add olive oil. When the oil is hot, add the shallots and garlic and cook, stirring frequently, until softened, for 1 to 2 minutes. Add the peas, lemon zest, and lemon juice, and toss to coat. Season with salt and pepper and keep warm.
  • Step 4 For the beurre blanc: Combine the white wine and shallot in a small saucepan. Bring to simmer and cook until the wine is reduced by half. Add the cream and bring to a boil
  • Step 5 let boil 30 seconds to 1 minute to thicken. Season with salt and pepper. Reduce heat to low and begin whisking in the cold butter, a piece or two at a time until the sauce is thick and glossy (do not let the sauce boil). Whisk in the lemon juice and season with salt and pepper. Keep warm.
  • Step 6 Serve the pork with the peas, drizzled with the beurre blanc, and garnish with parsley.
Shrimp & Vegetable Fried Rice

Shrimp & Vegetable Fried Rice

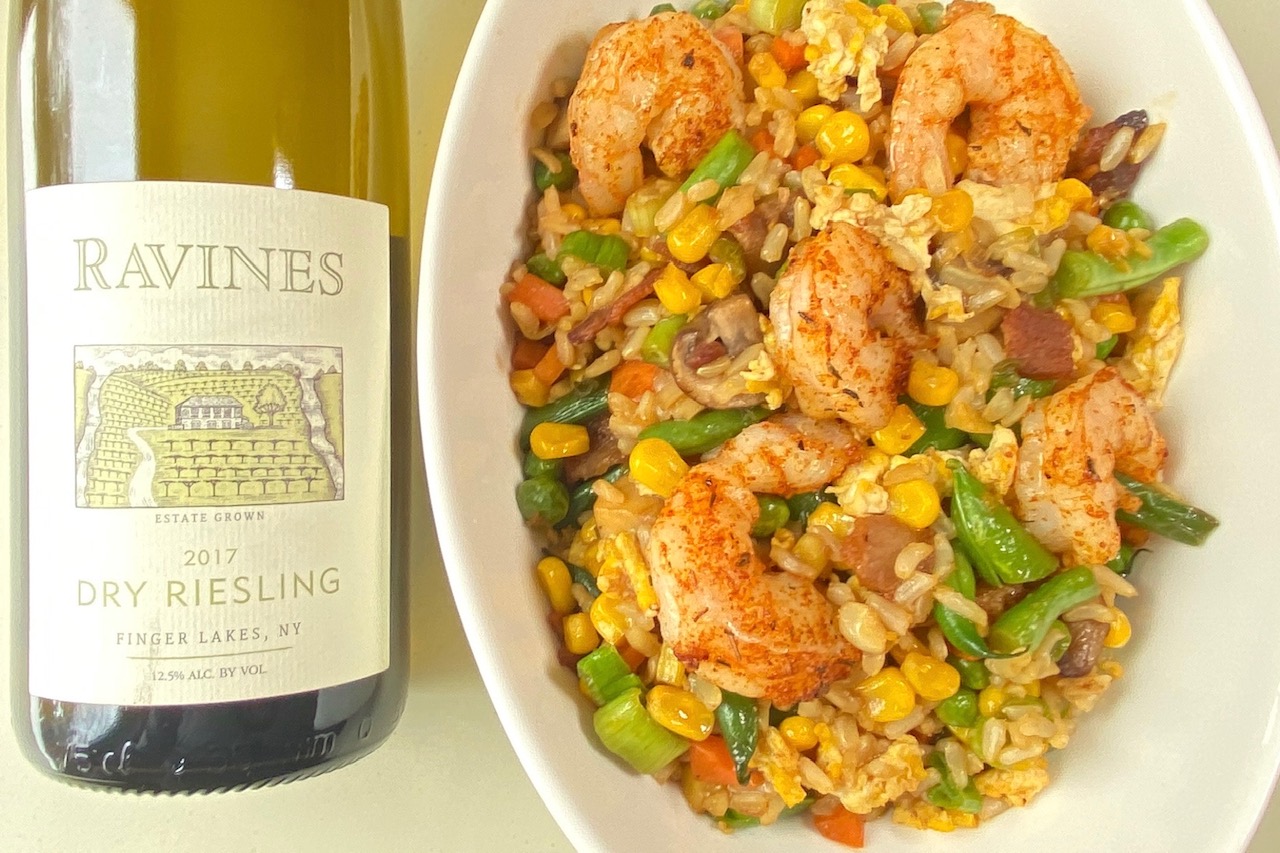
Chinese take-out has always been a weekly staple at our house.  And, while I’ve tried many times over the years to master this cuisine at home, I have never been able to get it right…until now!  Finally, after many attempts, I have created a delicious, healthy, and satisfying Asian dish — my Shrimp & Vegetable Fried Rice is the perfect weekday dish to replace take-out.  It is loaded with vegetables and I use brown rice instead of white which makes it even healthier!


Now, for the pairing…I have always heard that Riesling pairs nicely with Asian cuisine.  Surprisingly, I have never tried Riesling wines before.  Wow, what was I waiting for! I started my Riesling journey with a dry wine from the Finger Lakes region of NY.  The wine is refreshingly crisp and dry and bursting with orchard fruit flavor.  Interestingly, I did get a hint of petrol on the nose, which I understand is very common with Riesling wines.  The pairing was perfect!  I will definitely be exploring more Riesling wines.


This recipe has no ratings just yet.

Shrimp & Vegetable Fried Rice

March 13, 2021
: 4

By:

Ingredients
  • ½ lb medium-size shrimp (about 16 shrimp)
  • 4 pieces center-cut bacon, chopped
  • 2 eggs
  • 1 cup chopped carrot
  • ½ cup sliced mushroom
  • ½ cup chopped green beans
  • ½ cup chopped sugar snap peas
  • 1 cup thawed frozen corn
  • ½ cup thawed frozen peas
  • ½ cup chopped green onion
  • 2 garlic cloves, minced
  • 4 cups cooked brown rice
  • ¼ cup gluten-free, low sodium tamari
  • 1 tablespoon rice wine vinegar
  • 1 ½ tablespoon pure maple syrup
  • 2 tablespoons sesame oil
  • 1 ½ tablespoon canola oil
  • Kosher salt and freshly ground pepper
Directions
  • Step 1 Preheat oven to 400 degrees
  • Step 2 Drizzle the shrimp with ½ tablespoon canola oil and season with salt and pepper. Roast for approximately 4 minutes in the oven. Set aside.
  • Step 3 To make the sauce, combine the tamari, rice wine vinegar, maple syrup, and 1 tablespoon sesame oil. Set aside.
  • Step 4 Heat a large saute pan and add the chopped bacon. Cook on medium heat for about 4-5 minutes until the bacon is cooked. Remove the bacon from the pan and drain the bacon fat. Add ½ tablespoon of sesame oil to the pan. Add the eggs and scramble them over medium heat. Remove the eggs from the pan and set them aside. Clean out the pan.
  • Step 5 Heat 1 tablespoon canola oil and ½ tablespoon sesame oil in the cleaned saute pan. Add the carrots, green beans, and mushrooms. Cook for approximately 3 minutes. Add the peas, snap peas, corn, green onion, and garlic. Cook for another 2 minutes. Add the brown rice and cook for 1 minute. Add the sauce and cook for another minute. Add the cooked bacon and eggs and stir to combine.
  • Step 6 Serve in bowls with the shrimp on top. Garnish with chopped scallion.
Mom’s Jewish Apple Cake
mom's jewish apple cake

Mom’s Jewish Apple Cake

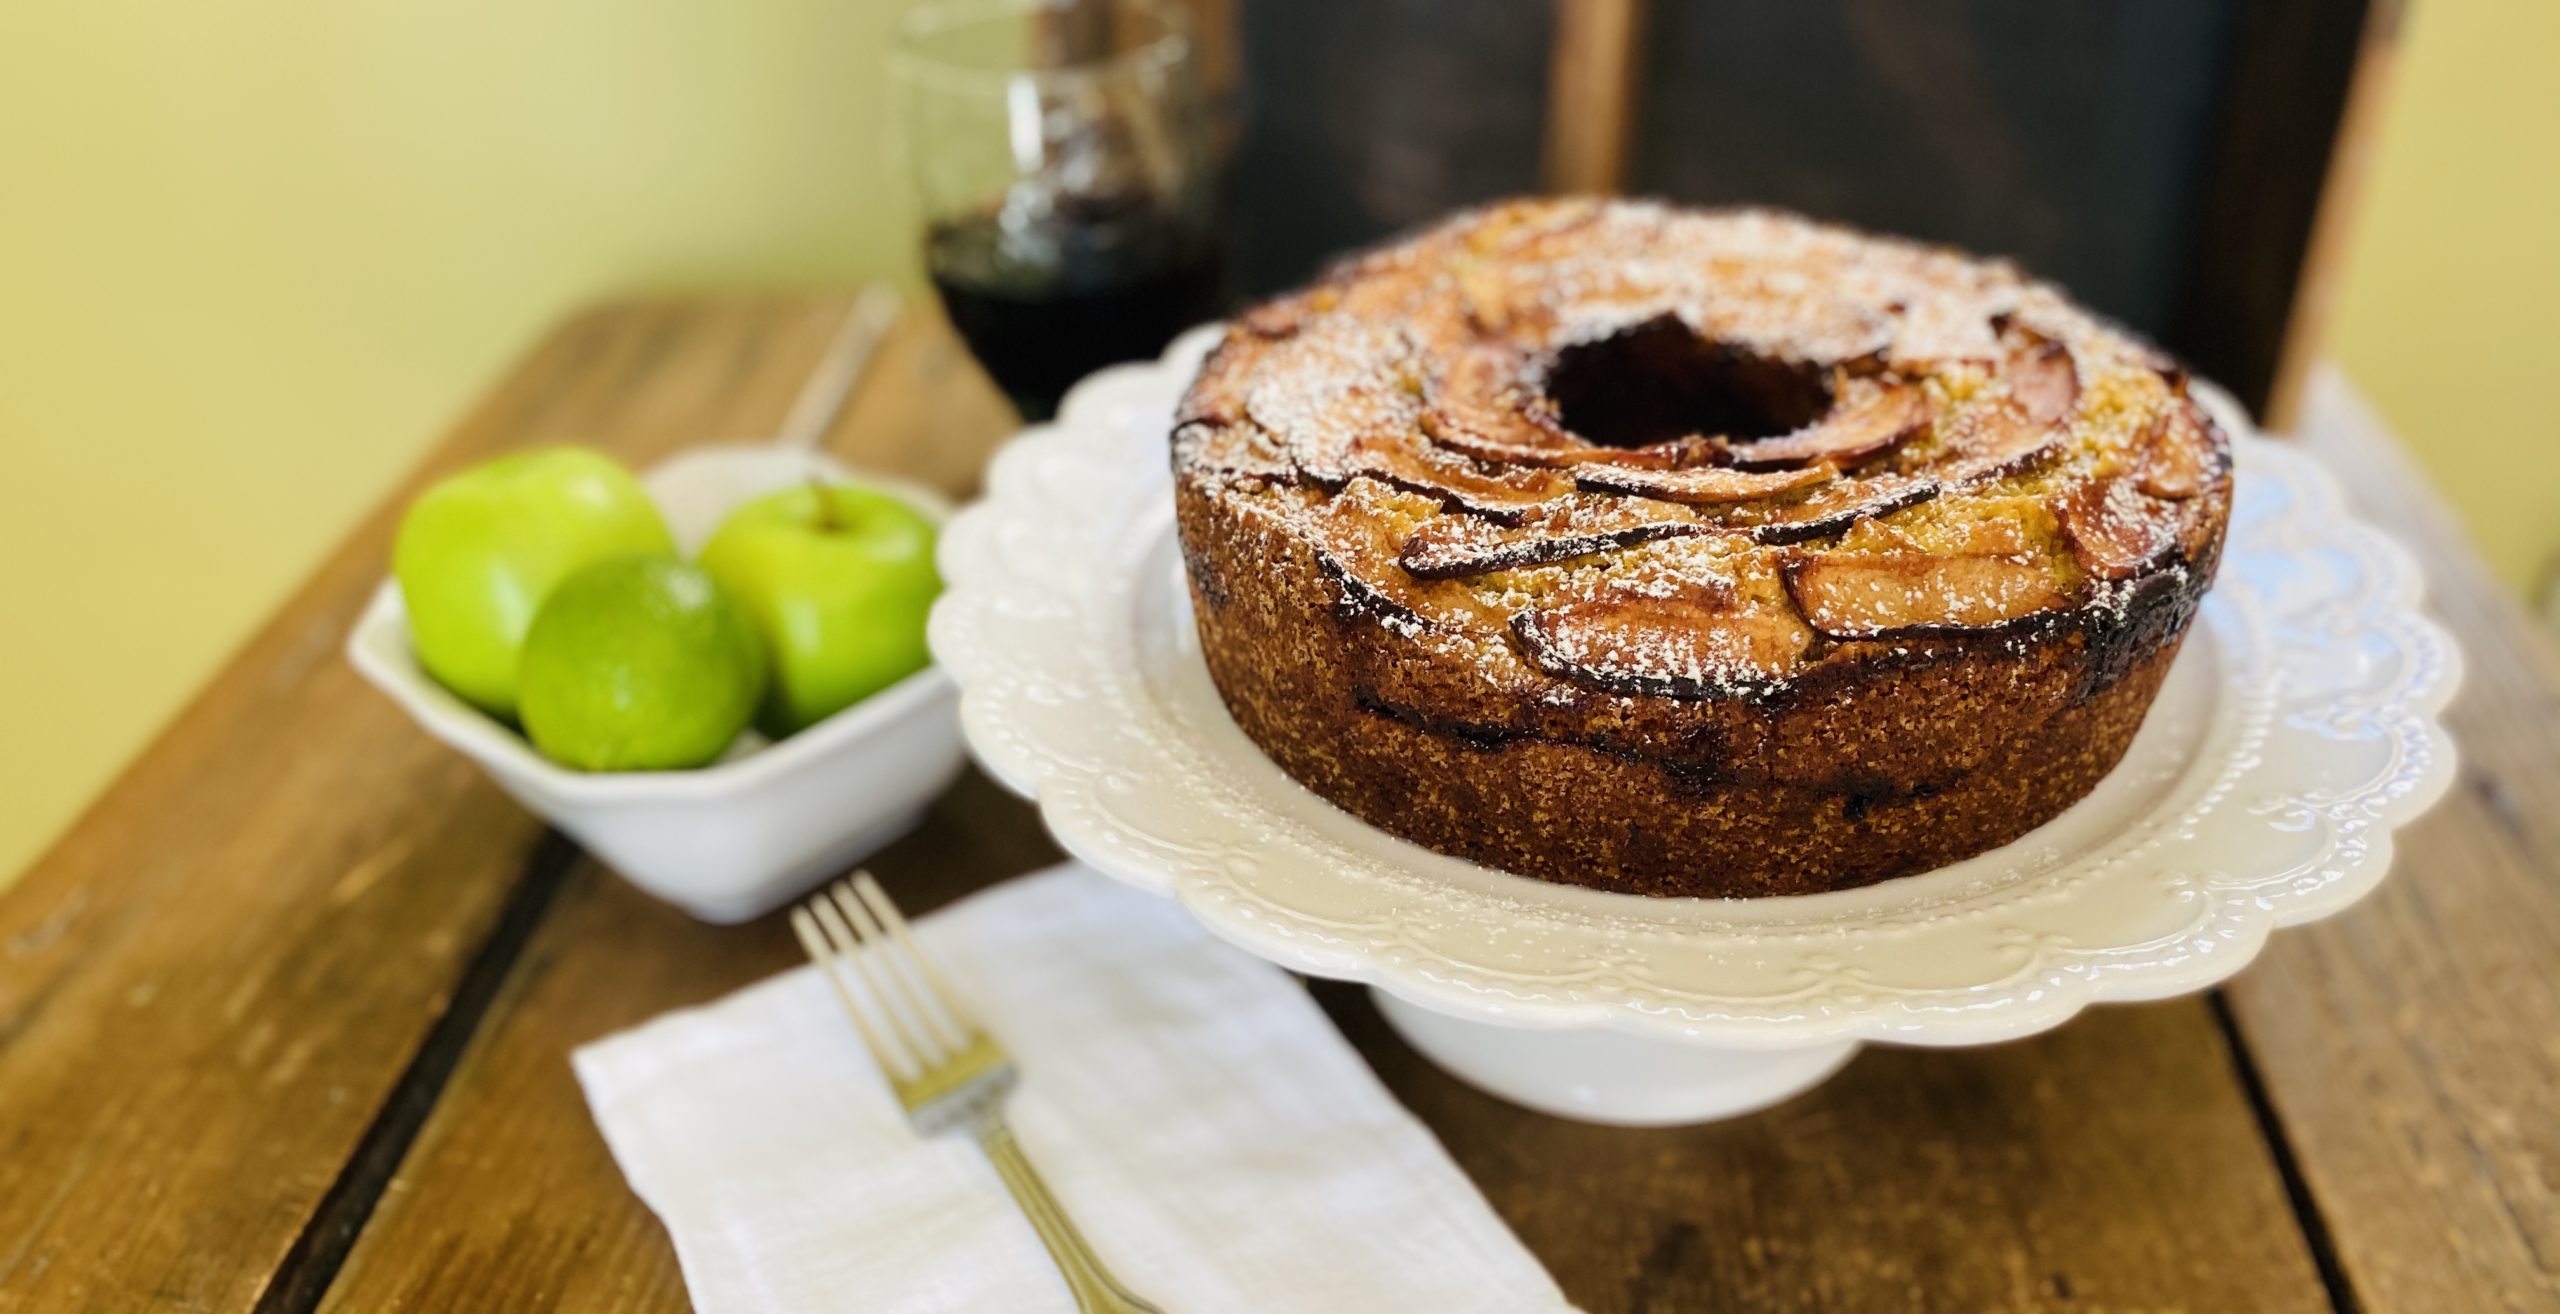
I’ve been eating my mom’s Jewish apple cake for as long as I can remember.  My mom would make it for holidays, or when friends came over, or even when she had a few extra apples in the refrigerator.  Everyone in the family loved and craved this cake.  It is great as an after-dinner dessert but even better with coffee in the morning.  My son would always ask my Mom to make it for him.  It is by far his favorite dessert.  I made a few modifications from my Mom’s original recipe but I think the flavor still matches the original.


For the wine pairing, I chose a Pinot Noir from Oregon.  Mostly because that was what we were drinking that night.  Surprisingly, it paired very well.  I love it when I stumble upon a great pairing!  To learn more about Pinot Noir wines, check out my Pinot Noir pairing page.


This recipe has no ratings just yet.

Mom's Jewish Apple Cake

March 10, 2021
: 8

By:

Ingredients
  • 4 Granny Smith apples, peeled, cored and sliced thinly
  • 2 teaspoons of cinnamon
  • 4 tablespoon maple syrup
  • Juice of 2 limes
  • 2 3/4 cups of flour
  • 1 tablespoon baking powder
  • 1 teaspoon Kosher salt
  • 1 cup extra virgin olive oil
  • 1 teaspoon pure vanilla extract
  • 1 cups of sugar
  • 1 cup Truvia brown sugar blend
  • 4 eggs, room temperature
  • 1 tablespoon powder sugar
Directions
  • Step 1 Preheat oven to 350 degrees F. Grease and flour a 10-inch tube pan.
  • Step 2 For the apples, mix the sliced apples with the cinnamon, maple syrup, and juice of 1 lime. Set aside in the refrigerator for about 1 hour.
  • Step 3 For the cake batter, whisk together the flour, baking powder, and salt.
  • Step 4 In the bowl of an electric mixer, whisk together the eggs, sugars, extra virgin olive oil, juice of 1 lime, and vanilla extract. Add the dry ingredients and whisk until just combined. Scrape down the sides of the bowl to ensure that all of the ingredients are fully combined.
  • Step 5 Add about 1/2 of the cake batter to the bottom of the pan, then layer about 1/2 of the apples on top of the batter. Add the remaining cake batter on top of the apples. Finish with a thin layer of apples on top.
  • Step 6 Bake for about 1 hour, or until a toothpick inserted into the center comes out clean. Halfway through, cover the cake with aluminum foil so the apples on top do not burn. Cool to room temperature before removing from the pan. Sprinkle with powder sugar before serving.
Lemon & Rosemary Focaccia Bread

Lemon & Rosemary Focaccia Bread

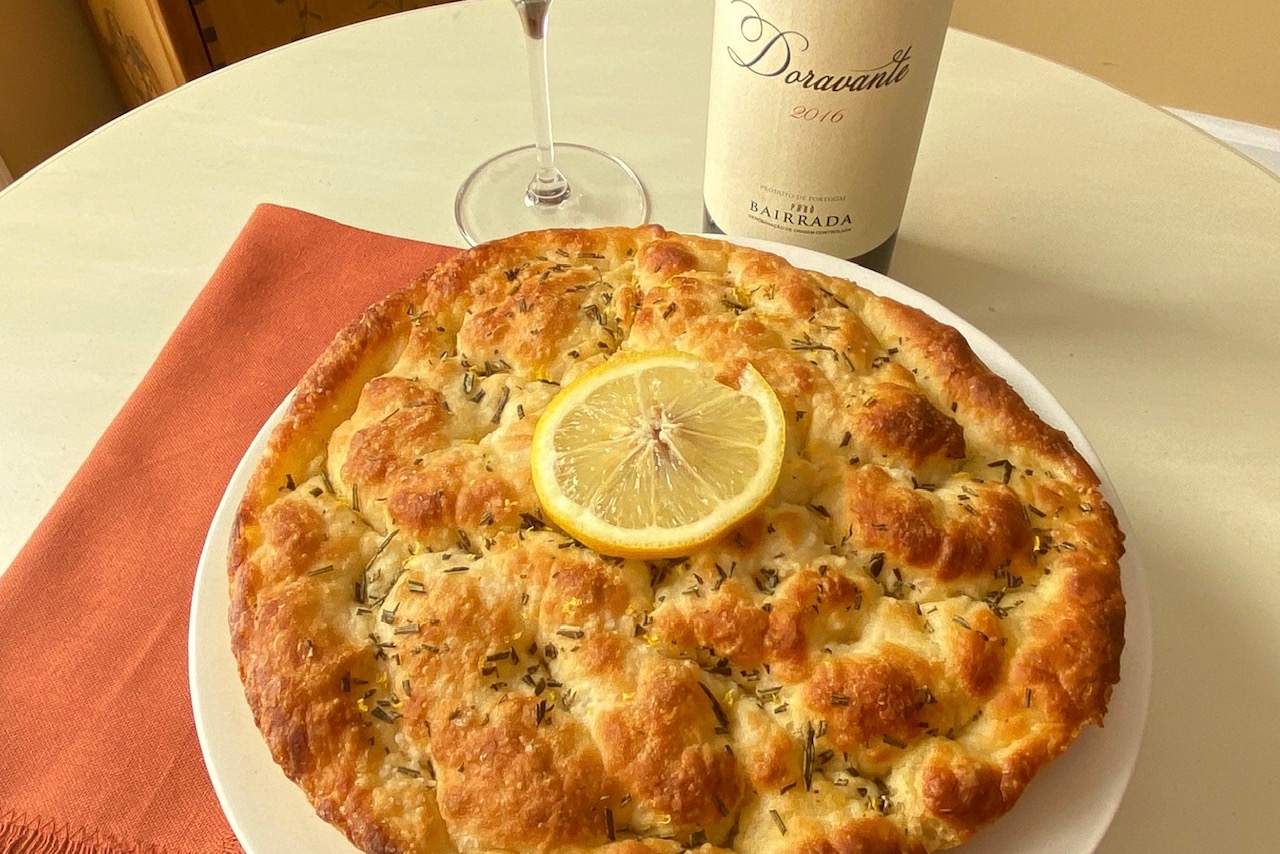
I’ve always loved to make my own Lemon & Rosemary focaccia bread.  When I first started, I followed a traditional recipe using my Kitchen Aid & dough hook to knead the dough for 7-10 minutes. Then, let the dough rise at room temperature before baking.  Recently, I came across a new method of making focaccia that changed my world!  Thank you @alexandracooks for introducing me to the overnight, refrigerator method and your amazing recipe.  While this method does take longer, your patience will be rewarded.  And surprisingly it is so much easier than pulling out the kitchen aid!


I modified the original recipe slightly by adding lavender honey to the dough and finishing with rosemary and lemon zest. I also like to use bread flour instead of all-purpose flour as it gives the bread a  light yet chewy texture.  If you want the original recipe, check out her site.  She has a great video and lots of tips on how to make the perfect focaccia bread!


This bread can be served with just about anything you like.  My favorite is to serve it with my Simply Paired Tomato Sauce and a nice bottle of Portuguese red wine!  Hope you enjoy it!


TIP: What’s great about this recipe is that it makes 2 loaves — perfect for a party!  I have also found that this bread freezes beautifully.  Once the bread is completely cooled, you can place in a Ziploc freezer bag, remove as much of the air as possible and place it in the freezer.  To thaw, remove from the freezer bag and place on a wire rack to thaw.  Should take 1-2 hours.  Before serving, I like to pop in a 375-degree oven for about 3-5 minutes to get the top nice and crispy.  Garnish with some more lemon zest and serve.


This recipe has no ratings just yet.

Lemon & Rosemary Focaccia

February 26, 2021
: 8-12

By:

Ingredients
  • 4 cups of bread flour
  • 2 teaspoons Instant yeast
  • 2 teaspoons kosher salt
  • 2 cups Lukewarm water
  • 1 tablespoon honey
  • 6 tablespoons extra virgin olive oil
  • Zest of 2 lemons
  • 1 tablespoon chopped fresh rosemary
  • 1 tablespoon Maldon or flaky sea salt
Directions
  • Step 1 To make the dough, combine the flour, yeast, and salt in a large bowl and whisk until combined. In a separate bowl whisk together the honey and water. Add the water mixture to the flour mixture and combine with a wooden spoon. You should have a soft, sticky dough. Add 1 tablespoon olive oil and coat the dough evenly with your hands. This will prevent the dough from drying out. Cover with plastic wrap and place in the refrigerator for at least 12 hours. The dough will rise over time and should double in size.
  • Step 2 Prepare 2 9 inch cake pans by coating with 1 tablespoon of olive oil in each pan. Remove the dough from the refrigerator and deflate with your hand. Separate the dough in half, and place 1 half in each of the cake pans. Roll the dough in olive oil and form it into a ball. Let the dough rest and rise at room temperature for about 4 hours.
  • Step 3 Preheat oven to 425.
  • Step 4 Drizzle 1 tablespoon olive oil over each round of dough. Using the tips of your fingers and press down into the dough to create “dimples”. Feel free to add more olive oil if needed. Sprinkle the top with fresh rosemary and flaky sea salt to taste.
  • Step 5 Bake for about 20-25 minutes until golden brown and crispy. Remove from the oven and cool on a wire rack for about 10 minutes. Remove the focaccia from the pans and continue to cool on the wire rack for another 5 minutes. Garnish each focaccia with the zest of 1 lemon and serve with your favorite extra virgin olive oil.
Simply Paired Tomato Sauce

Simply Paired Tomato Sauce

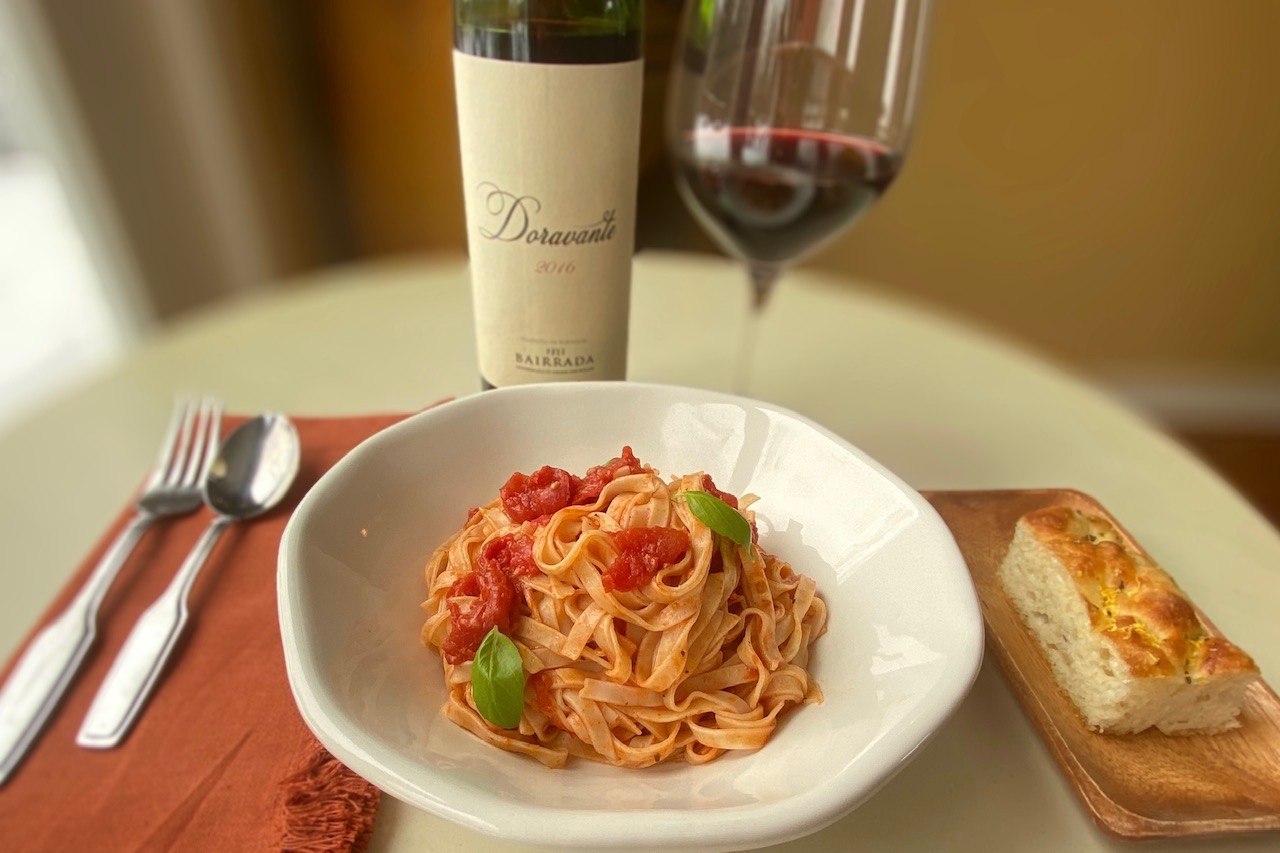
I’ve always taught my kids to enjoy cooking and cherish time spent in the kitchen.  How satisfying it can be when you create something from scratch that not only tastes amazing but is good for you as well.  One of the first recipes I taught them to make was a homemade tomato sauce.  Once I learned to make my own, I have never purchased store-bought again.  It is just that easy and so much more flavorful!  My Simply Paired Tomato Sauce has all the elements of a good Italian homemade sauce — with a few added touches that make it my own.  The most important thing to remember is to use the best ingredients you can find.  I like to serve this dish with homemade Foccacia bread (stay tuned for the upcoming recipe).


I chose to go a bit unconventional on the wine pairing as well.  Of course, you could always pair this with a nice bottle of Chianti or other medium-bodied Italian red wine.  However, I chose a Portuguese red wine from the Bairrada wine region.  The 2016 V Puro Doravante Tinto is smooth and elegant and has a nice balance of acidity and tannins.  The aroma has a hint of flowers which I think complements the Herbs de Provence I use in my sauce.  I hope you enjoy this pairing!


This recipe has no ratings just yet.

Simply Paired Tomato Sauce

February 18, 2021
: 4

By:

Ingredients
  • ¼ cup extra virgin olive oil
  • 2 whole garlic cloves, smashed
  • 1/2 tsp Herbs de Provence
  • 1 28 oz can San Marzano whole tomatoes
  • 1/4 cup dry white wine
  • 1/4 cup chicken stock
  • 1/2 tsp honey
  • 1 Whole sprig of basil
  • 1 Small parmesan cheese rind
  • 1 tablespoon butter
  • Kosher salt and freshly ground black pepper to taste
  • 1 lb. fresh pasta (I used linguine)
  • ¼ cup freshly grated parmesan cheese
Directions
  • Step 1 Place the tomatoes in a food processor and gently pulse until tomatoes are just-chopped. I like to have a little texture to my sauce.
  • Step 2 Heat the olive oil in a large sauté pan on medium heat. Add the garlic and Herbs de Provence and cook for about 1 minute. Add the chopped tomatoes and stir to combine. Bring to a boil. Add the wine and stock and cook for 1-2 minutes. Stir in the honey, basil, and cheese rind. Season with kosher salt and pepper.
  • Step 3 Lower the heat and simmer the sauce, partially covered for 20 minutes. Remove the lid and cook uncovered for another 5 minutes. Remove the cheese rind. Set aside
  • Step 4 For the pasta, bring a large pot of water to a rapid boil. Season generously with kosher salt. Cook your pasta to package directions. For this recipe, I used fresh linguine which took about 3-4 minutes to cook. Drain the pasta and add to the sauce. Add the parmesan cheese and stir to combine. Finish with fresh basil and more parmesan cheese.