Category: Summer Recipes

Summer Pasta Salad

Summer Pasta Salad

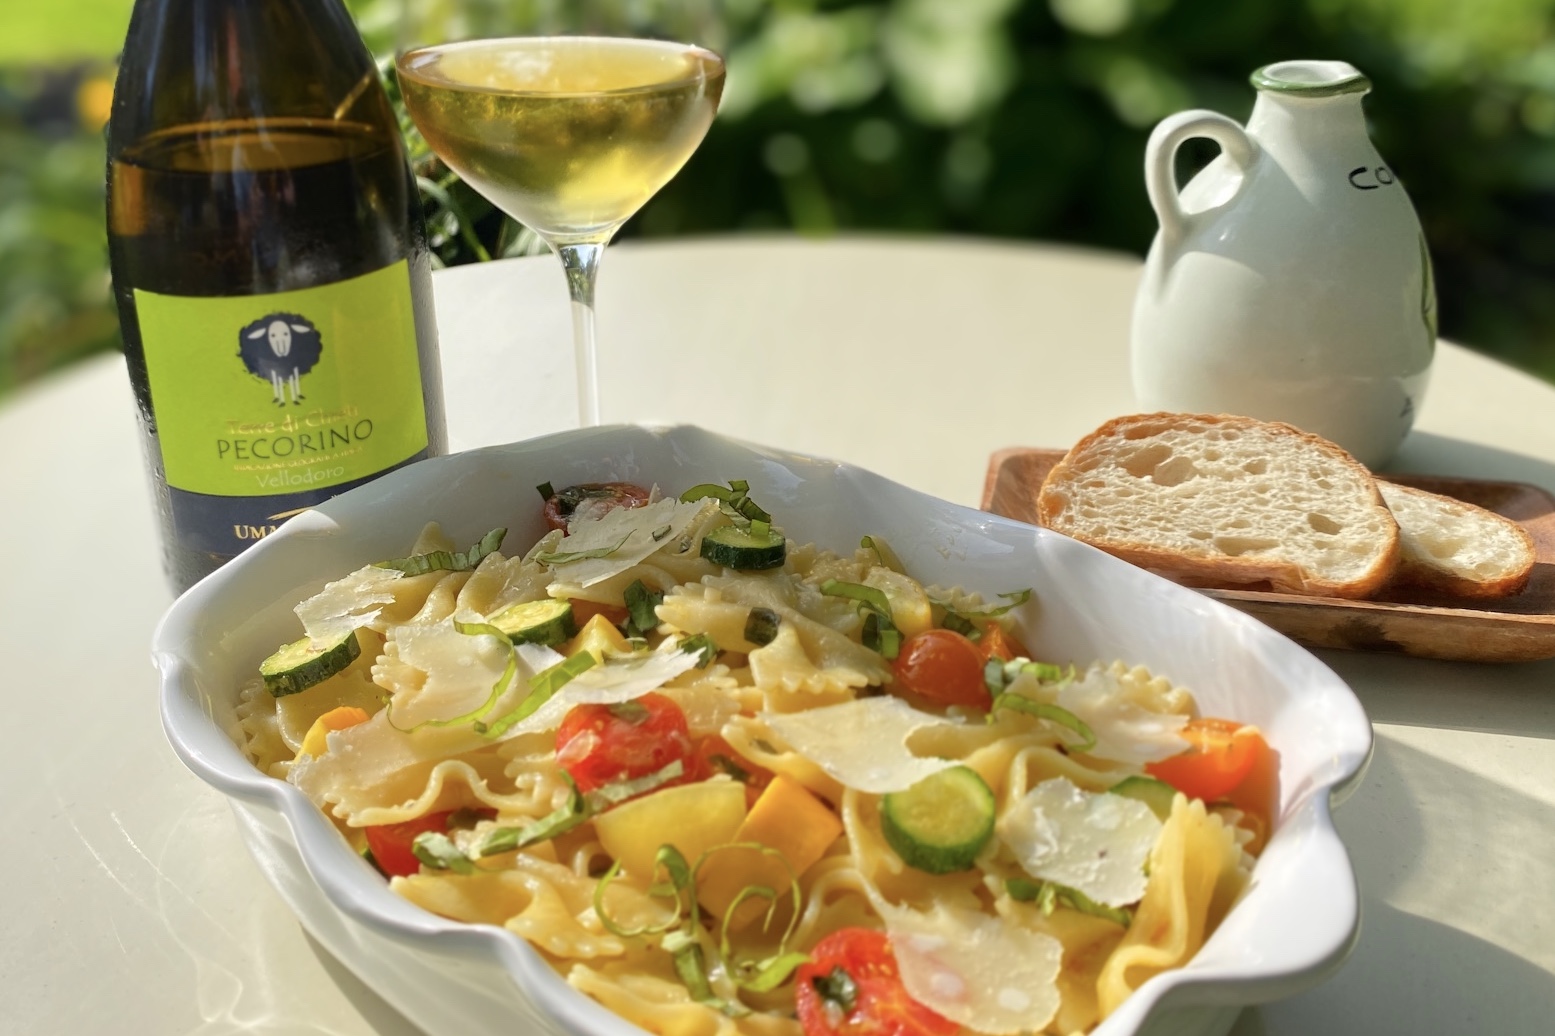
This recipe is special to me because it represents a few firsts; the very first recipe I created from scratch, and the first time I used vegetables grown by yours truly. Years ago, I decided to plant a small garden as a hobby. It was limited to tomatoes, squash, zucchini, and a few basil plants. It was successful, to a degree. And I found myself with an abundance of those vegetables at the same time. So, what do do with them all? I decided on a Summer Pasta Salad with homegrown veggies. It has been a favorite of my kids ever since.  My Summer Pasta Salad is the most requested meal I make and the best part is, it is so simple! Using the freshest ingredients and having a great extra virgin olive oil is key in making the dish shine.


Even though I have been making this recipe for years, I hadn’t thought about the pairing much…until recently.  Pecorino, a white wine from Italy, was recently introduced to me, and I love it!  The wine is medium-bodied with light tannins and medium acidity which holds up nicely to the tomatoes in the pasta.  This wine reminds me of Etna Bianco and will pair with similar foods like seafood and fresh ricotta cheese.  I hope you enjoy this pairing!


This recipe has no ratings just yet.

Summer Pasta Salad

July 28, 2020
: 4-6

By:

Ingredients
  • ½ cup extra virgin olive oil (use the best quality you can)
  • 1 package of cherry or grape tomatoes
  • ½ small zucchini
  • ½ small summer squash
  • 2 garlic cloves, minced
  • Zest and juice of 1 lemon
  • 1/2 cup of fresh basil leaves, chopped
  • 1 lb. pasta (penne or bow tie pasta work best)
  • ½ cup of chopped fresh mozzarella cheese
  • ½ cup freshly grated parmesan cheese
  • Kosher salt and freshly ground black pepper
Directions
  • Step 1 For the sauce, place the olive oil in a large serving bowl. Slice the tomatoes in half and add them to the olive oil. Chop the zucchini and squash and add them to the bowl. You want them to be about the same size as the tomatoes. Add the minced garlic, lemon zest, and the basil. Stir to combine. Season with salt and pepper. Let sit at room temperature for at least an hour and up to 4 hours.
  • Step 2 When ready to serve, make the pasta following the package directions. Drain the pasta and add the hot pasta to the bowl with the sauce. Add the parmesan cheese and ¼ cup lemon juice. Stir to combine. Add the mozzarella cheese and stir to combine. Season with more salt and pepper to taste. Finish with a drizzle of extra virgin olive oil and basil leaf garnish.
Orange, Honey & Herb Scones

Orange, Honey & Herb Scones

I’ve never been interested in baking.  But these past few months being at home has given me a newfound interest.   I decided to start my baking career with scones because I like that they are not too sweet and they pair well with my morning coffee. I did a ton of research and tested lots of different recipes to come up with my Orange, Honey & Herb Scones recipe.  What I love about this dish is the unexpected flavor the Herbs De Provence brings to the scone.  And it balances the sweetness of the orange blossom honey beautifully.


For the pairing, I chose a Cava, which is a sparkling wine from Spain.  Much of the Cava wine in Spain is produced in the Catalonia region along the Mediterranean coast. Cava is made in a similar way to champagne but uses a unique blend of Spanish grapes.  It has a unique flavor profile that can include citrus notes and an aroma of Mediterranean herbs such as rosemary and thyme. What’s really great about Cava is that you can get a really great bottle at an affordable price!  If you like Prosecco, I highly recommend you try Cava!


This recipe has no ratings just yet.

Orange, Honey & Herb Scones

July 21, 2020
: 6-8

By:

Ingredients
  • ¾ cup heavy cream
  • 3 Tablespoons honey
  • ½ Tablespoon Herbs De Provence
  • 2-1/4 cups all-purpose flour
  • Zest of 1 orange
  • 1 Tablespoon baking powder
  • ¼ teaspoon salt
  • 1 stick of butter, frozen
  • 1 egg
  • 1 teaspoon pure vanilla extract
  • 2 tablespoons raw sugar
  • Honey Glaze
  • 4 tablespoons powdered sugar
  • 2 tablespoons honey
  • 2 tablespoons of freshly squeezed orange juice
Directions
  • Step 1 Pre-Heat oven to 400 degrees
  • Step 2 Heat the heavy cream, honey, and Herbs De Provence over medium heat for about 6-7 minutes. Remove from heat and chill in the refrigerator for about 1 hour.
  • Step 3 Whisk together the flour, baking powder, orange zest, and salt in a bowl and set aside. Grate the frozen butter using a box grater and combine it with the flour mixture.
  • Step 4 Whisk the egg and vanilla into the cream. Add to the flour mixture. Stir until just combined.
  • Step 5 Turn dough out onto a lightly floured surface and fold together gently to combine. The dough should be nearly smooth. Roll out the dough to approximately ½ inch thickness. Using a round cookie cutter, cut out the scones and place on a parchment-lined baking sheet. Brush each scone with additional heavy cream and sprinkle with a little raw sugar. Bake for 13 to 15 minutes or until golden brown. Remove scones from baking sheet and place on a wire rack.
  • Step 6 To make the glaze, whisk together the orange juice, honey, and powdered sugar. Spoon over the warm scones. Serve with butter and your favorite jam!
Grilled Chicken Parmesan with Heirloom Tomato Sauce

Grilled Chicken Parmesan with Heirloom Tomato Sauce

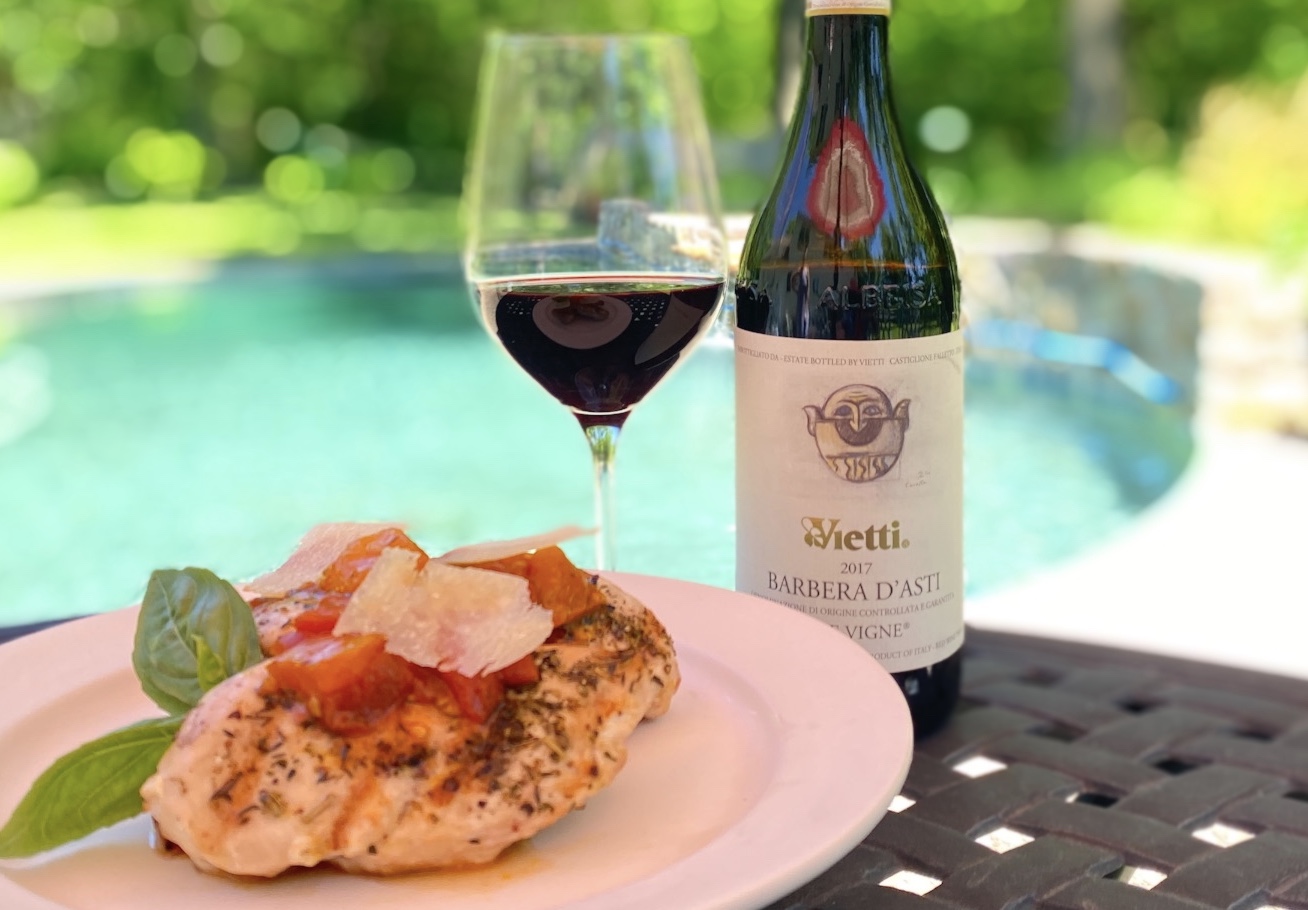
Summer is all about using the freshest of ingredients in a simple way to create amazing recipes.  One of my favorite things to do in the Summer is to visit the farmers market to get the freshest, local ingredients I can find.  And this time of year, local heirloom tomatoes are the best.  I use them to create a fresh sauce for my healthy grilled chicken parmesan with heirloom tomato sauce.


For the pairing, I chose a Barbera wine from Italy.  It is an everyday, affordable wine that is one of the most food-friendly wines available.  It is full-bodied with a deep color and nice fruit flavor.  It typically pairs well with pasta and other comfort foods that include cream or tomato-based sauces.  I love it with the grilled chicken parmesan and heirloom tomato sauce recipe because it really enhances the flavors of the tomatoes.  I hope you like it as well!  To learn more about Barbera wines, check out my Barbera pairing page.


This recipe has no ratings just yet.

Grilled Chicken Parmesan with Heirloom Tomato Sauce

July 2, 2020
: 4-6

By:

Ingredients
  • 1 package of organic boneless chicken breast
  • 1 tablespoon Herbs De Provence
  • ¼ cup plus 2 tablespoons of extra virgin olive oil
  • 2 large garlic cloves, smashed
  • Pinch of red pepper flake
  • 1 tablespoon sherry vinegar
  • 4-5 heirloom tomatoes (orange and yellow), roughly chopped
  • 1 tablespoon honey
  • 1 small parmesan cheese rind
  • ½ cup of fresh basil, lightly chopped
  • 1 tablespoon butter
  • Kosher salt and freshly ground pepper
  • ¼ cup shaved parmesan cheese
Directions
  • Step 1 Heat ¼ cup olive oil in a large saute pan over medium heat. Add the garlic, ½ tablespoon Herbs De Provence and red pepper flakes and cook about 1 minute. Add the vinegar and cook until almost evaporated.
  • Step 2 Add the chopped tomatoes and cook for about 4-5 minutes. Reduce the heat to low and add the honey, salt & pepper, and parmesan cheese rind. Cook the sauce, partially covered for 20 minutes. Remove from the heat and add the chopped basil and 1 tablespoon butter. Set aside.
  • Step 3 Dry the chicken breast with paper towels. Season with salt, pepper, and the remaining ½ tablespoon Herbs De Provence. Grill the chicken approximately 7-8 minutes per side based on the thickness of the chicken. Remove from the grill and let rest for 5 minutes.
  • Step 4 To serve, place the chicken on a platter and generously spoon the sauce over the chicken. Sprinkle with the shaved parmesan cheese and garnish with fresh basil.

Rosé Pasta & Burrata

Rosé Pasta & Burrata

I’ve been making my own homemade tomato sauces for years.  In fact, I’ve even taught my children how to make my basic sauce because it is so easy yet so much better than any store-bought brand.  Over the years I learned that the French also have a version of a tomato sauce that is a bit richer and less acidic than the Italian version.  It is considered one of the French “mother sauces”.  The classic French sauce typically includes onion, carrot, pork or bacon, chicken stock, sugar, and fresh herbs.  And the unique part of the French sauce is that it starts with a roux mixture of butter and flour.  This will not only thicken the sauce but make it rich & creamy.


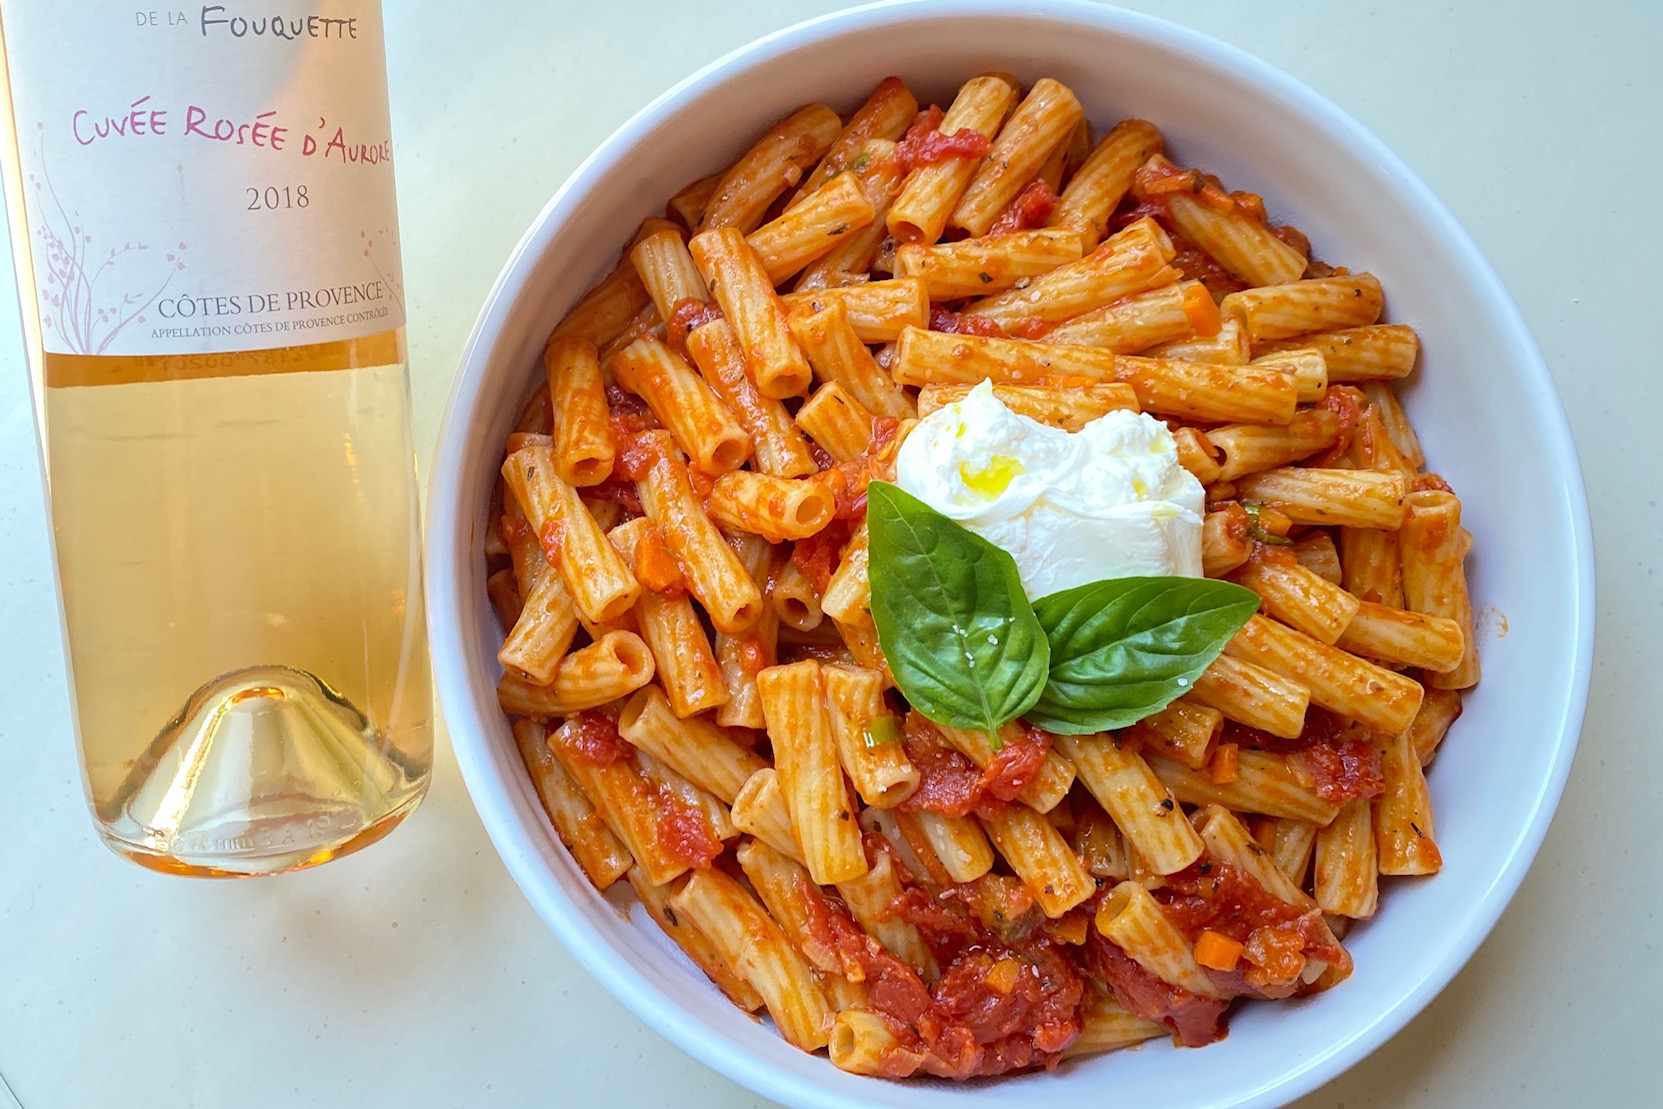
I discovered through research there are many different versions of this classic French sauce.  So, I started experimenting with my own version and that is how the Rosé Pasta & Burrata recipe came to be.  My goal was to lighten it up a bit but still keep it rich and creamy.  So, I replaced the roux with a parmesan cheese rind and finished the sauce with 1 tablespoon of butter to balance the acidity of the tomatoes.  My version also includes Rosé wine along with the chicken stock.  Why?  Well, why not?


You are probably not surprised that my pairing for this Rosé Pasta & Burrata dish is a Provence Rosé.  I like to serve this pasta at room temperature and the wine only slightly chilled.  It is an unexpected pairing, but they surprisingly go really well together.  I hope you enjoy it!  To learn more about Provence Rosé, check out my Rosé pairing page.


This recipe has no ratings just yet.

Rosé Pasta & Burrata

June 25, 2020
: 6

By:

Ingredients
  • ¼ extra virgin olive oil
  • 2 scallions
  • 1small Carrot, finely chopped (about 1/4 cup)
  • ½ tablespoon Herbs De Provence
  • 1 garlic clove, smashed
  • 1 28 oz can of whole tomatoes
  • ½ cup dry, Provence Rose
  • ½ cup chicken stock
  • ½ tablespoon honey
  • 1 small Parmesan cheese rind
  • 1 basil stem
  • 1 tablespoon butter
  • Kosher salt and freshly ground black pepper
Directions
  • Step 1 Heat a large pot of water with ½ tablespoon salt.
  • Step 2 Add the tomatoes to a large bowl and squeeze them firmly with your hands to break up the tomatoes. Set aside.
  • Step 3 Finely chop the green onion, separating the white from the green part. Finely chop the carrot. Heat ¼ cup o olive oil in a large saute pan. Cook carrots & green onion in the oil for about 4 minutes. Add the Herbs de Provence & smashed garlic clove and cook for 30 seconds.
  • Step 4 Add the tomatoes to the pan with the carrots and scallions and bring them to a boil. Add the wine and chicken stock and cook for another 2 minutes. Add the honey, parmesan cheese rind and basil.
  • Step 5 Reduce heat to medium-low and partially cover the pan. Cook the sauce for about 30 minutes, stirring occasionally. Finish with 1 tablespoon butter. Season with salt and pepper.
  • Step 6 Cook the rigatoni according to package directions. Combine with the sauce and place in a large serving bowl.
  • Step 7 Break up the burrata and spread evenly over the pasta. Garnish with and chopped green scallions
Strawberry and Spinach Salad

Strawberry and Spinach Salad

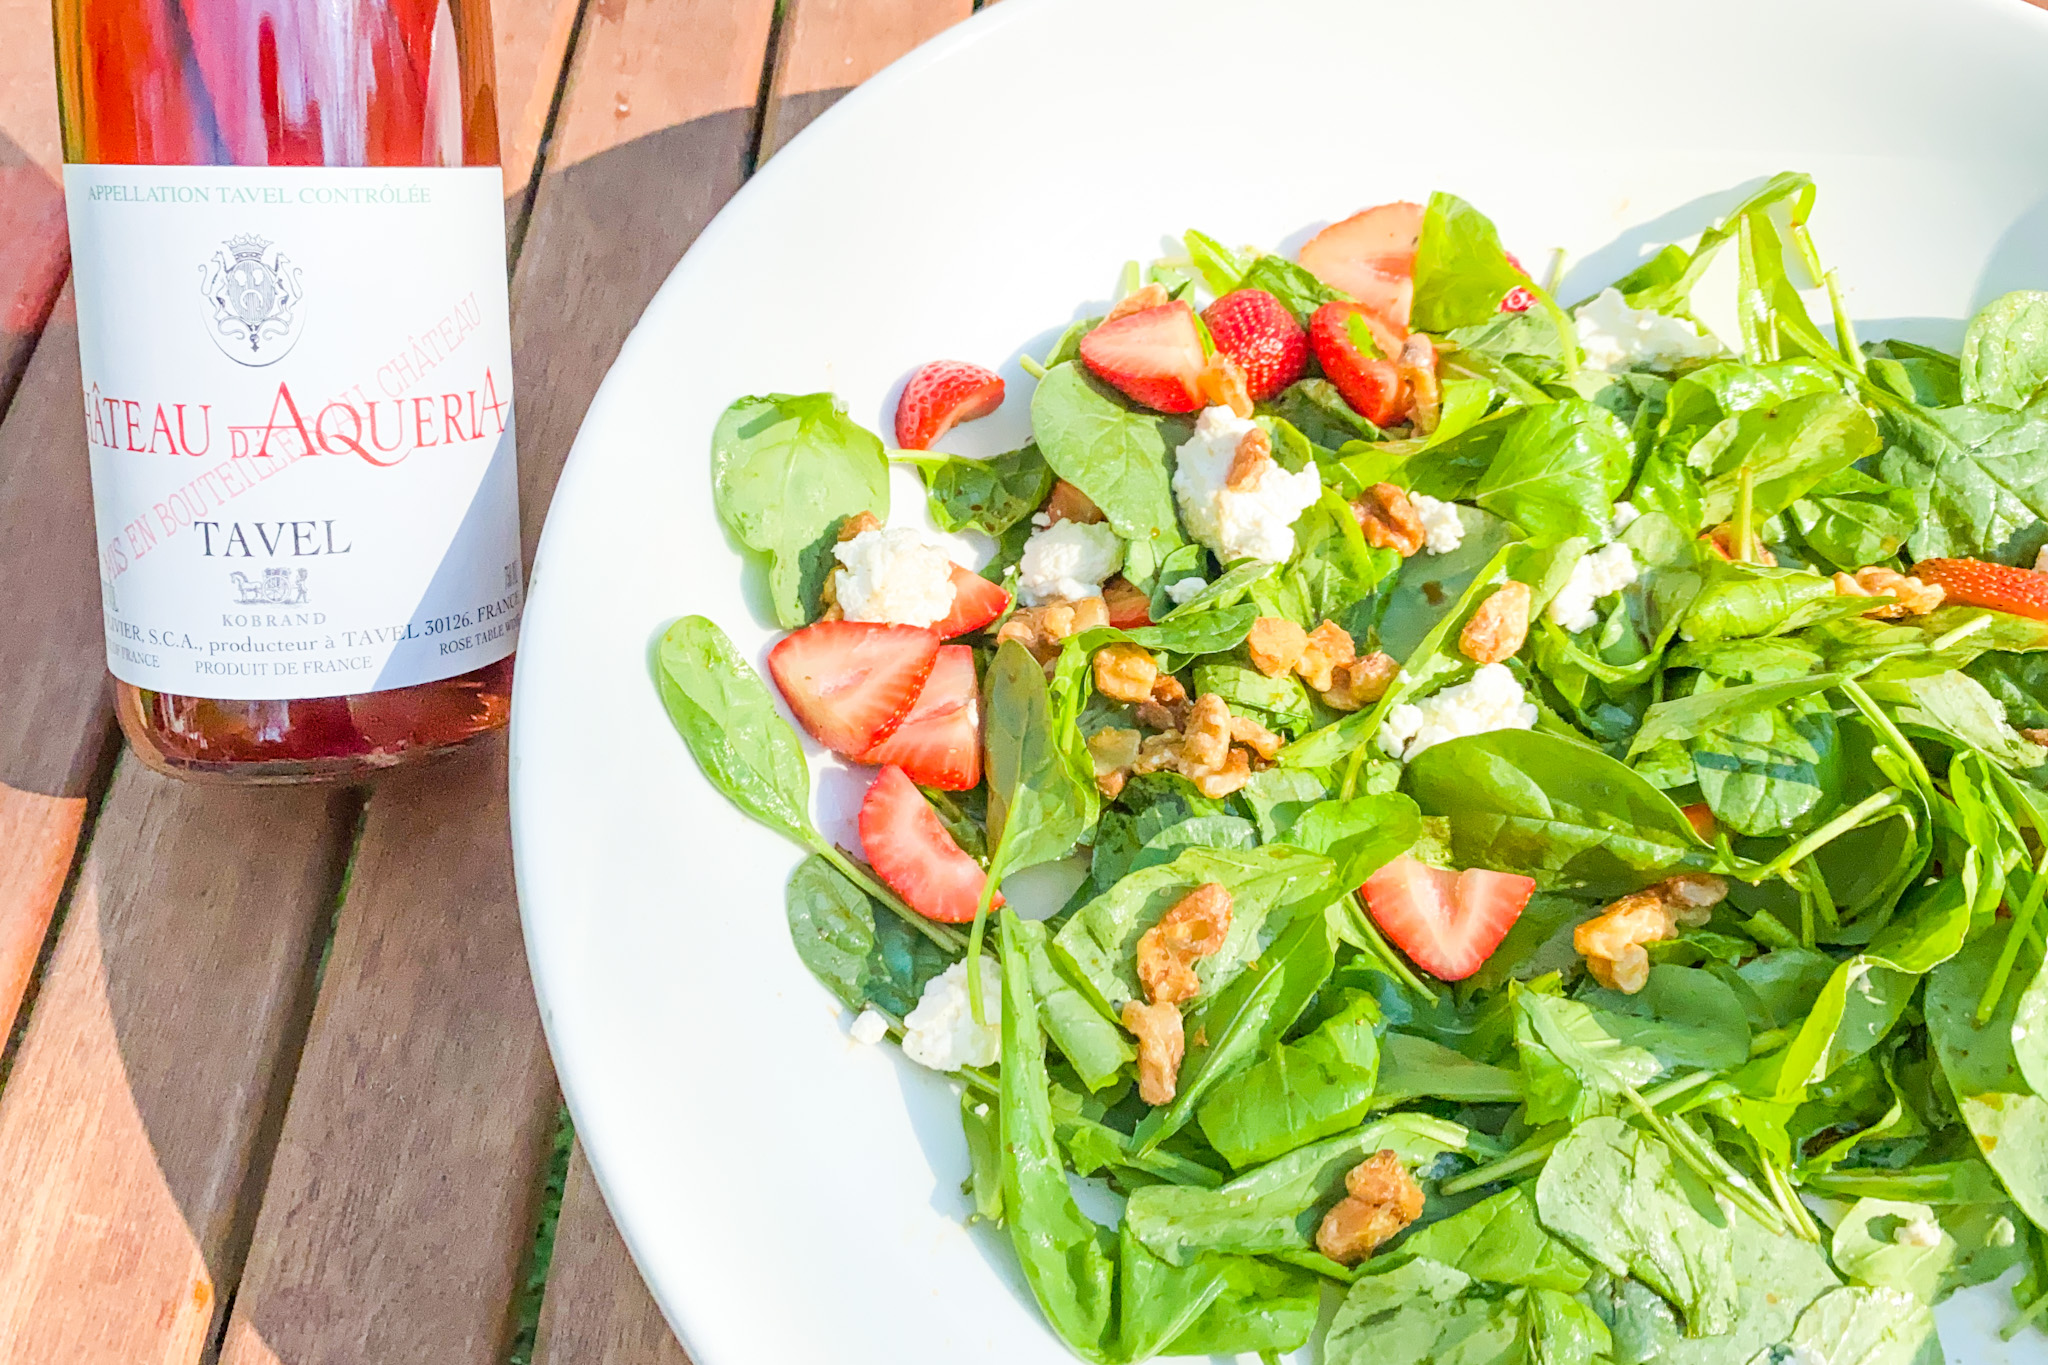
The best salads for me have the freshest, seasonal ingredients.  But also, the least amount of ingredients.  I like to make 1 ingredient the STAR of the show and then complement it with texture and crunch. In this strawberry and spinach salad, seasonal strawberries, wild if you can find them, are the BEST.  The fresh ricotta gets firm and creamy when you strain the liquid and it adds a nice creamy texture to the salad that blends nicely with the strawberries.  The maple walnuts add a nice crunch and the balsamic dressing brings it all together.


For the pairing, I chose a Rosé wine from the Tavel region of France.  The fruit flavor in the wine tastes like strawberry and orange which pairs very nicely with the fruit in the salad.  Tavel wines are also more robust and spicy which I love with the arugula.  Check out my Rosé pairing page to learn more about Tavel Rosé.


This recipe has no ratings just yet.

Strawberry & Spinach Salad

June 5, 2020
: 4-6

By:

Ingredients
  • 6 cups baby spinach
  • 2 cups arugula
  • 2 cups of fresh strawberries, sliced
  • ½ cup of fresh ricotta
  • ½ cup walnut halves
  • 2 tablespoons pure maple syrup
  • 3 tablespoons balsamic vinegar
  • 2 tablespoons extra-virgin olive oil
  • salt & pepper to taste
Directions
  • Step 1 Preheat oven to 300 degrees
  • Step 2 For the walnuts, line a baking sheet with parchment paper and place walnuts in an even layer. Roast for 5 minutes. Remove walnuts from the oven and place in a bowl. Mix in 1 tablespoon maple syrup and lightly sprinkle with Kosher salt. Place the walnuts back on the baking sheet in an even layer. Roast for another 10 minutes until toasted. Remove from the oven and cool on a wire rack.
  • Step 3 Place the ricotta in a paper towel-lined strainer for about 1 hour. Set aside.
  • Step 4 For the dressing, whisk together the balsamic vinegar, 1 tablespoon maple syrup, and the olive oil. Season with salt and pepper. Set aside
  • Step 5 To serve, toss the spinach, arugula, and strawberries in a large bowl. Lightly season with salt and pepper. Add in the ricotta cheese and toss lightly to combine. Spoon the dressing over the salad and toss again with salt & pepper. Finish the salad with the toasted walnuts.
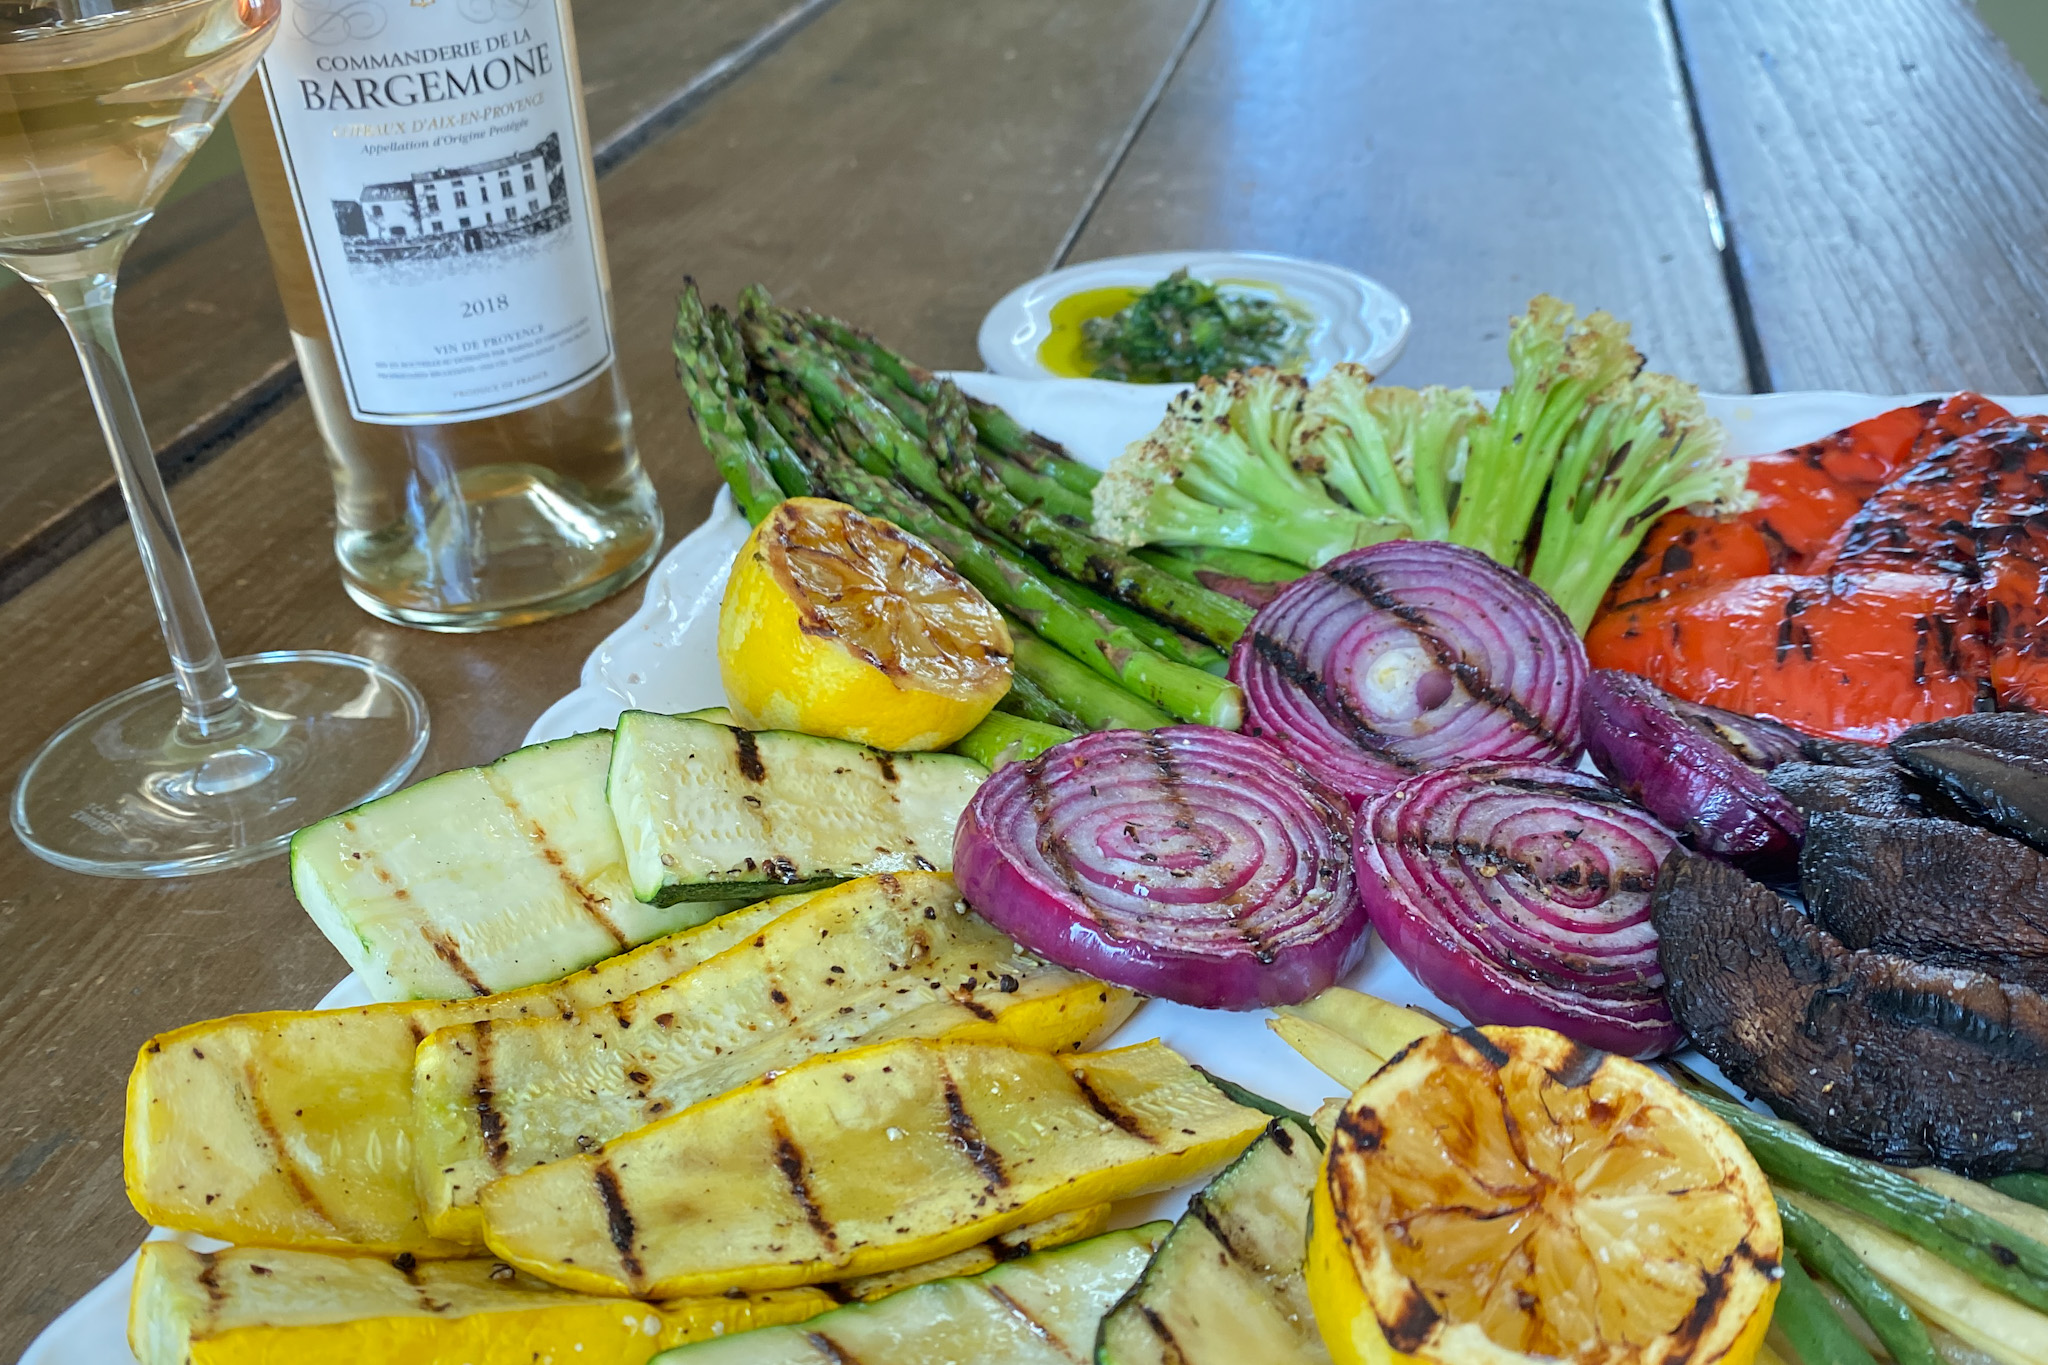
Grilled Vegetables and Pistou Sauce

Grilled Vegetables and Pistou Sauce

Over time, I have really learned to appreciate vegetables. In fact, there was a time in my life I considered being a vegetarian.  But, I enjoy a good steak as well so that quickly fell by the wayside!  My grilled vegetables and Pistou sauce recipe, however, can make anyone consider being a vegetarian.  It is extremely simple to prepare but the combination of the smokiness from the grill and the freshness of the Pistou sauce adds an element of sophistication that is so satisfying.  Serve this dish as a vegetarian main course with a loaf of good crusty bread.  Or, add it to your holiday buffet table.

The wine pairing I chose is a Provence Rosé.  Since Pistou is a sauce that comes from the Provence region of France, it’s a perfect pairing. While I have yet to visit Provence (it’s next on my bucket list), this pairing immediately takes me there! To learn more, check out my Rosé pairing page.


This recipe has no ratings just yet.

Grilled Vegetables with Pistou Sauce

March 16, 2020
: 6-8

By:

Ingredients
  • 1 red and 1 yellow pepper
  • 1 Japanese eggplant
  • 1 zucchini
  • 1 yellow squash
  • 1/2 bunch of thick asparagus
  • 1 red onion
  • 2 large portabello mushrooms
  • Pistou Sauce
  • 2 cloves of garlic, finely minced
  • 4 cups of basil leaves
  • 1 plum tomato, seeded and finely chopped
  • 1/2 cup of extra-virgin olive oil
  • 1/4 cup of aged Gouda cheese
  • 1/4 teaspoon fresh lemon juice
  • 1/4 teaspoon Kosher salt
  • freshly ground black pepper
Directions
  • Step 1 Preheat grill to medium heat (approximately 400 degrees)
  • Step 2 Seed the peppers and cut into quarters. Cut the ends of the eggplant, zucchini, and squash and cut in quarters lengthwise. You should have 4 thin pieces of each vegetable. Trim the ends of the asparagus. Keeping the skin on the onion, slice the onion in ½ inch thick round slices. Using a damp paper towel, gently wipe the mushrooms to remove any dirt.
  • Step 3 Lightly brush the vegetables on both sides with olive oil. Season with salt & pepper.
  • Step 4 Grill the vegetables on both sides until done. Peppers, onion, and mushroom will take approximately 8-10 minutes. Zucchini and eggplant will take approximately 5-6 minutes. Asparagus approximately 4-5 minutes.
  • Step 5 For the Pistou, in a food processor combine garlic, salt, and basil. Pulse a few times until leaves begin to break down. With the machine running, drizzle in the olive oil, until the pistou reaches a smooth consistency. Place mixture in a bowl and add the tomato and cheese. Taste and season with salt & freshly ground black pepper. Finish with lemon juice
  • Step 6 To assemble, arrange the vegetables on a large platter. Group each vegetable together on the platter. Spoon pistou sauce generously over the vegetables and serve.
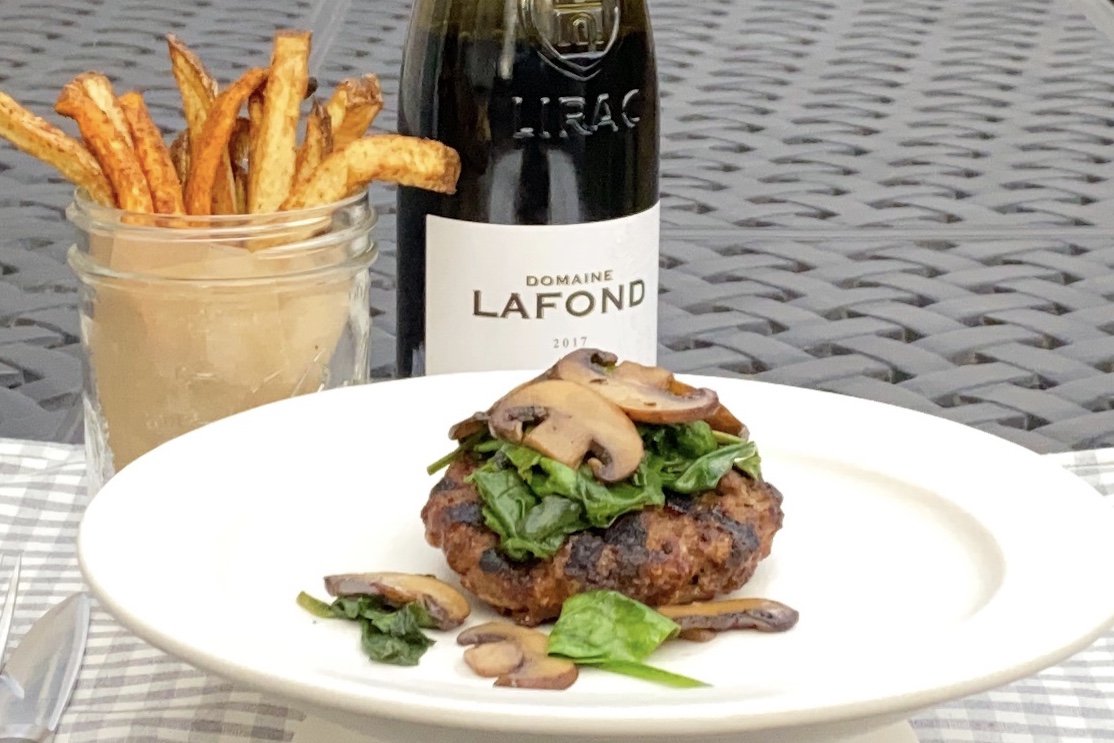
Grilled Burger with Spinach, Mushroom and Gruyere

Grilled Burger with Spinach, Mushroom and Gruyere

I love a good burger.  But then again, who doesn’t?  However, I don’t like the excessive toppings that most restaurants add to their burgers.  I feel it detracts from tasting the meat – especially when you are using a great, local source for the ground meat.  I also wanted a healthier burger so I replaced the bun and heavy toppings with sautéed vegetables.  I included a little bit of cheese because, in my opinion, every burger needs cheese.  But instead of melting the cheese on top,  I combined it with the meat which makes for a moist burger. My grilled burger with spinach, mushroom and gruyere cheese is the perfect healthy burger for summer!

For the pairing, I chose a Cotes du Rhone red wine because they are simple, yet elegant wines that will elevate any meal.  And, the ingredients in this burger are very French (Dijon mustard, gruyere cheese) so it only seemed fitting to choose a French wine!  I absolutely love this pairing…I hope you do too! Check out my Cotes du Rhone page to learn more.

This recipe has no ratings just yet.

Grilled Burger With Mushrooms, Spinach & Gruyere

January 27, 2020
: 4

By:

Ingredients
  • 1 lb organic ground beef (local if you have it)
  • ½ cup grated Gruyere cheese
  • 1 tablespoon Dijon mustard
  • 1 teaspoon tamari (or low sodium soy sauce)
  • Kosher salt & freshly ground black pepper
  • 3 tablespoons of extra virgin olive oil
  • 1 package of baby portabella mushrooms, sliced
  • ½ teaspoon of Herbs de Provence
  • 1 bag or container of baby spinach
  • 2 garlic cloves, sliced
  • ½ Lemon
Directions
  • Step 1 Heat grill to medium-high temperature (450 – 500 degrees)
  • Step 2 For the burgers, in a large bowl, combine the ground beef, Gruyere cheese, mustard, tamari, salt, and pepper. With your hands, gently combine the ingredients until just mixed. Be careful not to over mix the meat. Separate the meat into 4 even balls. Shape each ball into a patty and place on a parchment-lined baking sheet. Cover with plastic wrap and refrigerate for at least 1 hour to firm up. You could also put in the freezer for 10 -15 minutes if you are short on time.
  • Step 3 Grill the burgers for approximately 4 minutes per side for medium burgers Remove from grill and let stand for 5 minutes before serving.
  • Step 4 For the mushrooms, heat 2 tablespoons of olive oil in a saute pan. When the oil is hot, add the mushrooms and Herbs de Provence. Cook on medium heat until mushrooms are nicely browned – approximately 6-7 minutes. My tip for cooking mushrooms. Do not stir for a few minutes once you add to the pan. It allows the mushrooms to release their moisture so they will brown more evenly.
  • Step 5 Once the mushrooms are brown, Add the garlic and cook for another 1-2 minutes. Remove from pan and set aside.
  • Step 6 In the same pan, add 1 tablespoon of olive oil and the spinach. Cook for approximately 2-3 minutes until spinach is slightly wilted. Add the mushroom mixture and a squeeze of lemon to the pan. Season with salt & freshly ground black pepper.
  • Step 7 To assemble, arrange the burgers on a platter. Spoon the spinach & mushroom mixture over each burger and serve.


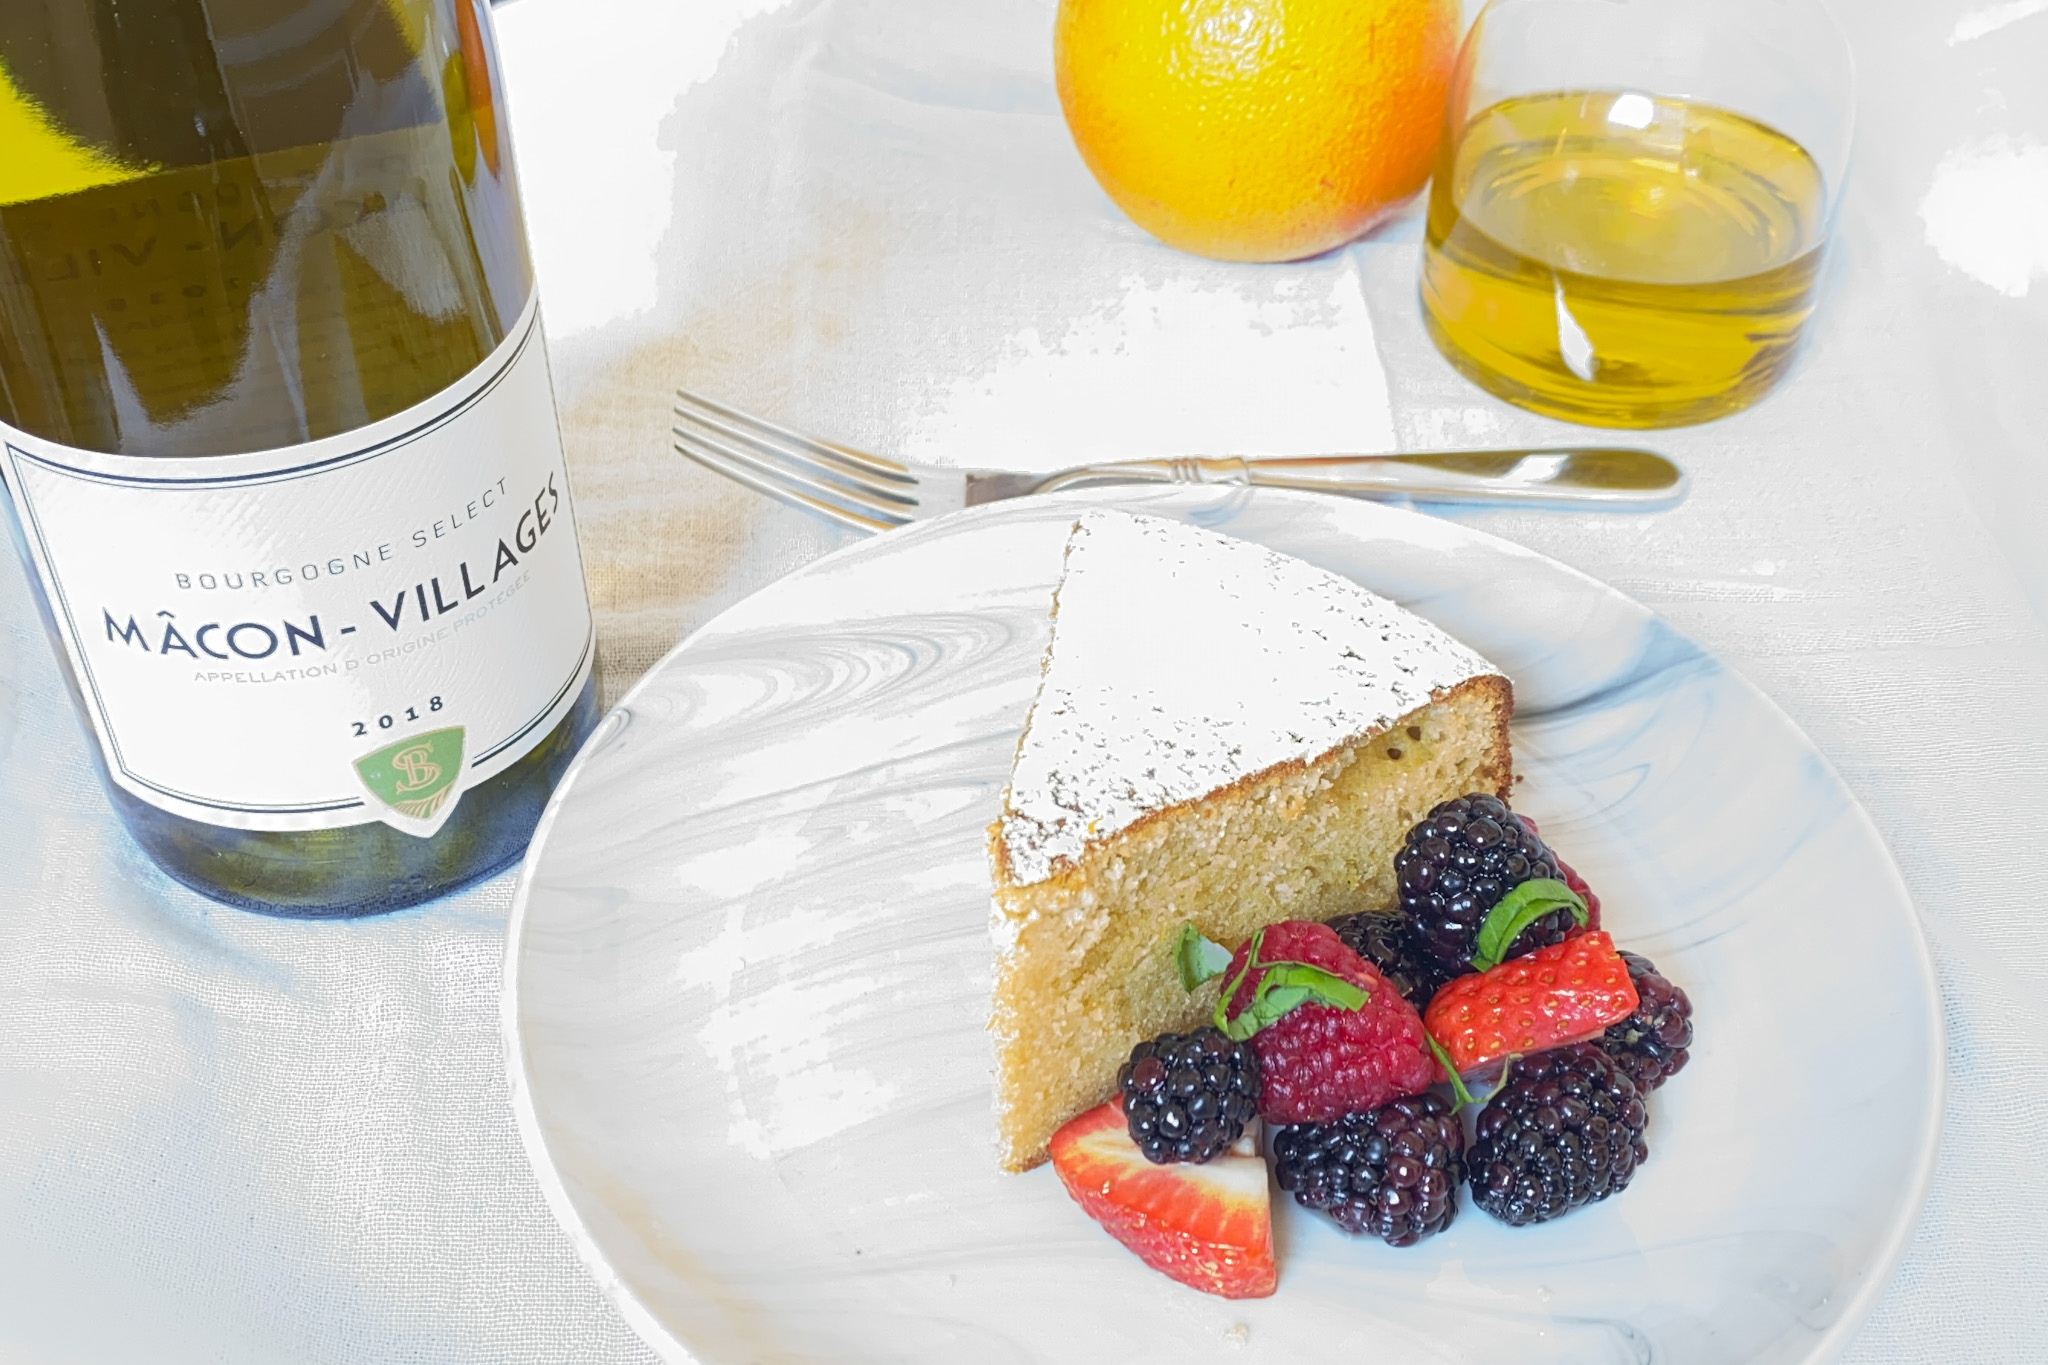
Orange Olive Oil Cake with Summer Berry Salad

Orange Olive Oil Cake with Summer Berry Salad

As I’ve mentioned before, I am not much of a baker.  I don’t really like it and I’m not really good at it.  But I quickly realized that every great meal ends with an equally great dessert.  So, I started experimenting with some baking recipes.  One of my first was an olive oil cake infused with lemon and limoncello.  I really loved the citrus flavor but the limoncello was overpowering.  What I loved most was there was no butter in the recipe!  Since the extra virgin olive oil in the cake makes it a bit healthier, I started experimenting with other ways to make a healthier cake by cutting down on the refined sugar and all-purpose flour.  And since I love the combination of orange and olive oil, I included both the zest and juice.  The result, my orange olive oil cake with summer berry salad. The perfect summer dinner party dessert!

For the pairing, I chose a French White Burgundy, specifically a Bourgogne blanc.  These wines are typically unoaked which makes them very food-friendly.  The wines are crisp and refreshing with natural citrus flavors that complement the orange in the cake and lime in the berry salad.  It’s the perfect pairing for a hot summer’s night dinner party or afternoon picnic.  To learn more, check out my White Burgundy pairing page.


This recipe has no ratings just yet.

Orange Olive Oil Cake with Summer Berry Salad

January 14, 2020
: 6-8

By:

Ingredients
  • 1.5 cups of all-purpose flour
  • 1/2 cup of almond flour
  • 3/4 cup sugar
  • 1/4 cup honey
  • 1/4 teaspoon salt
  • 1.5 teaspoon baking powder
  • 3/4 cup of extra virgin olive oil
  • 1/2 cup of whole milk
  • 4 large eggs, room temperature
  • 1.5 tablespoons of orange zest (2 oranges)
  • 1/4 cup of fresh orange juice (1 orange)
  • 1 teaspoon pure vanilla extract
  • 1 cup of strawberries
  • 1/2 cup of blueberries
  • 1/2 cup of blackberries
  • 1/2 cup of raspberries
  • 1 tablespoon pure maple syrup
  • Zest & juice of 1 lime
  • 1/2 tablespoon fresh basil, chopped
Directions
  • Step 1 Preheat the oven to 350°.
  • Step 2 Brush a 9-inch, spring-form cake pan with olive oil and line the bottom with parchment paper. Brush the parchment paper with extra virgin olive oil.
  • Step 3 In a bowl, whisk the flour, almond flour, sugar, salt, and baking powder. In the bowl of an electric mixer, whisk the olive oil, milk, eggs, orange zest, orange juice, vanilla, and honey. Add the dry ingredients and whisk until just combined. The batter will be slightly runny.
  • Step 4 Pour the batter into the prepared pan and bake for approximately 45 minutes and up to an hour, until the top is golden brown, and an inserted toothpick comes out clean. Transfer the cake to a wire rack and let cool for 30 minutes. Run a knife around the edge of the pan and release it from the spring-form pan. Place the cake onto the wire rack and let cool completely before serving.
  • Step 5 For the berry salad, combine the berries into a large bowl. Add the maple syrup, lime juice, and zest Stir to combine. When ready to serve, add in fresh basil.
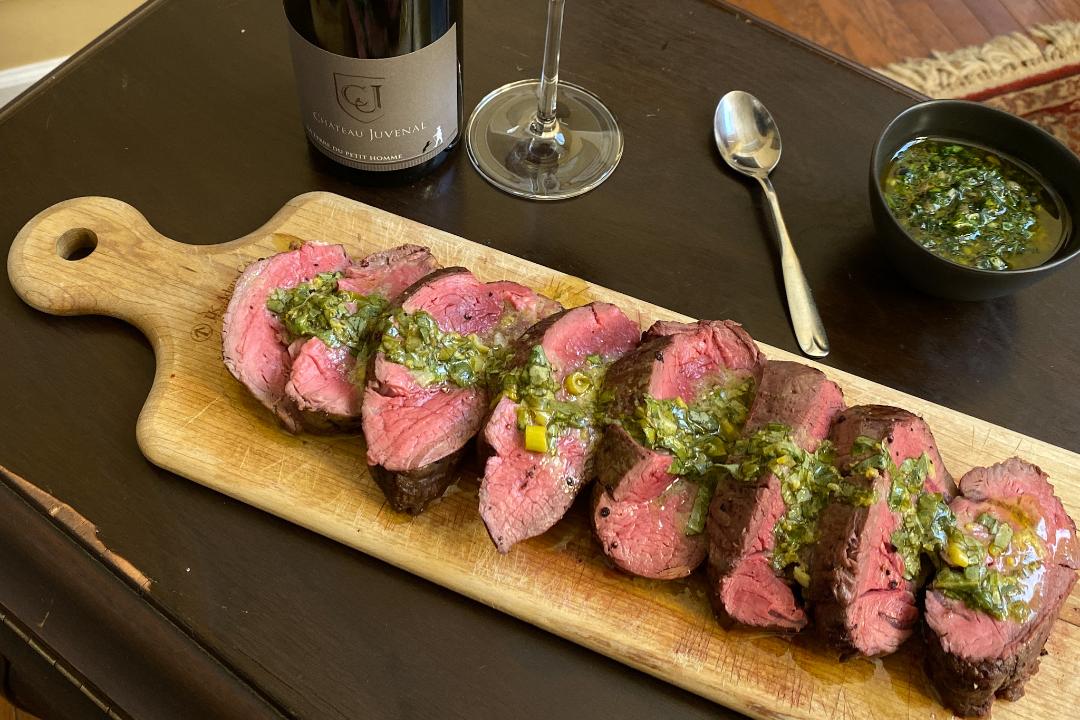
Filet Mignon with Lemon & Basil Sauce

Filet Mignon with Lemon & Basil Sauce

One of the rules I like to follow when cooking is simple is better.  Another is that ingredients do matter.  This dish couldn’t be simpler, but the amazing result depends on using the best, and freshest ingredients you can find.  Whenever I serve a whole filet mignon, I go to my local butcher.  It will cost more, but trust me, it is worth it.  Besides, it is not every day that you serve a whole filet, right!  Interestingly, I started serving this dish as part of my annual Christmas day “extravaganza” party (more about that in my upcoming Holiday eBook).  But I realized that this Filet Mignon with Lemon & Basil sauce was too good to serve only one time a year!


For the pairing, I went with a classic red meat pairing, Cotes du Rhone from France.  But you could easily explore pairing with white wine to complement the citrusy sauce.  I think I might try a French White Burgundy the next time I make this dish.  Let me know what you think in the comments below.  To learn more, check out my Cotes du Rhone and White Burgundy pairing pages.

This recipe has no ratings just yet.

Filet Mignon with Lemon & Basil Sauce

January 12, 2020
: 6-8

By:

Ingredients
  • 1 whole filet mignon, trimmed and tied (approximately 3.5 to 4 pounds)
  • 2/3 cup olive oil plus 2 tablespoons
  • 2 lemons zested and ¼ cup of lemon juice
  • 1 teaspoon of Dijon mustard
  • ½ cup of chopped basil
  • 1 green onion, finely chopped
  • Kosher salt and freshly ground black pepper
Directions
  • Step 1 Preheat oven to 425 degrees
  • Step 2 For the sauce, whisk together the extra virgin olive oil, lemon zest, lemon juice spring onion, Dijon mustard, and basil. Season with kosher salt & freshly ground black pepper. Set aside.
  • Step 3 Bring filet to room temperature. Place filet on a rimmed baking sheet and dry well with paper towels. Rub with 2 tablespoons of extra virgin olive oil and season generously with Kosher salt and freshly ground black pepper. Roast the filet for approximately 35-45 minutes, until the temperature registers 125 degrees in the center for rare and 135 degrees for medium-rare.
  • Step 4 Cover the filet with aluminum foil and allow to rest for 20 minutes. Using a sharp knife, slice in ¼ inch thick slices.
  • Step 5 To serve, arrange the filet slices on a large board or platter, slightly overlapping. Spoon the sauce generously over the slices. Filet can be served immediately but for best results, cover with plastic wrap and let marinate at room temperature for an hour before serving.
Grilled Swordfish with Lemon and Capers

Grilled Swordfish with Lemon and Capers

We eat a lot of fish in my house — especially in the summer.  I love grilled seafood because the simple preparation really allows you to appreciate the taste of the fish.  That is also why I typically complement my fish dishes with light and simple sauces.  Swordfish is one of my favorite fish to grill.  And the lemon, olive oil and caper sauce couldn’t be easier.  Be sure to use the best, extra virgin olive oil you have.  It really does make a difference!

For the pairing, I chose an Etna Bianco from Sicily as it pairs so well with all seafood, but especially grilled seafood.  This pairing is so simple yet elegant it is perfect for a summer dinner party al fresco!  To learn more about Etna Bianco wines, check out my Etna Bianco pairing page.


This recipe has no ratings just yet.

Grilled Swordfish with Lemon and Capers

December 28, 2019
: 4

By:

Ingredients
  • 2 pieces of swordfish (approximately 1 inch thick)
  • 1/4 cup EVOO plus 1 tablespoon
  • 1 lemon, juiced & zested
  • 2 tablespoons capers, drained
  • Kosher salt and freshly ground black pepper
Directions
  • Step 1 Prepare grill with clean grates and medium-high heat (450 – 500 degrees)
  • Step 2 Whisk together the EVOO, lemon zest, lemon juice and capers in small bowl. Set aside.
  • Step 3 Place 1 swordfish filet on a cutting board. Using a very sharp knife, slice filet in half lengthwise so that you have 2 pieces approximately ½ inch thick. Repeat with the other swordfish filet.
  • Step 4 Place 1 piece of swordfish filet between two pieces of parchment or wax paper. Using the flat end of a kitchen mallet, gently pound the swordfish filet so that you end up with a piece that is approximately ¼ inch thick. Repeat with the remaining 3 swordfish filets.
  • Step 5 Brush both sides of each filet with EVOO and season both sides with salt & pepper.
  • Step 6 Grill first side for approximately 2 minutes and second side for approximately 1 minute. Be sure grill is very hot and clean otherwise the fish will stick.
  • Step 7 Arrange the swordfish filets on a large platter. Spoon the dressing evenly over the fish. Finish with a sprinkle of Fleur de sel and freshly ground black pepper. If you don’t have Fleur de sel, use Kosher or sea salt.