Author: valerie.smith28

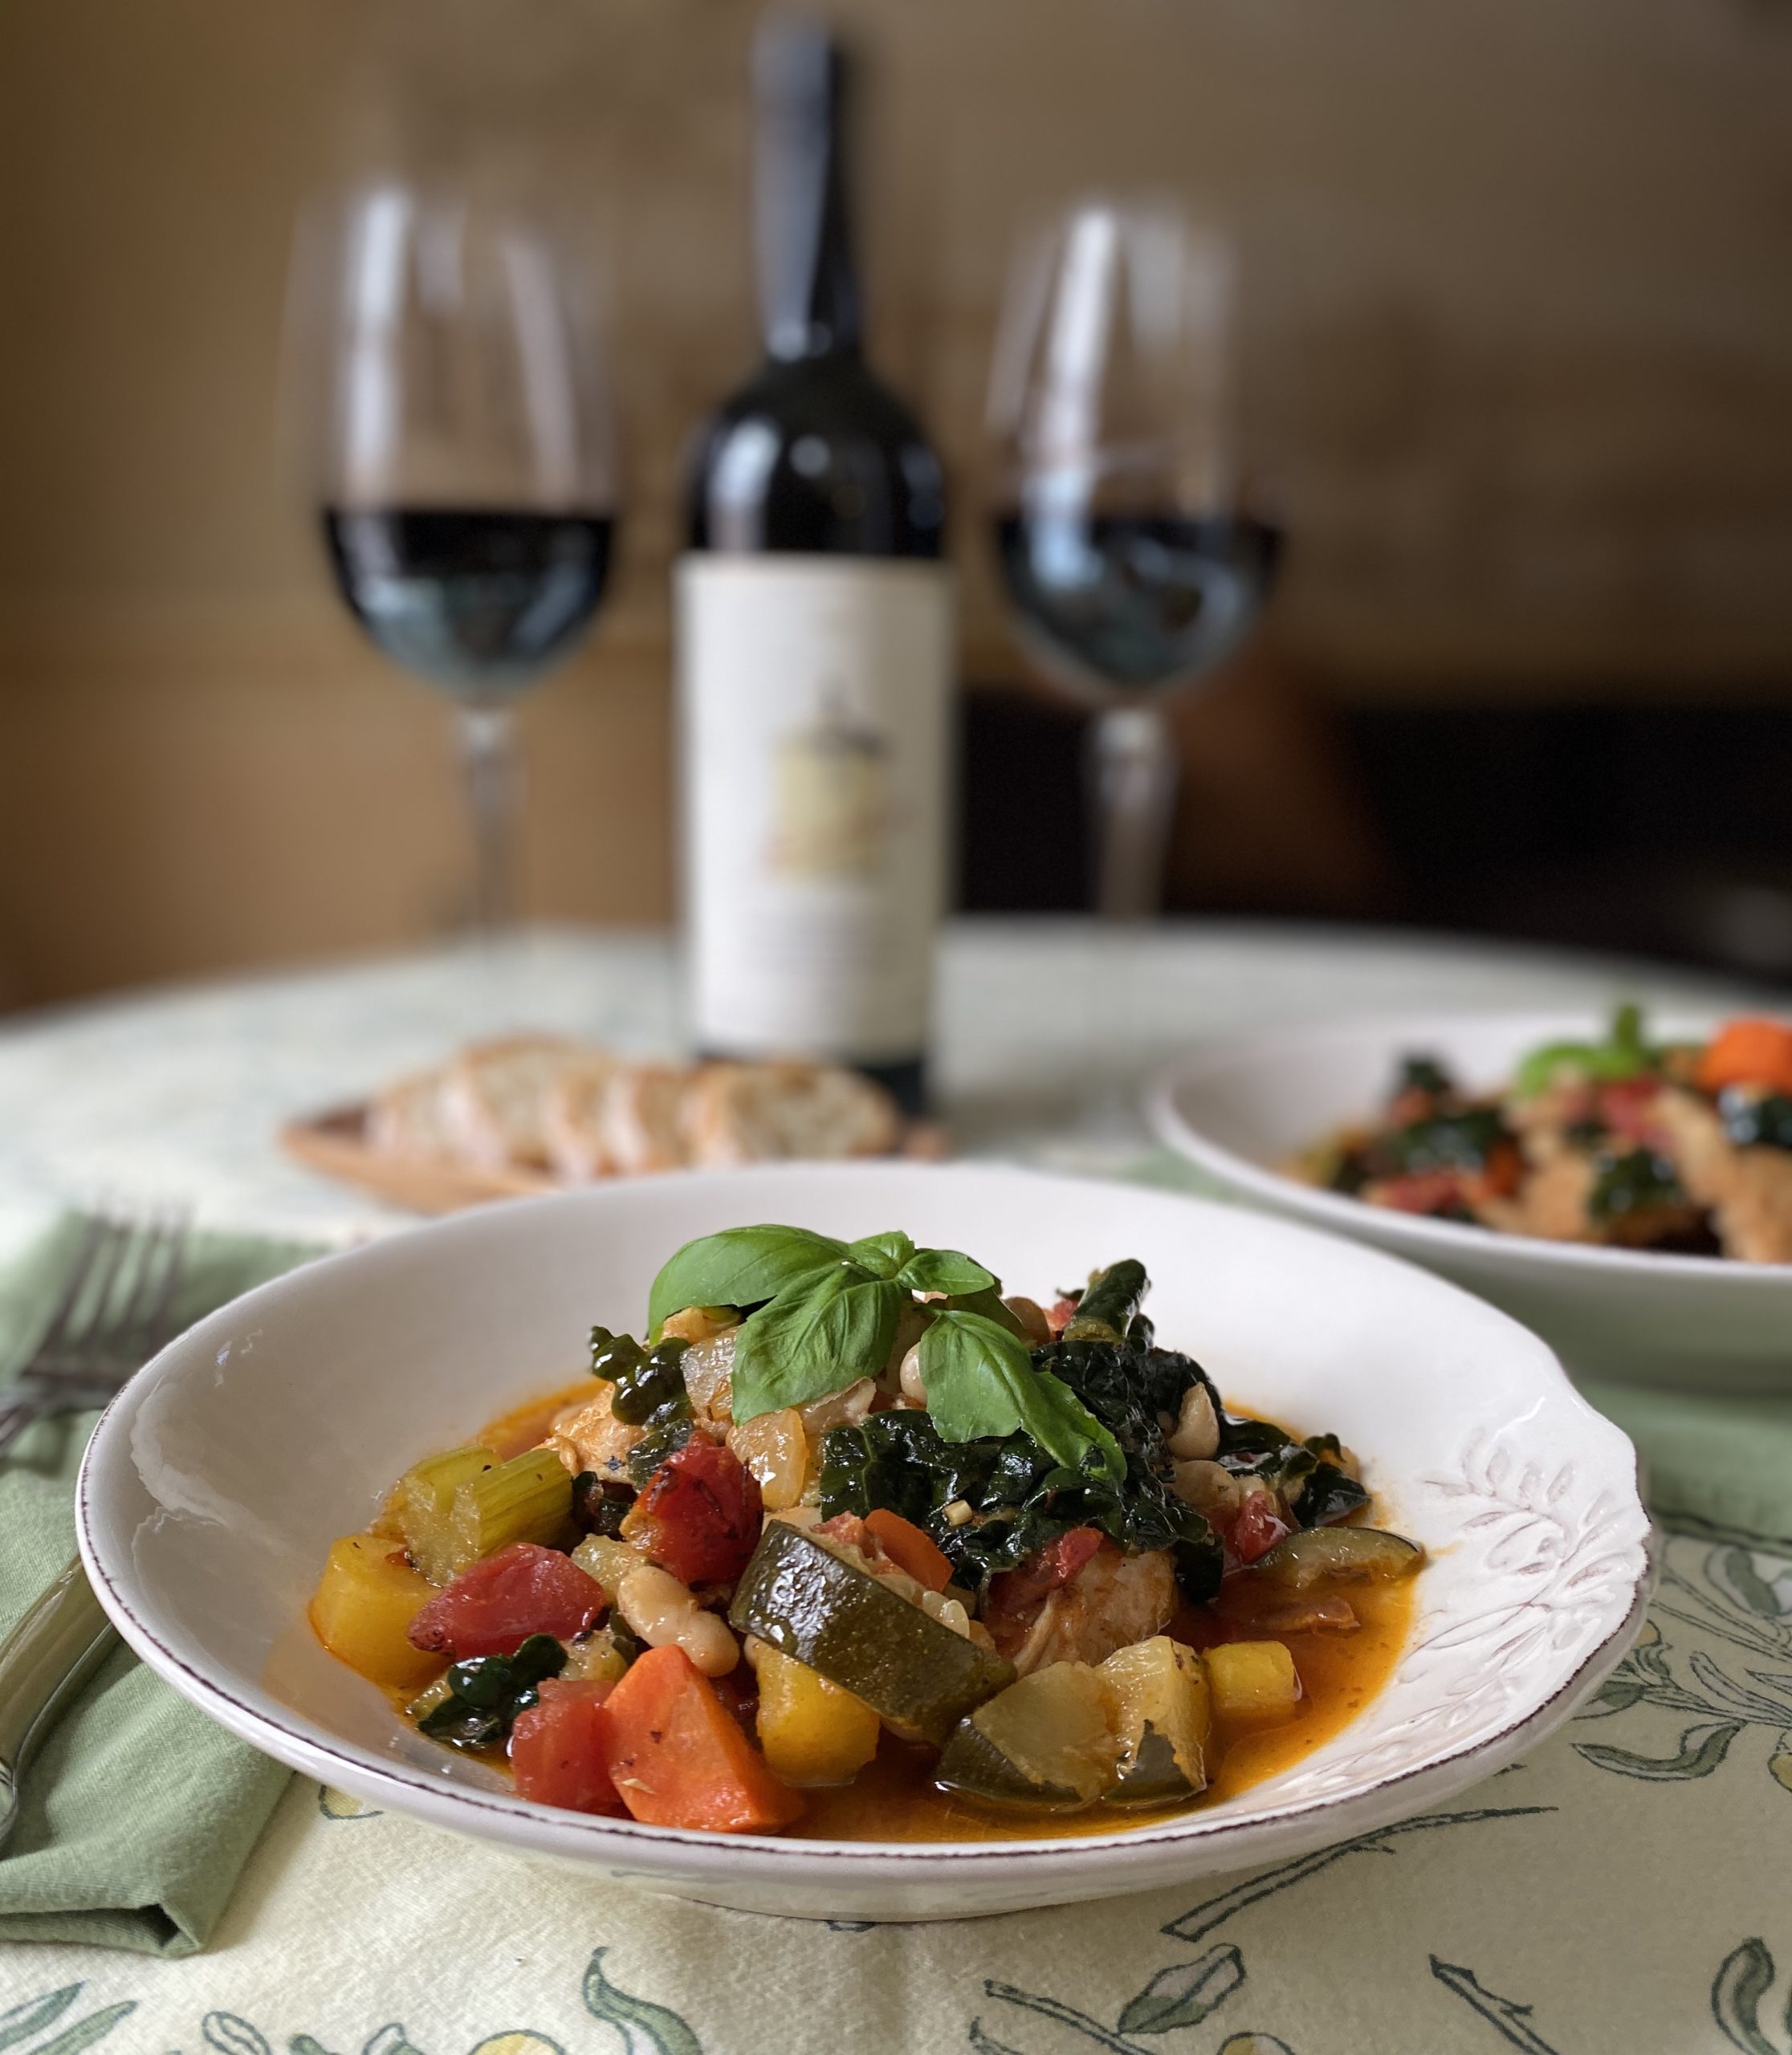
Tuscan Chicken Stew

Tuscan Chicken Stew

For much of my young adult life, I had visions of Tuscany — the food, the wine, and the culture.   Visiting Tuscany was always on the top of my bucket list.  That dream came true in the summer of 2008 when a few college friends and their families traveled to a beautiful Tuscan villa to celebrate the 40th birthday of our friend.  It was the trip of a lifetime!  I remember coming home and being obsessed with Tuscan wine and food.  I wanted to recreate the dishes and flavors I experienced while visiting. And that is how my Tuscan Chicken Stew recipe came to be!

This pairing was inspired by the flavors of Tuscany and the special memories I have from that amazing trip.  I chose to pair this dish with a Super Tuscan wine.  Why?  It just makes sense!  Check out my Super Tuscan pairing page to learn more.


This recipe has no ratings just yet.

Tuscan Chicken Stew

March 3, 2020
: 4-6

By:

Ingredients
  • 4 tablespoons extra virgin olive oil
  • 1 package of boneless, skinless chicken thighs (I use Bell & Evans)
  • ½ cup of diced pancetta or bacon
  • 1 cup chopped carrots (2 to 3 carrots)
  • 1 cup chopped onion (about ½ an onion)
  • 1 cup chopped celery (about 2 stalks)
  • ½ cup of chopped fennel (1 fennel bulb)
  • ½ cup of chopped zucchini
  • 1 teaspoon Herbs de Provence
  • 2 garlic cloves finely minced
  • 1/8 teaspoon red pepper flakes
  • 1 tablespoon tomato paste.
  • ½ cup dry white wine
  • 1 15 oz. can of diced fire-roasted tomatoes
  • 3 cups chicken stock
  • 1 bay leaf
  • 1 small parmesan cheese rind
  • 1 15 oz. can cannellini beans, drained and rinsed
  • 1 small bunch of Tuscan Kale – stems removed and chopped
  • Fresh basil & grated parmesan cheese for garnish
  • Kosher salt & freshly ground pepper to taste
  • 4 thick slices of Ciabatta bread, toasted
Directions
  • Step 1 Dry the chicken with paper towels and season on both sides with salt & freshly ground black pepper. Heat 2 tablespoons of oil in a large Dutch oven. Place ½ of the chicken thighs in the pan and brown on both sides (approximately 2-3 minutes per side). Remove chicken from the pan. Place the second batch of chicken into the pan and brown evenly on both sides. Remove from the pan and set aside.
  • Step 2 Add the pancetta and cook until crisp. Remove from the pan and set aside.
  • Step 3 Add the carrot, onion, celery, fennel, and Herbs De Provence to the pan. Season with salt and pepper and cook for approximately 3 minutes. Add the garlic, zucchini, and red pepper flakes and cook for another 1 minute. Add the tomato paste and cook for another 2 minutes.
  • Step 4 Deglaze the pan with the white wine (be sure to scrape the brown bits from the bottom of the pan). Put the chicken and pancetta back in the pan. Add the chicken stock, fire-roasted tomatoes, a bay leaf, and parmesan cheese rind. Stir to combine. Bring the stew to a boil. Then reduce heat to low, and cook partially covered for 30 minutes.
  • Step 5 Add the kale to the pot and cook fully covered for another 5 minutes. Add the white beans and cook for another 5 minutes fully covered. Season with salt & freshly ground black pepper.
  • Step 6 To serve, place the toasted ciabatta bread into the bowls. Ladle the stew over the bread. Drizzle with extra virgin olive oil and garnish with fresh basil and a sprinkle of parmesan cheese.
Grilled Pizza with Lemon and Arugula

Grilled Pizza with Lemon and Arugula

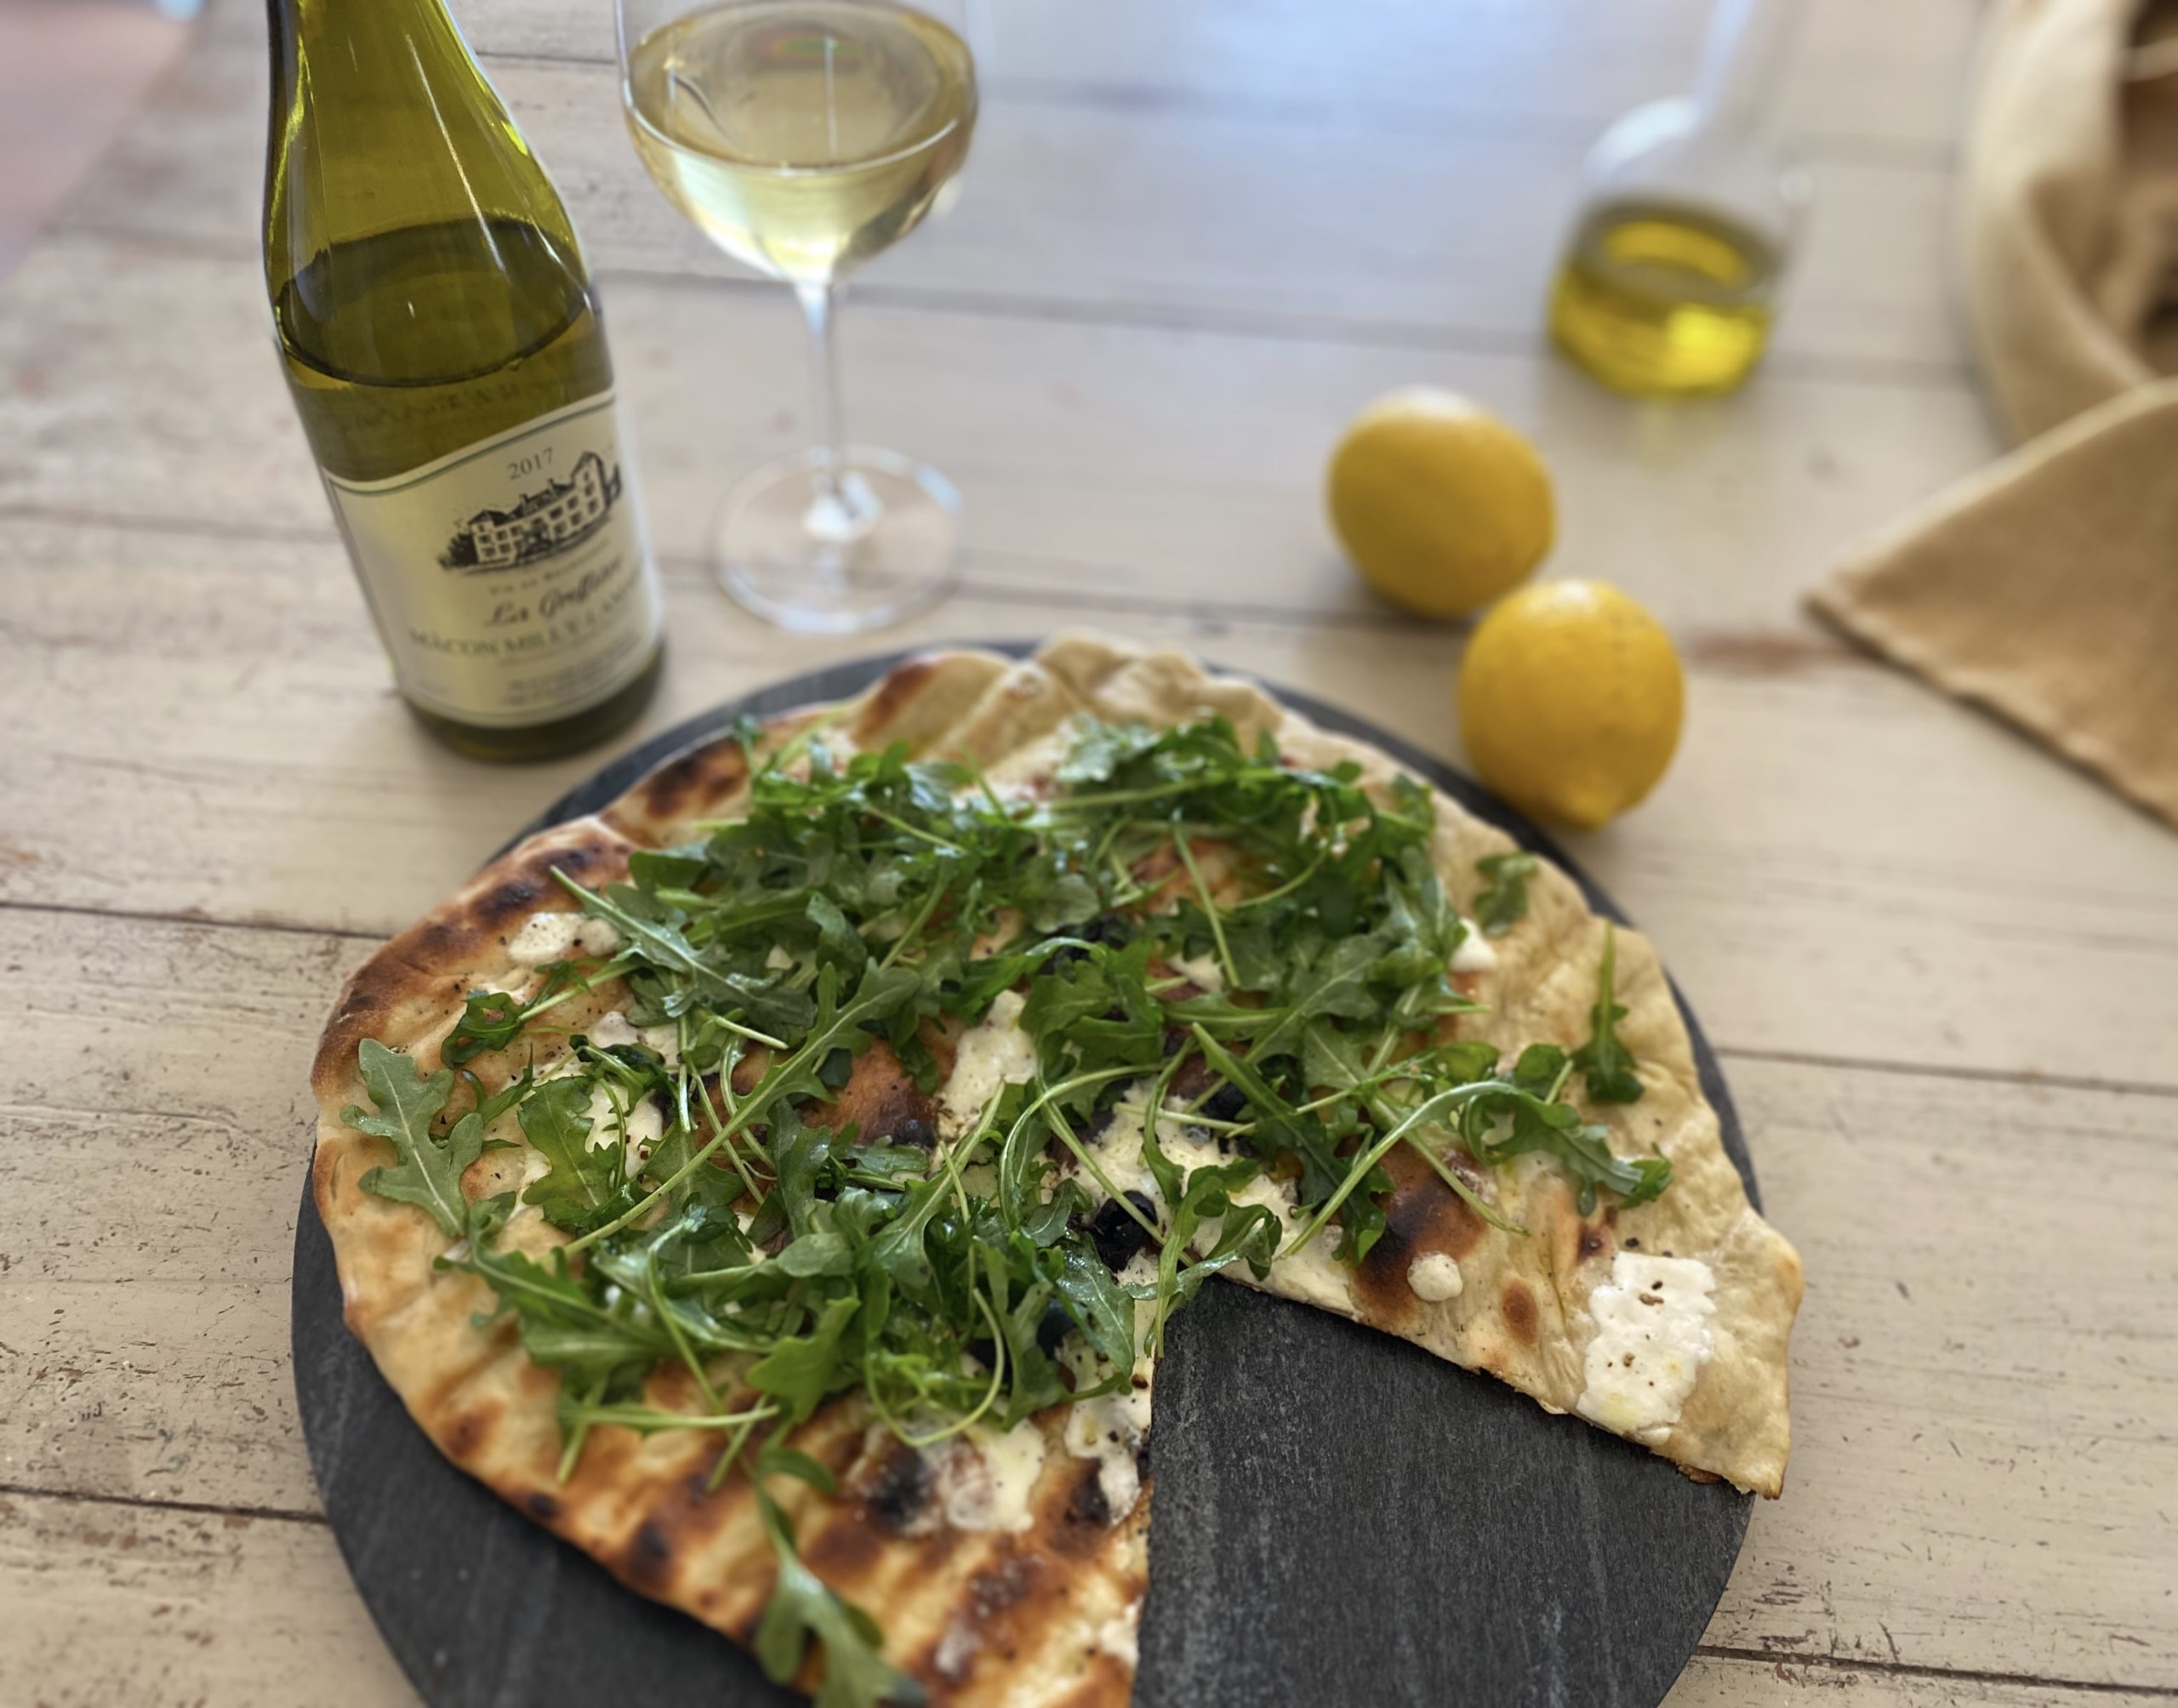
Friday nights are wine and appetizer or “appy” nights at my house (surprise). After a long work week, I’m looking for something simple yet satisfying to pull together.  And, I want to use fresh farmer’s market ingredients.  This grilled pizza with lemon and arugula recipe hits all the right points!

For the pairing, I like a crisp and refreshing wine to complement the citrus but also a wine with more structure to balance the richness of the burrata cheese.  A good white from the Burgundy region of France is the perfect pairing. The minerality and herbaceous character pairs nicely with the arugula and citrus.  Check out my White Burgundy pairing page to learn more.


This recipe has no ratings just yet.

Grilled Pizza with Lemon and Arugula

January 28, 2020
: 4

By:

Ingredients
  • 1 small-med size pizza dough (I go to my favorite local pizza shop) – make sure it is room temp
  • 1 ball of burrata cheese or fresh mozzarella
  • 2 cups baby arugula
  • Zest of 1 lemon
  • 1 teaspoon of lemon juice
  • 2 tablespoons of extra virgin olive oil
  • 1 tablespoon fresh parmesan cheese
  • 2 tablespoons of flour
  • Kosher salt & freshly ground pepper
Directions
  • Step 1 Heat grill to high. Be sure that the grill grates are very clean, or the pizza will stick.
  • Step 2 Dust your work surface with a little flour so the dough does not stick. Roll out dough with a rolling pin (or with hands for a more rustic look) until about 1/8 inch thickness. You want to dough to be thin enough to crisp on the grill but not too thin so it will burn. Brush 1 side with olive oil and sprinkle with salt. Place the dough on the grill olive oil side down. Grill until crisp – approximately 2 minutes. It is important that you pay attention to the dough to ensure it doesn’t burn. You may need to move the dough around with tongs to keep from cooking too quickly.
  • Step 3 Remove from heat. Brush olive oil on the uncooked side and place on cutting board with the cooked side up. Break up Burrata with your hands and sprinkle evenly over pizza. Return pizza to grill, cheese side up. Grill approximately 2 minutes. The Goal is to evenly cook & crisp the crust while melting the cheese on top.
  • Step 4 Remove from grill and place on a wire rack to keep the pizza crust crisp.
  • Step 5 Place arugula in bowl and dress with lemon juice, 1 tablespoon of olive oil, salt & pepper to taste. Spread an even layer on pizza. Finish with lemon zest, parmesan cheese and a drizzle of olive oil.
Grilled Burger with Spinach, Mushroom and Gruyere

Grilled Burger with Spinach, Mushroom and Gruyere

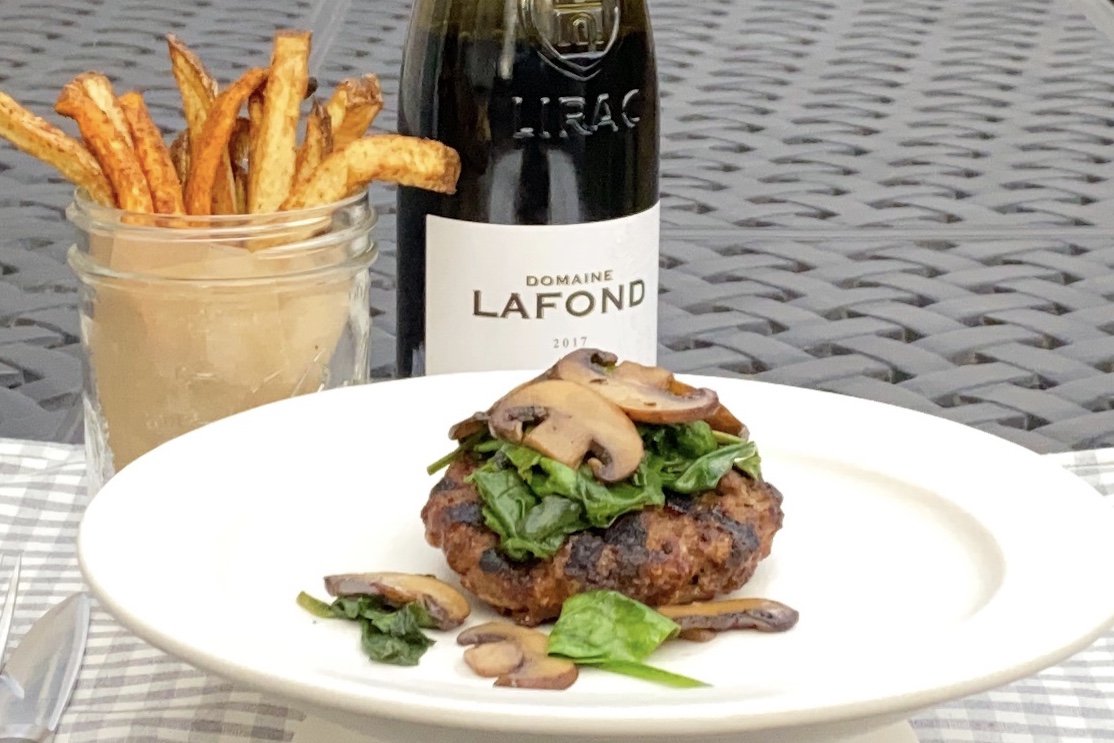
I love a good burger.  But then again, who doesn’t?  However, I don’t like the excessive toppings that most restaurants add to their burgers.  I feel it detracts from tasting the meat – especially when you are using a great, local source for the ground meat.  I also wanted a healthier burger so I replaced the bun and heavy toppings with sautéed vegetables.  I included a little bit of cheese because, in my opinion, every burger needs cheese.  But instead of melting the cheese on top,  I combined it with the meat which makes for a moist burger. My grilled burger with spinach, mushroom and gruyere cheese is the perfect healthy burger for summer!

For the pairing, I chose a Cotes du Rhone red wine because they are simple, yet elegant wines that will elevate any meal.  And, the ingredients in this burger are very French (Dijon mustard, gruyere cheese) so it only seemed fitting to choose a French wine!  I absolutely love this pairing…I hope you do too! Check out my Cotes du Rhone page to learn more.

This recipe has no ratings just yet.

Grilled Burger With Mushrooms, Spinach & Gruyere

January 27, 2020
: 4

By:

Ingredients
  • 1 lb organic ground beef (local if you have it)
  • ½ cup grated Gruyere cheese
  • 1 tablespoon Dijon mustard
  • 1 teaspoon tamari (or low sodium soy sauce)
  • Kosher salt & freshly ground black pepper
  • 3 tablespoons of extra virgin olive oil
  • 1 package of baby portabella mushrooms, sliced
  • ½ teaspoon of Herbs de Provence
  • 1 bag or container of baby spinach
  • 2 garlic cloves, sliced
  • ½ Lemon
Directions
  • Step 1 Heat grill to medium-high temperature (450 – 500 degrees)
  • Step 2 For the burgers, in a large bowl, combine the ground beef, Gruyere cheese, mustard, tamari, salt, and pepper. With your hands, gently combine the ingredients until just mixed. Be careful not to over mix the meat. Separate the meat into 4 even balls. Shape each ball into a patty and place on a parchment-lined baking sheet. Cover with plastic wrap and refrigerate for at least 1 hour to firm up. You could also put in the freezer for 10 -15 minutes if you are short on time.
  • Step 3 Grill the burgers for approximately 4 minutes per side for medium burgers Remove from grill and let stand for 5 minutes before serving.
  • Step 4 For the mushrooms, heat 2 tablespoons of olive oil in a saute pan. When the oil is hot, add the mushrooms and Herbs de Provence. Cook on medium heat until mushrooms are nicely browned – approximately 6-7 minutes. My tip for cooking mushrooms. Do not stir for a few minutes once you add to the pan. It allows the mushrooms to release their moisture so they will brown more evenly.
  • Step 5 Once the mushrooms are brown, Add the garlic and cook for another 1-2 minutes. Remove from pan and set aside.
  • Step 6 In the same pan, add 1 tablespoon of olive oil and the spinach. Cook for approximately 2-3 minutes until spinach is slightly wilted. Add the mushroom mixture and a squeeze of lemon to the pan. Season with salt & freshly ground black pepper.
  • Step 7 To assemble, arrange the burgers on a platter. Spoon the spinach & mushroom mixture over each burger and serve.


Broccoli & Cauliflower Salad

Broccoli & Cauliflower Salad

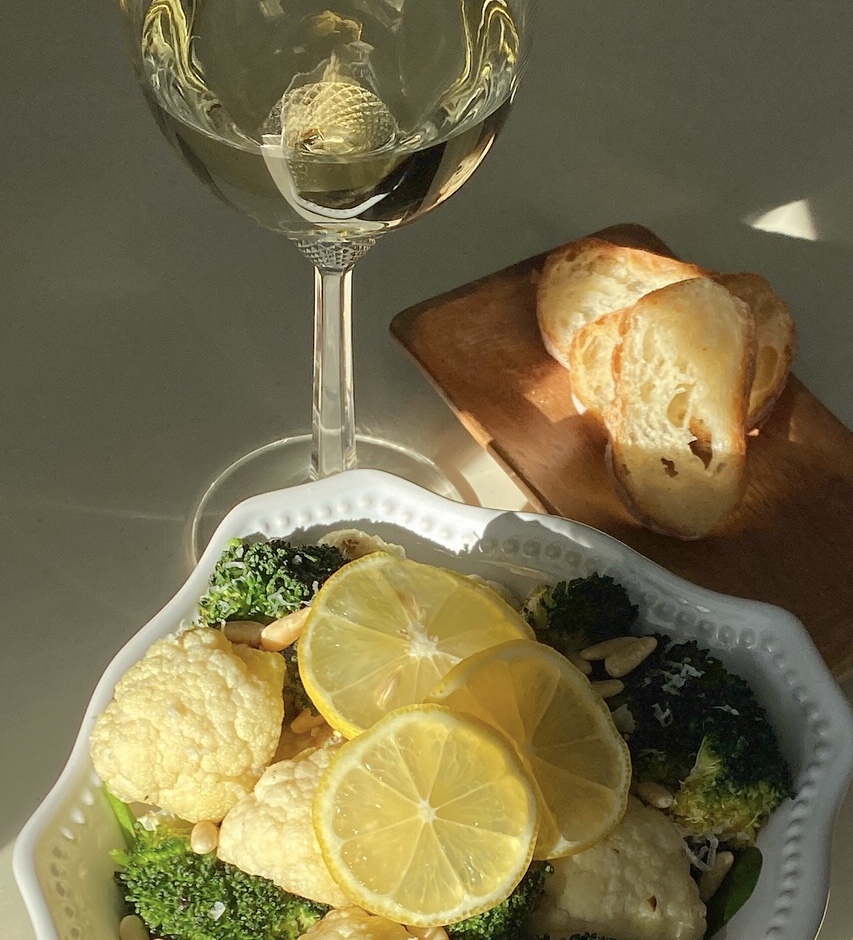
This dish was inspired by watching Giada De Laurentiis prepare her Broccoli & Cauliflower salad recipe on the Food Network.  I loved her recipe – which calls for breading the vegetables in flour, egg & breadcrumbs, and then pan-frying in oil.  While the dish was delicious, it was time-consuming.  I was also looking for something a little healthier so I decided to create my own version.  I love this recipe because it is light on calories yet rich and satisfying!  You can make this as a side dish to any meat, fish, or chicken dish but it is hearty enough to stand on its own as a weekday meal!


I chose a French White Burgundy to pair with this dish because it is light and refreshing yet a bit structured.  You could try a simple Bourgogne Blanc which has a nice citrus flavor profile to complement the lemon in the dish.  Or, to elevate this dish, splurge on a nice bottle of Chablis.  You won’t be disappointed!  Check out my White Burgundy page to learn more.


This recipe has no ratings just yet.

Broccoli & Cauliflower Salad

January 23, 2020
: 4

By:

Ingredients
  • 1 medium bunch of broccoli cut into small to medium size florets
  • 1/2 head of cauliflower cut into small to medium size florets
  • 4 tablespoons extra virgin olive oil
  • 6-8 cups of baby spinach
  • Juice and zest of 1 lemon
  • ¼ cup of freshly grated parmesan cheese
  • ¼ cup toasted pine nuts
  • Kosher salt & freshly ground pepper to taste
Directions
  • Step 1 Preheat oven to 425
  • Step 2 Place even layer of broccoli & cauliflower on rimmed baking sheets (do not overcrowd). Toss with 2 tablespoons of extra virgin olive oil. Season with salt & pepper
  • Step 3 Roast vegetables for approximately 7-8 minutes. Remove from the oven. Sprinkle evenly with cheese and return to oven for another 2-3 minutes until lightly browned.
  • Step 4 In the meantime, place spinach in a serving bowl and toss with ½ lemon juice, lemon zest, 2 tablespoons of olive oil, and salt & pepper. Top with broccoli & cauliflower and toss to combine.
  • Step 5 Finish with a sprinkle of freshly grated parmesan cheese, a drizzle of lemon juice, and toasted pine nuts. To toast the pine nuts, place them in a sauté pan and heat for a few minutes until they are lightly brown. Be careful as they can burn easily!
Orange Olive Oil Cake with Summer Berry Salad

Orange Olive Oil Cake with Summer Berry Salad

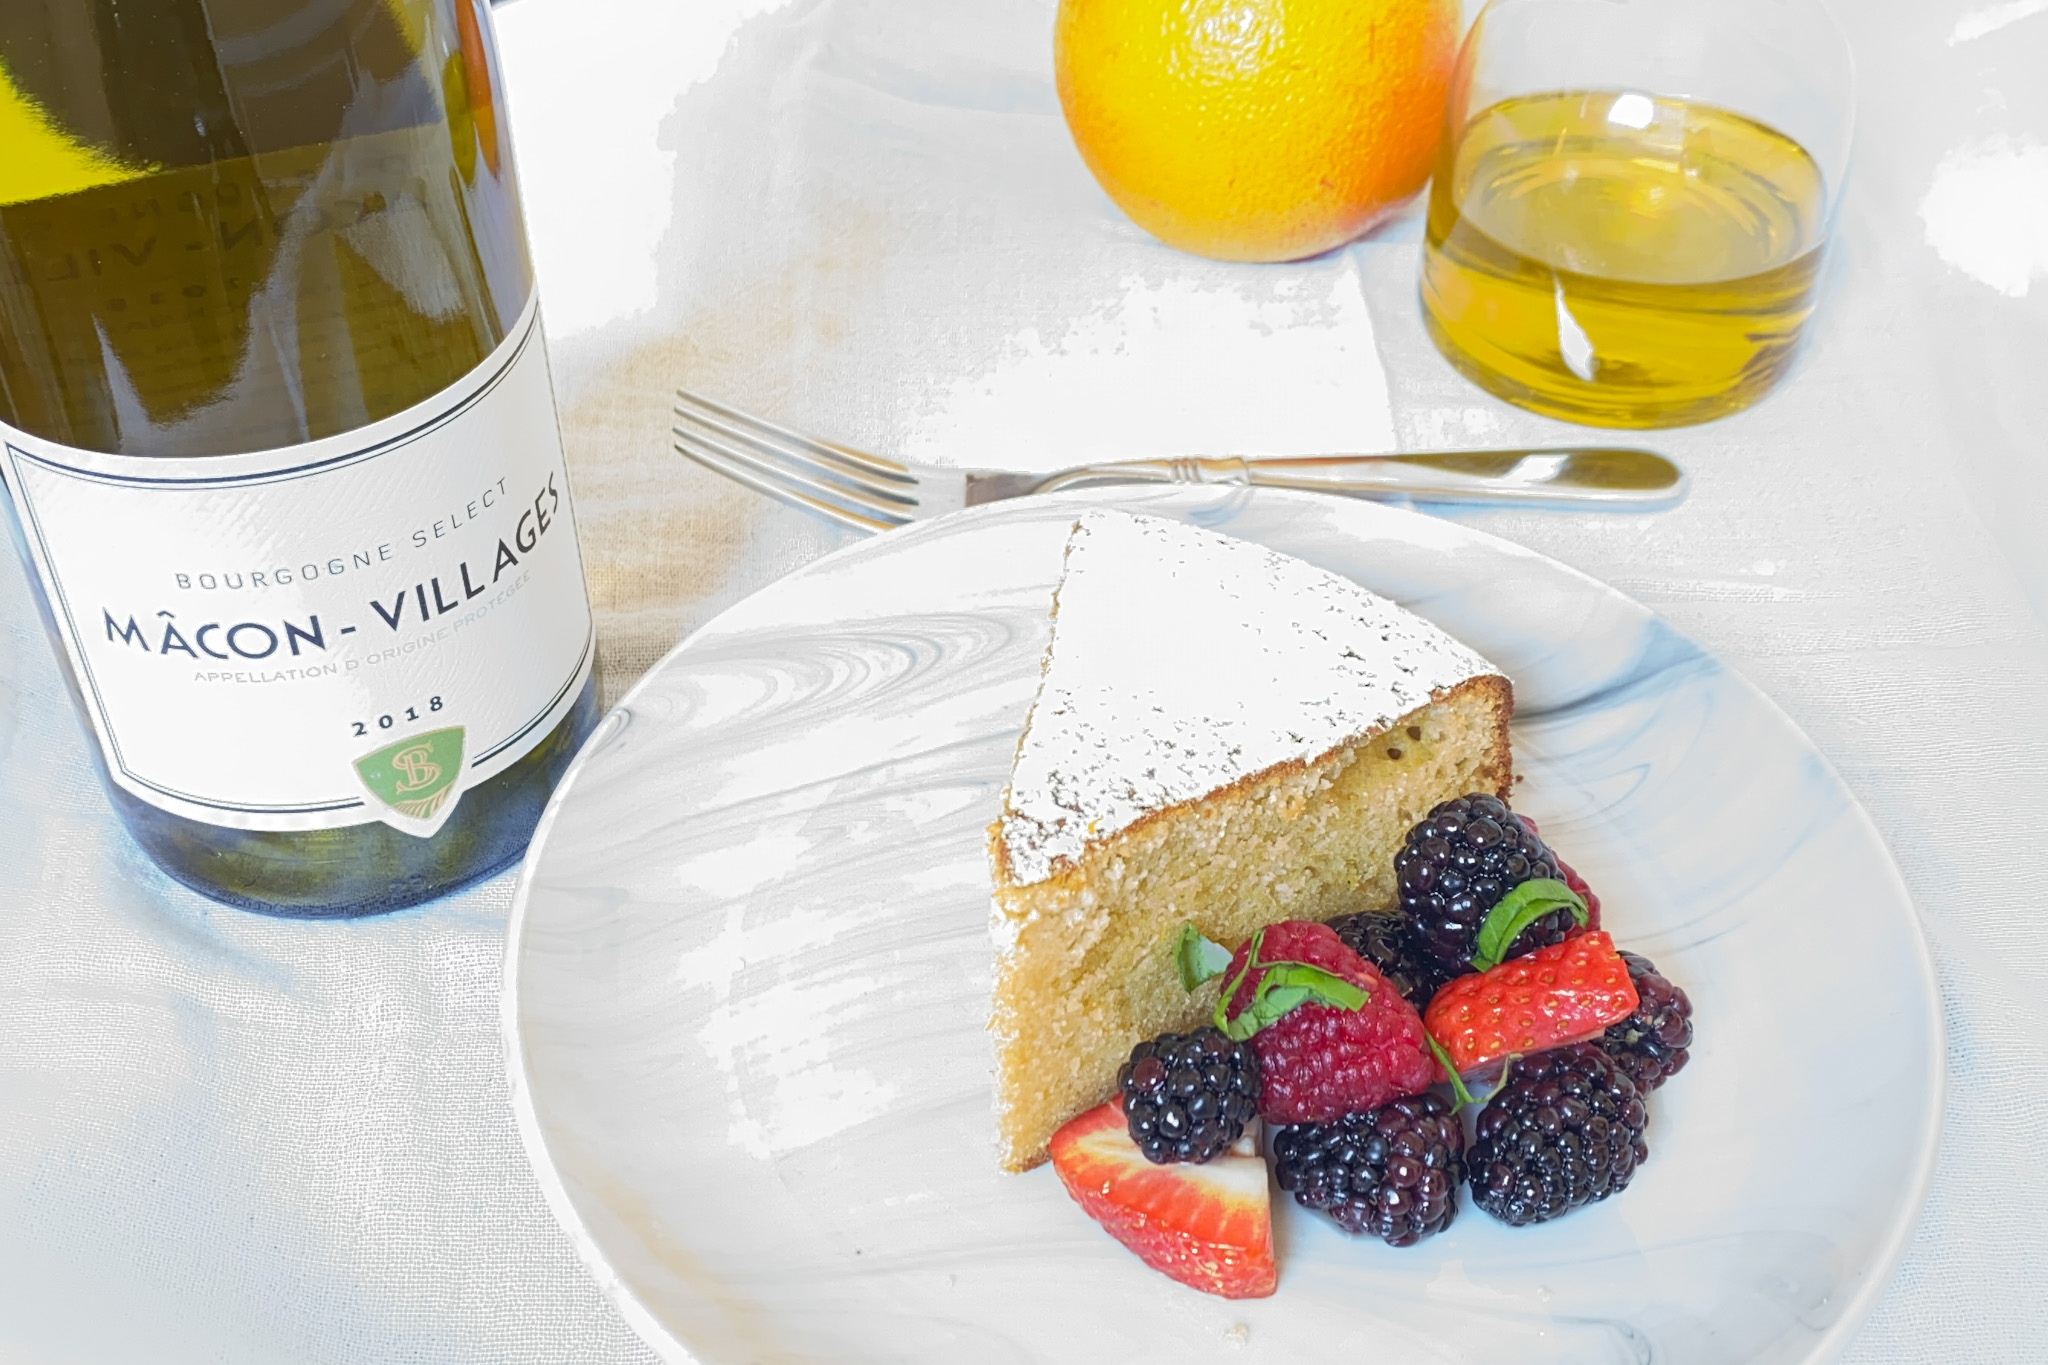
As I’ve mentioned before, I am not much of a baker.  I don’t really like it and I’m not really good at it.  But I quickly realized that every great meal ends with an equally great dessert.  So, I started experimenting with some baking recipes.  One of my first was an olive oil cake infused with lemon and limoncello.  I really loved the citrus flavor but the limoncello was overpowering.  What I loved most was there was no butter in the recipe!  Since the extra virgin olive oil in the cake makes it a bit healthier, I started experimenting with other ways to make a healthier cake by cutting down on the refined sugar and all-purpose flour.  And since I love the combination of orange and olive oil, I included both the zest and juice.  The result, my orange olive oil cake with summer berry salad. The perfect summer dinner party dessert!

For the pairing, I chose a French White Burgundy, specifically a Bourgogne blanc.  These wines are typically unoaked which makes them very food-friendly.  The wines are crisp and refreshing with natural citrus flavors that complement the orange in the cake and lime in the berry salad.  It’s the perfect pairing for a hot summer’s night dinner party or afternoon picnic.  To learn more, check out my White Burgundy pairing page.


This recipe has no ratings just yet.

Orange Olive Oil Cake with Summer Berry Salad

January 14, 2020
: 6-8

By:

Ingredients
  • 1.5 cups of all-purpose flour
  • 1/2 cup of almond flour
  • 3/4 cup sugar
  • 1/4 cup honey
  • 1/4 teaspoon salt
  • 1.5 teaspoon baking powder
  • 3/4 cup of extra virgin olive oil
  • 1/2 cup of whole milk
  • 4 large eggs, room temperature
  • 1.5 tablespoons of orange zest (2 oranges)
  • 1/4 cup of fresh orange juice (1 orange)
  • 1 teaspoon pure vanilla extract
  • 1 cup of strawberries
  • 1/2 cup of blueberries
  • 1/2 cup of blackberries
  • 1/2 cup of raspberries
  • 1 tablespoon pure maple syrup
  • Zest & juice of 1 lime
  • 1/2 tablespoon fresh basil, chopped
Directions
  • Step 1 Preheat the oven to 350°.
  • Step 2 Brush a 9-inch, spring-form cake pan with olive oil and line the bottom with parchment paper. Brush the parchment paper with extra virgin olive oil.
  • Step 3 In a bowl, whisk the flour, almond flour, sugar, salt, and baking powder. In the bowl of an electric mixer, whisk the olive oil, milk, eggs, orange zest, orange juice, vanilla, and honey. Add the dry ingredients and whisk until just combined. The batter will be slightly runny.
  • Step 4 Pour the batter into the prepared pan and bake for approximately 45 minutes and up to an hour, until the top is golden brown, and an inserted toothpick comes out clean. Transfer the cake to a wire rack and let cool for 30 minutes. Run a knife around the edge of the pan and release it from the spring-form pan. Place the cake onto the wire rack and let cool completely before serving.
  • Step 5 For the berry salad, combine the berries into a large bowl. Add the maple syrup, lime juice, and zest Stir to combine. When ready to serve, add in fresh basil.
Filet Mignon with Lemon & Basil Sauce

Filet Mignon with Lemon & Basil Sauce

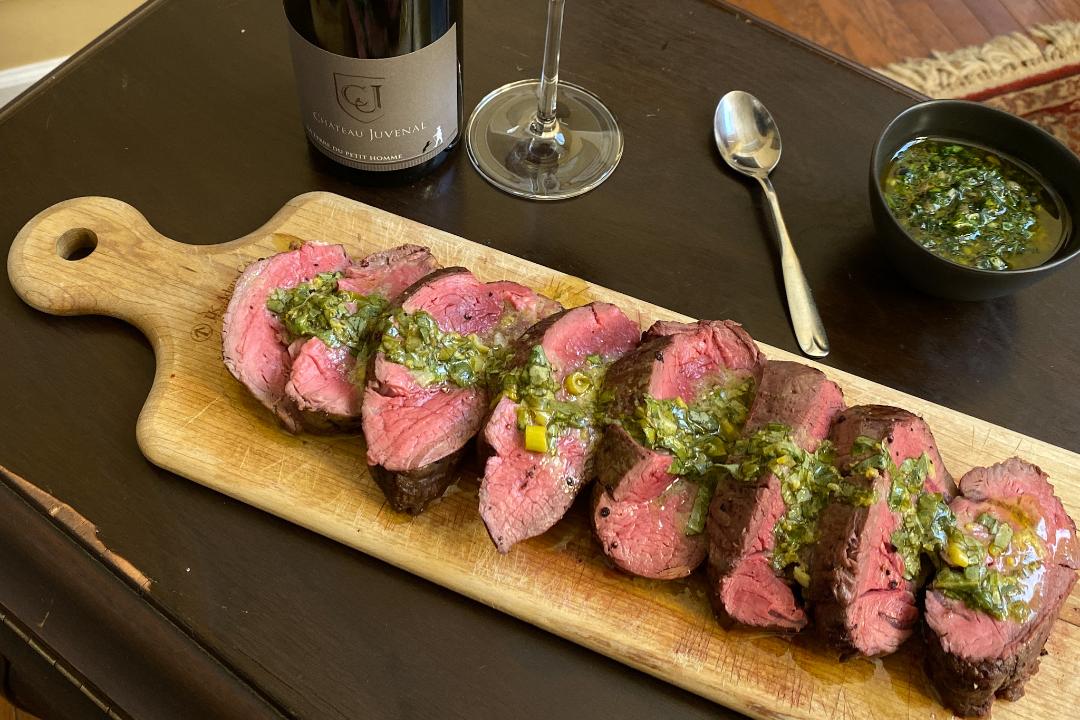
One of the rules I like to follow when cooking is simple is better.  Another is that ingredients do matter.  This dish couldn’t be simpler, but the amazing result depends on using the best, and freshest ingredients you can find.  Whenever I serve a whole filet mignon, I go to my local butcher.  It will cost more, but trust me, it is worth it.  Besides, it is not every day that you serve a whole filet, right!  Interestingly, I started serving this dish as part of my annual Christmas day “extravaganza” party (more about that in my upcoming Holiday eBook).  But I realized that this Filet Mignon with Lemon & Basil sauce was too good to serve only one time a year!


For the pairing, I went with a classic red meat pairing, Cotes du Rhone from France.  But you could easily explore pairing with white wine to complement the citrusy sauce.  I think I might try a French White Burgundy the next time I make this dish.  Let me know what you think in the comments below.  To learn more, check out my Cotes du Rhone and White Burgundy pairing pages.

This recipe has no ratings just yet.

Filet Mignon with Lemon & Basil Sauce

January 12, 2020
: 6-8

By:

Ingredients
  • 1 whole filet mignon, trimmed and tied (approximately 3.5 to 4 pounds)
  • 2/3 cup olive oil plus 2 tablespoons
  • 2 lemons zested and ¼ cup of lemon juice
  • 1 teaspoon of Dijon mustard
  • ½ cup of chopped basil
  • 1 green onion, finely chopped
  • Kosher salt and freshly ground black pepper
Directions
  • Step 1 Preheat oven to 425 degrees
  • Step 2 For the sauce, whisk together the extra virgin olive oil, lemon zest, lemon juice spring onion, Dijon mustard, and basil. Season with kosher salt & freshly ground black pepper. Set aside.
  • Step 3 Bring filet to room temperature. Place filet on a rimmed baking sheet and dry well with paper towels. Rub with 2 tablespoons of extra virgin olive oil and season generously with Kosher salt and freshly ground black pepper. Roast the filet for approximately 35-45 minutes, until the temperature registers 125 degrees in the center for rare and 135 degrees for medium-rare.
  • Step 4 Cover the filet with aluminum foil and allow to rest for 20 minutes. Using a sharp knife, slice in ¼ inch thick slices.
  • Step 5 To serve, arrange the filet slices on a large board or platter, slightly overlapping. Spoon the sauce generously over the slices. Filet can be served immediately but for best results, cover with plastic wrap and let marinate at room temperature for an hour before serving.
Grilled Polenta and Mushrooms

Grilled Polenta and Mushrooms

I started my wine journey with Pinot Noir so it will always hold a special place in my heart.  I first learned about American Pinot Noir by reading “Wine for Dummies”.  I then went to my first wine tasting, Robert Mondavi, and it was there that I really fell in love with Pinot Noir wines.  I became passionate about the different regions known for making great Pinots:  from the Russian River Valley in California to the Willamette Valley in Oregon to the hills of the Burgundy region of France.  I love Pinot Noir!


This dish offers a great opportunity to try two great but very different Pinot Noir wine regions: the Willamette Valley in Oregon and the Russian River Valley in California.  Pinot Noir and mushrooms are a match made in heaven so you really can’t go wrong.  Try out both and let me know what you think in the comments below!  To learn more, check out my Pinot Noir pairing page.


This recipe has no ratings just yet.

Grilled Polenta and Mushrooms

January 12, 2020
: 4-6

By:

Ingredients
  • 1 pound mixed mushrooms, coarsely chopped (baby Bellas, shitake, oyster, etc.)
  • 1 scallion, finely chopped
  • 1/8 teaspoon red pepper flakes
  • ½ teaspoon Herbs de Provence
  • 2 tablespoons extra-virgin olive oil
  • ¼ cup white wine
  • Kosher salt & Pepper to taste
  • a Quality packaged tube of polenta (I like Ancient Harvest)
  • 1 teaspoon fresh lemon juice
  • 1 tablespoon butter
  • ½ cup fresh Parmesan cheese
  • Fresh basil for garnish
Directions
  • Step 1 Heat grill to medium-high
  • Step 2 For the mushrooms, heat olive oil in a sauté pan. Add mushrooms and scallion to the pan. Stir to combine with the olive oil then lower heat to medium and leave alone for approximately 2 minutes to let the mushrooms cook.
  • Step 3 Stir the mushrooms and continue to cook for another 2-4 minutes until they are evenly brown. Stir in the red pepper flakes & Herbs de Provence. Cook for another minute then add the wine. Cook for approximately 1 minute until much of the wine is absorbed. Remove from heat and finish with a squeeze of lemon, pinch of salt & pepper, and the butter. Set aside.
  • Step 4 For the polenta, slice half of the tube into ½ inch pieces. Dry well with paper towels. Brush with olive oil on both sides and season with salt and pepper.
  • Step 5 Place polenta on a clean, hot grill. Grill for approximately 5-6 minutes per side or until you see nice grill marks. Remove from grill and place on serving platter or board. Spoon approximately 1 – 2 tablespoon of mushroom mixture over each polenta slice. Finish with a drizzle of olive oil, a sprinkle of parmesan cheese and garnish with fresh basil.
Maple Pecan Apple Tart

Maple Pecan Apple Tart

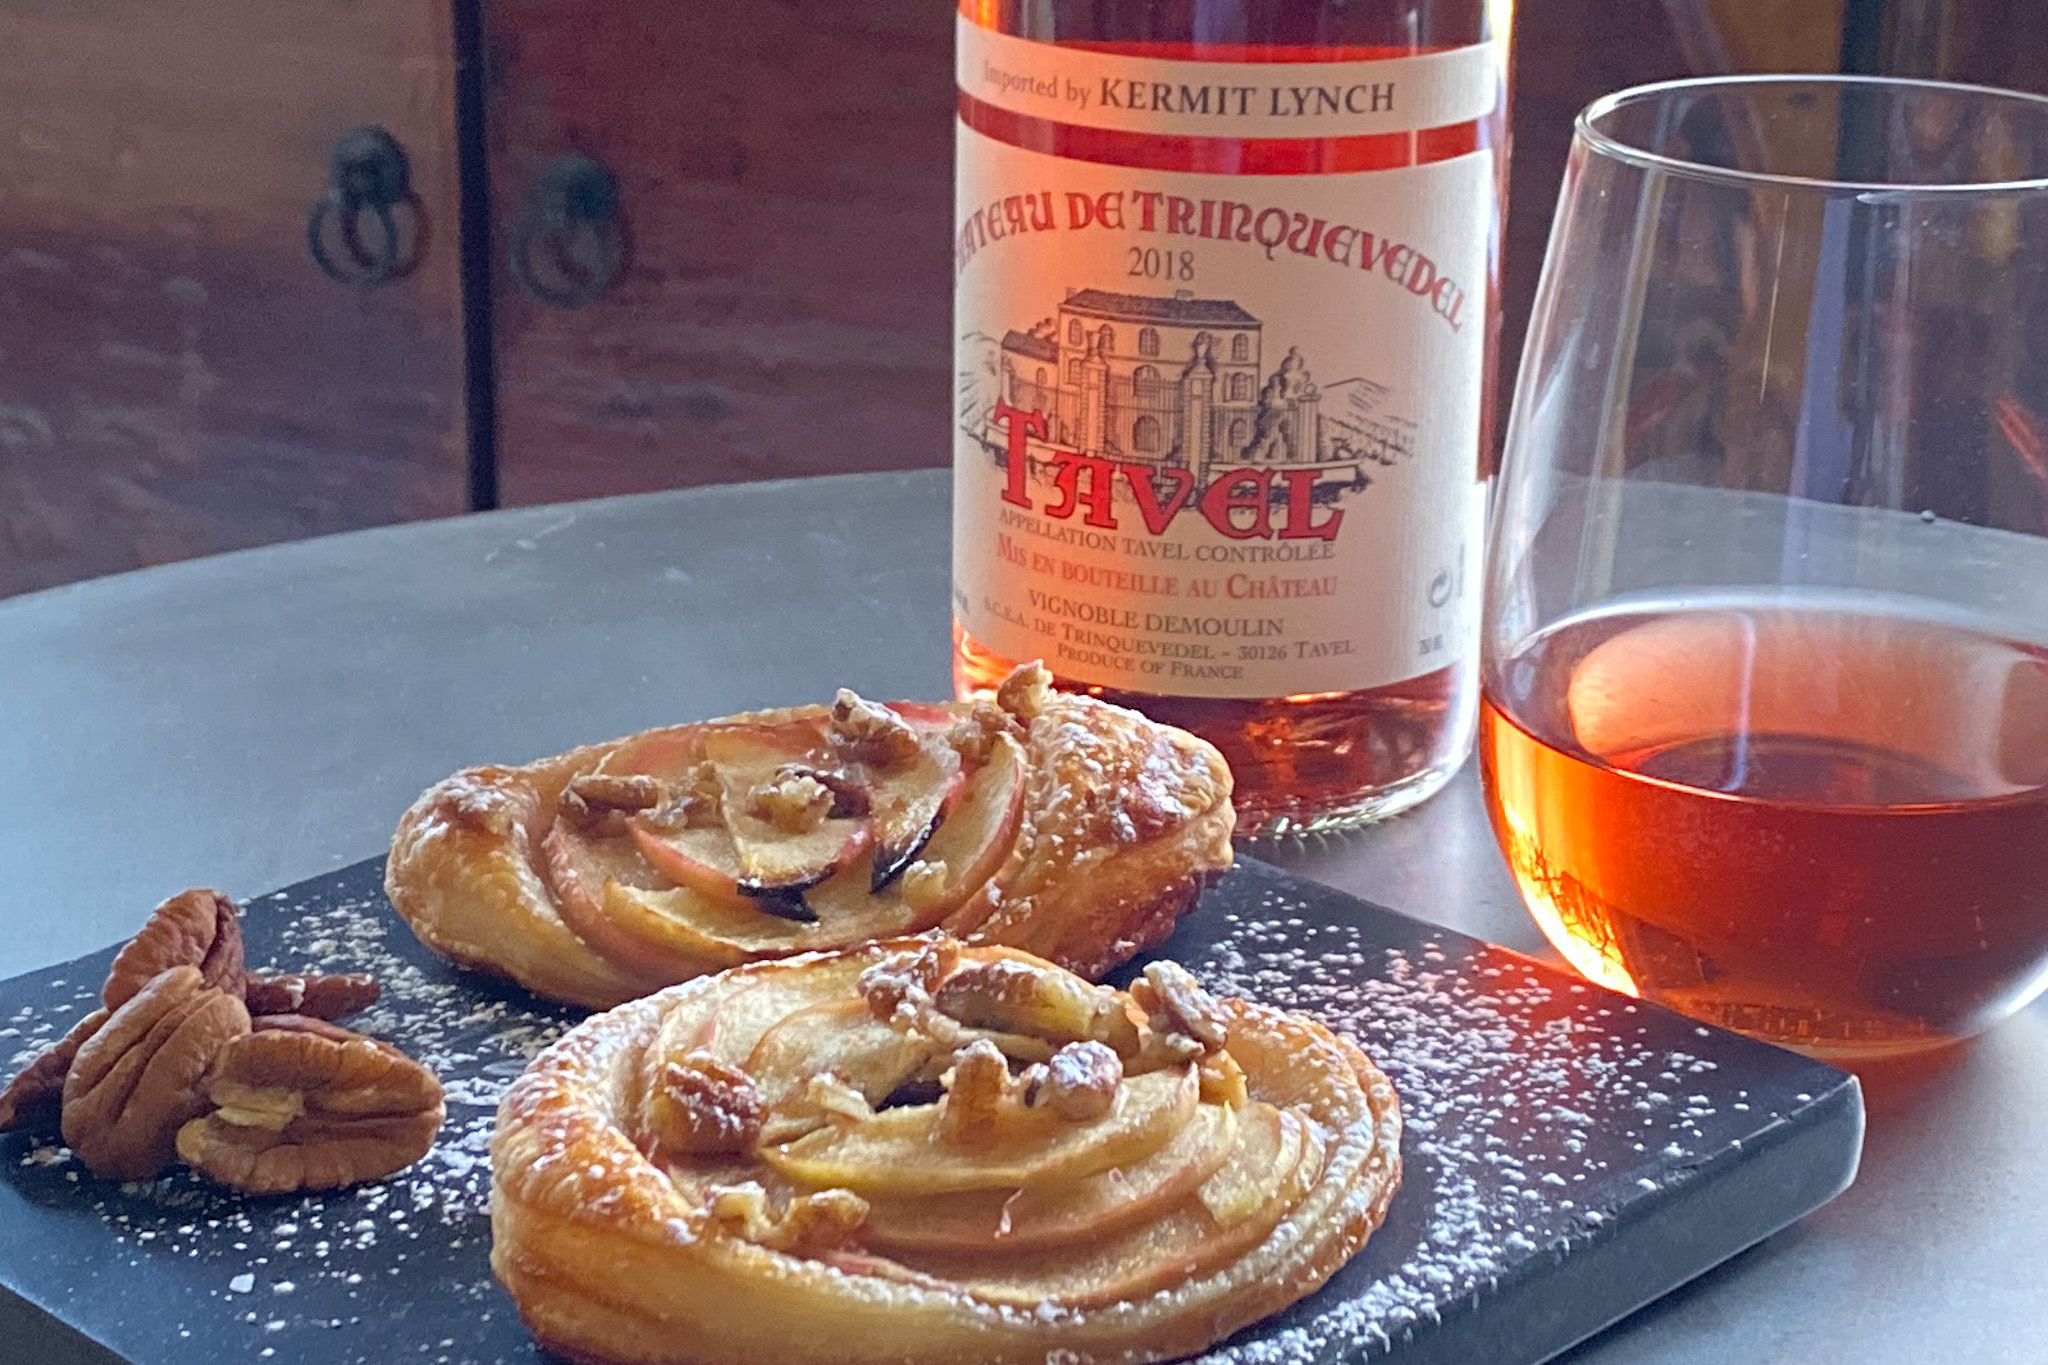
I’ve never really been great at making desserts.  But the fact is that when you entertain, people expect an amazing dessert.  So I’ve learned to create a few simple, yet elegant desserts.  One of my favorites for the Fall is Maple Pecan Apple Tarts.  Store-bought puff pastry is one of my favorite ingredients for making “on the fly” appetizers and desserts.  While it can be intimidating to work with at first, once you start you will wonder why you haven’t used it sooner!  What’s great about this dessert is that it captures the flavors of Fall from ingredients you probably already have in your pantry.


The wine pairing for this dessert was simple, a Tavel Rosé from France.  It is the epitome of Fall.  Tavel Rosé is characterized by a dark pink color and a more robust flavor than Provence Rosé.  The rich and spicy flavor will complement the maple and apple flavors beautifully. Check out my Rosé pairing page to learn more.


This recipe has no ratings just yet.

Maple Pecan Apple Tart

January 12, 2020
: 6-8

By:

Ingredients
  • 1 package of puff pastry (I prefer DuFour brand)
  • ½ cup of maple syrup
  • 1 tablespoon ghee or butter
  • 1 tablespoon apple cider
  • 1/8 teaspoon cinnamon
  • 2 teaspoons of apricot jam
  • Pinch of salt
  • 1 cup chopped pecans
  • 2 Honeycrisp apples
  • 1 lemon, juiced
  • 1 cup of boiling water
Directions
  • Step 1 Preheat oven to 400 degrees and line 2 baking sheets with parchment paper
  • Step 2 Remove puff pastry from package and let thaw on the kitchen counter for about 30 minutes or until soft enough (yet still cold) to roll out.
  • Step 3 To make the filling, combine maple syrup, ghee, apple cider, jam, and cinnamon in small non-stick sauté pan. Heat on low until just combined. Remove from heat and add in the pecans and pinch of salt. Set aside to cool.
  • Step 4 To prepare the apples, combine the lemon juice and boiling water in a medium bowl. Slice the apples in half and remove the core. Slice the apples as thinly as you can. Then add to the lemon juice water mixture. Let sit for 10 minutes while you prepare the puff pastry.
  • Step 5 To prepare the puff pastry, work with 1 sheet at a time, keeping the other sheet in the refrigerator to stay cold. Sprinkle work surface with flour so the dough does not stick while rolling. Roll out dough to approximate 10×13 size rectangle. Using a round cookie cutter, cut out large circles of the dough and place on parchment-lined baking sheets. You should get between 4-6 circles depending on the size of your cutter. Place the baking sheet in the freezer for 5-10 minutes to firm up the dough before adding the filling. Repeat with the second sheet of puff pastry.
  • Step 6 To assemble, place 1-2 tablespoons of the pecan mixture in the center of the circle leaving about a ¼ inch border. Top with 1 layer apples, placing them evenly around the circle slightly overlapping. Bake for approximately 15-18 minutes until puffed around the edges and golden brown. Drizzle with leftover pecan mixture and set aside to cool. Finish with a sprinkle of powder sugar and serve. Leftovers (if there are any) are great with morning coffee!
Palmiers Two Ways

Palmiers Two Ways

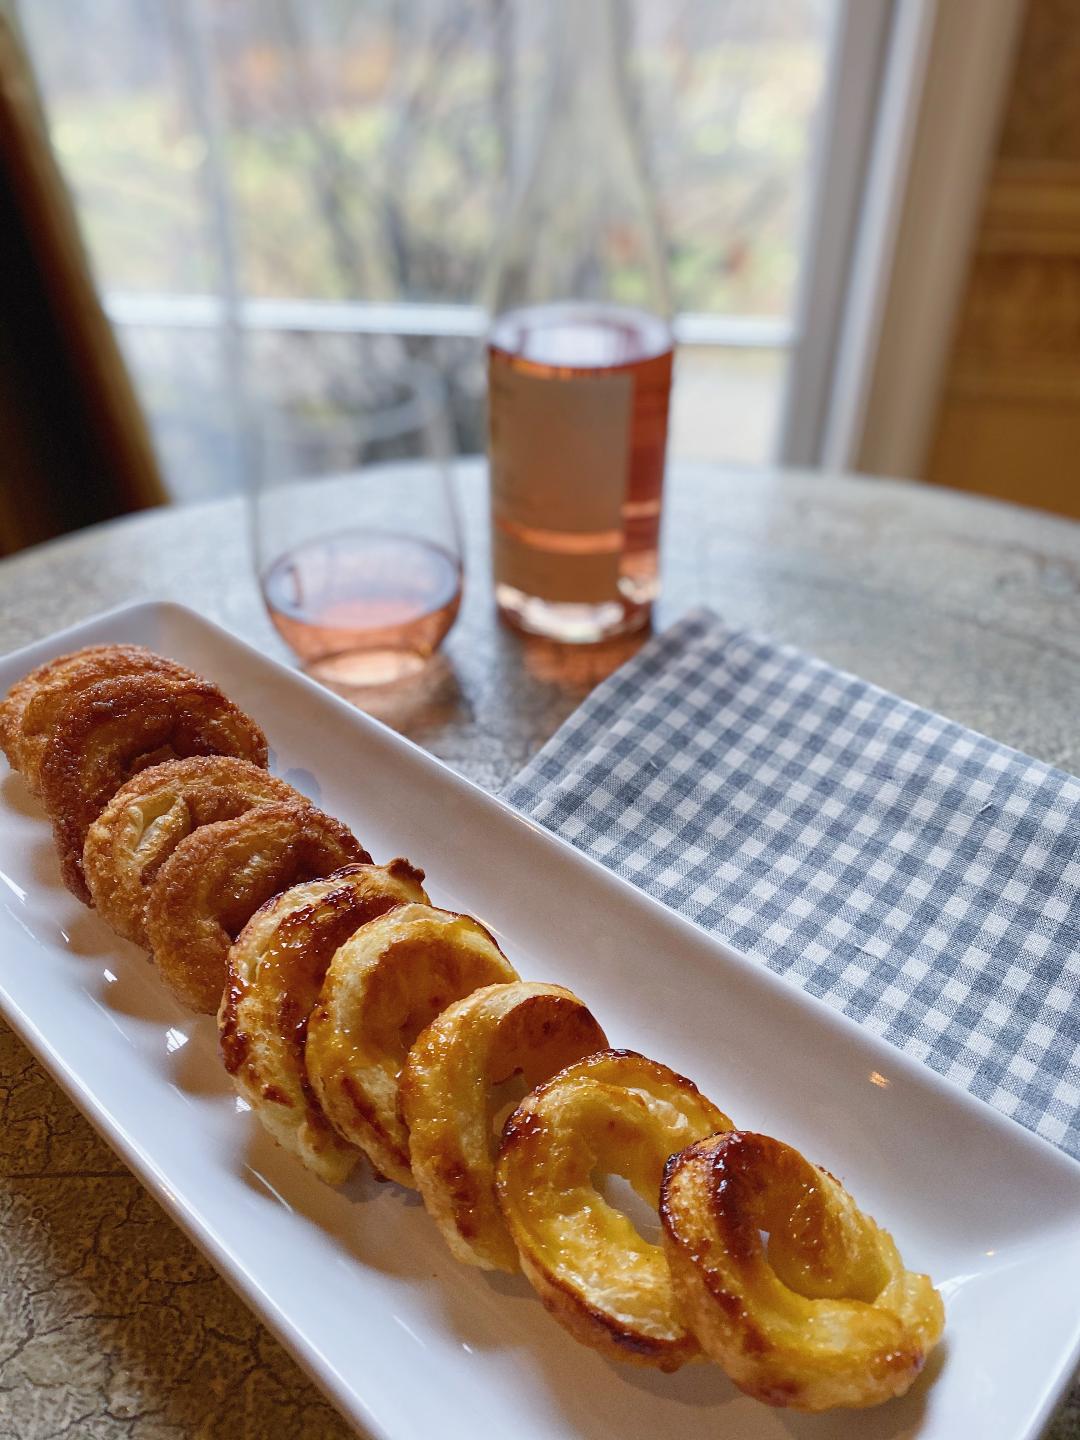
Palmier or “pigs’ ears” as I have always called them have been a part of me since childhood.  We used to travel to the Pocono Mountains every summer and each year our first stop was the local bakery & general store to get our fresh pigs’ ears.  I can still remember the wonderful smell of them baking when you walked into the store.  Many years later, I am watching Ina Garten on the Food Network make what she calls, Palmier, a classic French pastry.  Who knew my simple childhood treat was a classic French pastry!  Over the years I learned to make Palmiers, modifying classic recipes by using less sugar and a touch of cinnamon because it adds a sense of warmth I just love.  I also started experimenting with other ingredients both sweet and savory.  One of my favorite experiments was with lemon curd.  The crispiness of the pastry and creaminess of the lemon curd is a perfect match.


For the wine pairing, some might enjoy these pastries with a sweet wine which I am sure would work well.  I personally do not care for sweet wines, so I opted for a Provence Rose.  I love how the berry flavors in the wine match the citrus and acidity of the lemon curd.  For the classic palmier, I prefer a Tavel rose.  It is a little more structured and savory which complements the warmth of the cinnamon.  Check out my Rosé pairing page to learn more.


This recipe has no ratings just yet.

Palmiers Two Ways

January 4, 2020
: 8

By:

Ingredients
  • 2 sheets of puff pastry (I prefer Dufour brand)
  • ½ cup of granulated sugar plus 1 tablespoon
  • 1 teaspoon cinnamon
  • ½ cup Lemon curd
  • ¼ teaspoon salt
  • 2 tablespoons flour (for dusting work surface)
Directions
  • Step 1 Preheat oven to 425 degrees
  • Step 2 Thaw puff pastry on the counter for approximately 30 minutes until it unfolds and is ready to roll. Make sure the dough is still cold or it will be too sticky. If this happens you can place in the refrigerator for a few minutes to firm up
  • Step 3 For the Cinnamon Palmiers, combine the cinnamon and sugar in a small bowl. Place 1 sheet of puff pastry on a clean work surface. Keep the other sheet of puff pastry in the refrigerator until ready to use.
  • Step 4 Sprinkle 1/4 cup cinnamon-sugar mixture evenly over the dough. Roll over the dough lightly with a rolling pin to press the sugar mixture into the dough. Continue to roll out the dough to form an even rectangle. Flip dough and sprinkle the remaining ¼ cup cinnamon-sugar mixture over the dough. Roll over the dough lightly with a rolling pin to press the sugar into the dough. Sprinkle ¼ teaspoon of salt evenly over the dough.
  • Step 5 Tightly roll the dough by folding the long sides of the rectangle about an inch towards the middle. Fold each side again another inch towards the middle of the dough. Fold each side again another inch towards the middle until they meet. Wrap the dough in plastic wrap and chill for about 30 minutes.
  • Step 6 After chilling, slice the Palmiers approximately 1 inch thick using a sharp knife. Transfer the Palmiers to a parchment-lined baking sheet. Make sure to space the Palmiers a few inches apart as they will spread. Bake for 18 to 20 minutes, until golden brown. If it seems like the sugar on the bottom of the is starting to burn to reduce the oven temp to 375 to finish baking.
  • Step 7 For the Lemon Palmiers, Remove the second sheet of puff pastry from the refrigerator and place it on a clean work surface. Sprinkle 1 tablespoon of flour on the work surface so the dough does not stick while rolling out.
  • Step 8 Roll out the dough to form an even rectangle, approximately 12 x 13 inches. Spread the lemon curd in an even layer over the dough, leaving a ¼ inch border.
  • Step 9 Tightly roll the dough by folding the long sides of the rectangle about an inch towards the middle. Fold each side again another inch towards the middle of the dough. Fold each side again another inch towards the middle until they meet. Wrap the dough in plastic wrap and place in the freezer for about 30 minutes.
  • Step 10 Remove from the freezer and slice the Palmiers approximately 1 inch thick using a sharp knife. Transfer the Palmiers to a parchment-lined baking sheet. Make sure to space the Palmiers a few inches apart. Sprinkle each with a little sugar before baking.
  • Step 11 Bake for 18 to 20 minutes, until golden brown. If it seems like the bottom of the Palmiers is starting to burn, reduce the oven temp to 375 to finish baking.


Roast Chicken with Salsa Verde

Roast Chicken with Salsa Verde

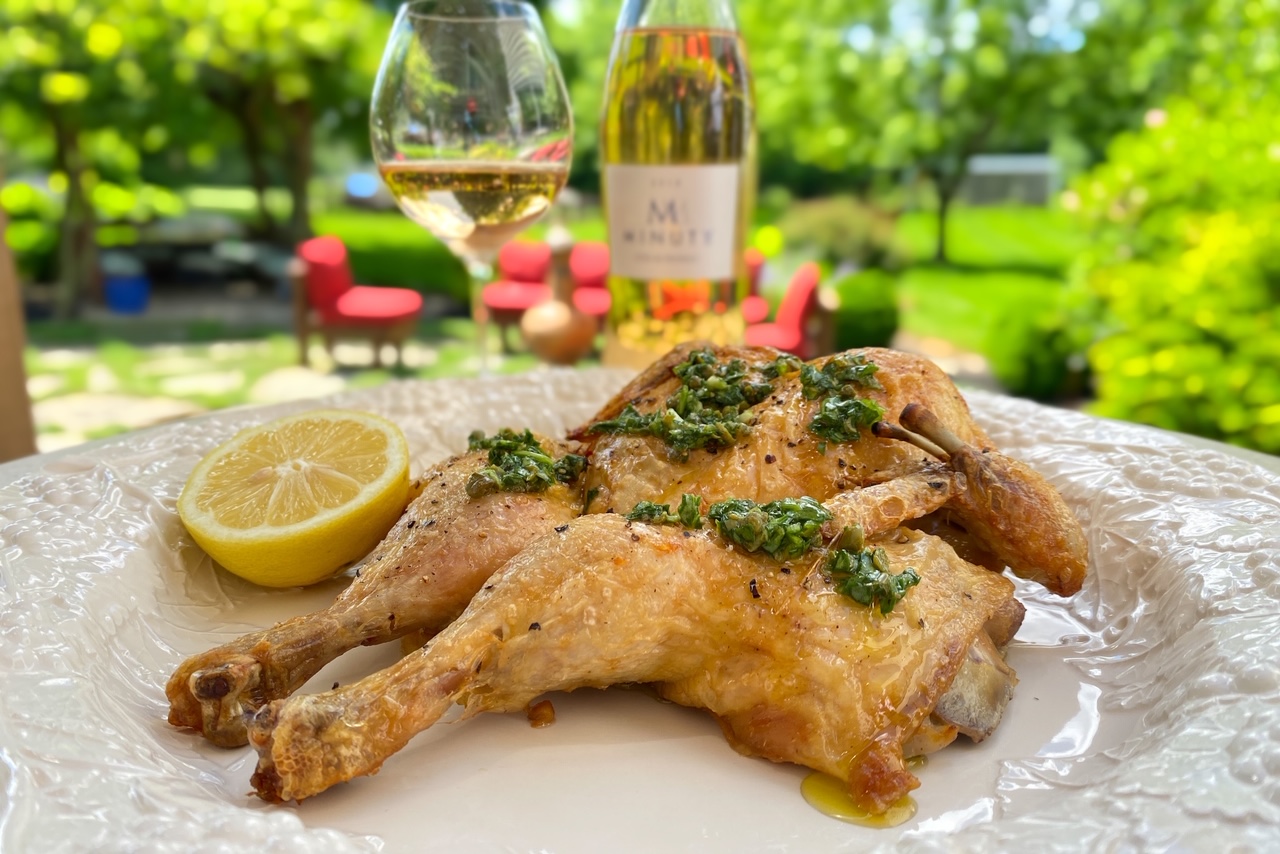
I could eat roast chicken any time of year.  And I probably have a different recipe to go with each season.  My Roast Chicken with Salsa Verde recipe is one of my favorites because it incorporates two of the best Spring ingredients – arugula and spring onions!  Roast chicken is such a warm, comforting dish but when you serve it with a fresh sauce like a salsa verde, it takes roast chicken to a whole new level!


I usually pair my roast chicken recipes with a red from the Cotes du Rhone region of France because, for me, roast chicken reminds me of a dish you would find in a quaint French Bistro. But with this dish, I felt that the fresh and herbaceous nature of the salsa verde required a full-body white wine or even better, a Provence rosé.  So, in the spirit of “Simply Paired”, I decided to challenge my palate and try both. And the winner is…Provence rosé!  Check out my Rosé Pairing page to learn more.

This recipe has no ratings just yet.

Roast Chicken with Salsa Verde

December 30, 2019
: 4

By:

Ingredients
  • 1 3-4 lb. organic chicken
  • 3/4 cup plus 2 tablespoons extra virgin olive oil
  • Kosher salt and freshly ground pepper
  • 2 cups baby arugula
  • 1 scallion, green part only, finely chopped
  • 2 tablespoons of capers
  • Zest of 1 lemon
  • 1/8 teaspoon of red pepper flake
  • 1 tablespoon fresh basil, chopped
  • 1 garlic clove, finely minced
  • ½ teaspoon of salt
  • ¼ teaspoon of pepper
Directions
  • Step 1 Preheat oven to 425 degrees
  • Step 2 Ask your butcher to “spatchcock” the chicken or see the Tip below and do it yourself!
  • Step 3 Place the chicken on a baking sheet. Drizzle two tablespoons of olive oil on both sides of the chicken and season with salt & pepper. Roast for approximately 50 min to 1 hour based on the size of your chicken. Let rest for about 15 minutes.
  • Step 4 For the salsa verde, lay arugula on cutting board, place your capers on top, and coarsely chop to a chunky pesto consistency.
  • Step 5 Place the mixture into a bowl and add the lemon zest, red pepper flakes, garlic, scallions, basil. Mix together and add 3/4 cup of olive oil. Season with salt and pepper. Set aside.
  • Step 6 To assemble, cut the leg & thigh from each breast, and place on a platter. Remove each breast from the bone and slice width-wise in a few pieces. Place chicken in the center of the platter. Spoon salsa verde generously over the chicken and serve.


Tip

Spatchcocking a chicken isn’t that difficult.  It just requires some patience and a good pair of kitchen shears.

Prep the chicken by removing any neck parts and gizzards and discard. Place the chicken, breast-side down, on a cutting board.  The first step to flattening the chicken is to remove the backbone.  Use kitchen shears and cut along the right side of the backbone from the tail to the neck. Next, cut along the left side of the backbone.  Discard the backbone. To flatten the bird, you need to break the breastbone. To do this, press down on each of the wings, at the same time until the breast-bone cracks.  Rinse the chicken and pat dry with paper towels.